Wednesday, April 26

inload: Warhammerfest T-2

+ Finishing touches – T-2 days to Fest +

+ I'm working on a Catachan guntruck as my maiden entry for Warhammerfest, and – wonder of wonders – I think I'm going to have it finished in time, rather than scrambling at the very last second. +

+ Above you can see a detail of the Goliath's nickname – I took the idea for the rather swanky style of handwriting – and speech marks – from photographs  of tanks from the Second World War. I've used a lot of real-world reference for this project; for the Imperial Guard in particular I think it suits them to have clear antecedents – it's how these are swathed and blended into the 40k milieu that makes them interesting. +

+++

+ What's new? +

+ Since the last inload, I've added the squirrel marking I explained there – shown in the pict-capture above prior to oil glazes. Besides that, most of the changes were to the crew – fairly subtle additional detailing and refinement of their equipment. The major addition is the base. +

+ A scenic base is, I think, very important to give some context and narrative to the vehicle, so I've created a section of jungle trail. It was with some trepdiation that I approached this, as I don't have much experience with this aspect of modelling. Still, the best teacher is experimentation, so I got stuck in. +

+ The underlying structure of the base is layers of corkboard overlaid with Polyfilla. While wet, I added fine sand and embedded some small twigs and debris. I also added a large root that I fortuitously dug up while gardening a few weeks ago. It makes a good basis for a nice twisted jungly tree. This was secured to the cork using superglue before adding the Polyfilla. +

+ Once it had all dried, I painted a layer of watered-down PVA over the whole thing to seal it. Once that had dried, I sprayed it successively with black, and brown spray, then used some more directed khaki and olive touches – the former for the trail, and the latter for the surrounding undergrowth. I was aiming for a fairly subtle modulation +

+ After polishing off as much of the vehicle and crew as I could (I'm still waiting for the oils on the flag to dry to add the finishing touches), I attacked the base with a variety of earthy brown and green oil paints to vary the broad areas of colour that were in place after the spraying. +

+ This was a nice quick job – lucky, as it was getting late, and I'm determined not to be dead on my feet for the actual event! Before turning it, I couldn't resist getting a couple of shots of everything in place. The plinth base is a temporary one – a larger one is (rather nail-bitingly) in the post, so I'm crossing my mechadendrites that it arrives in time. +


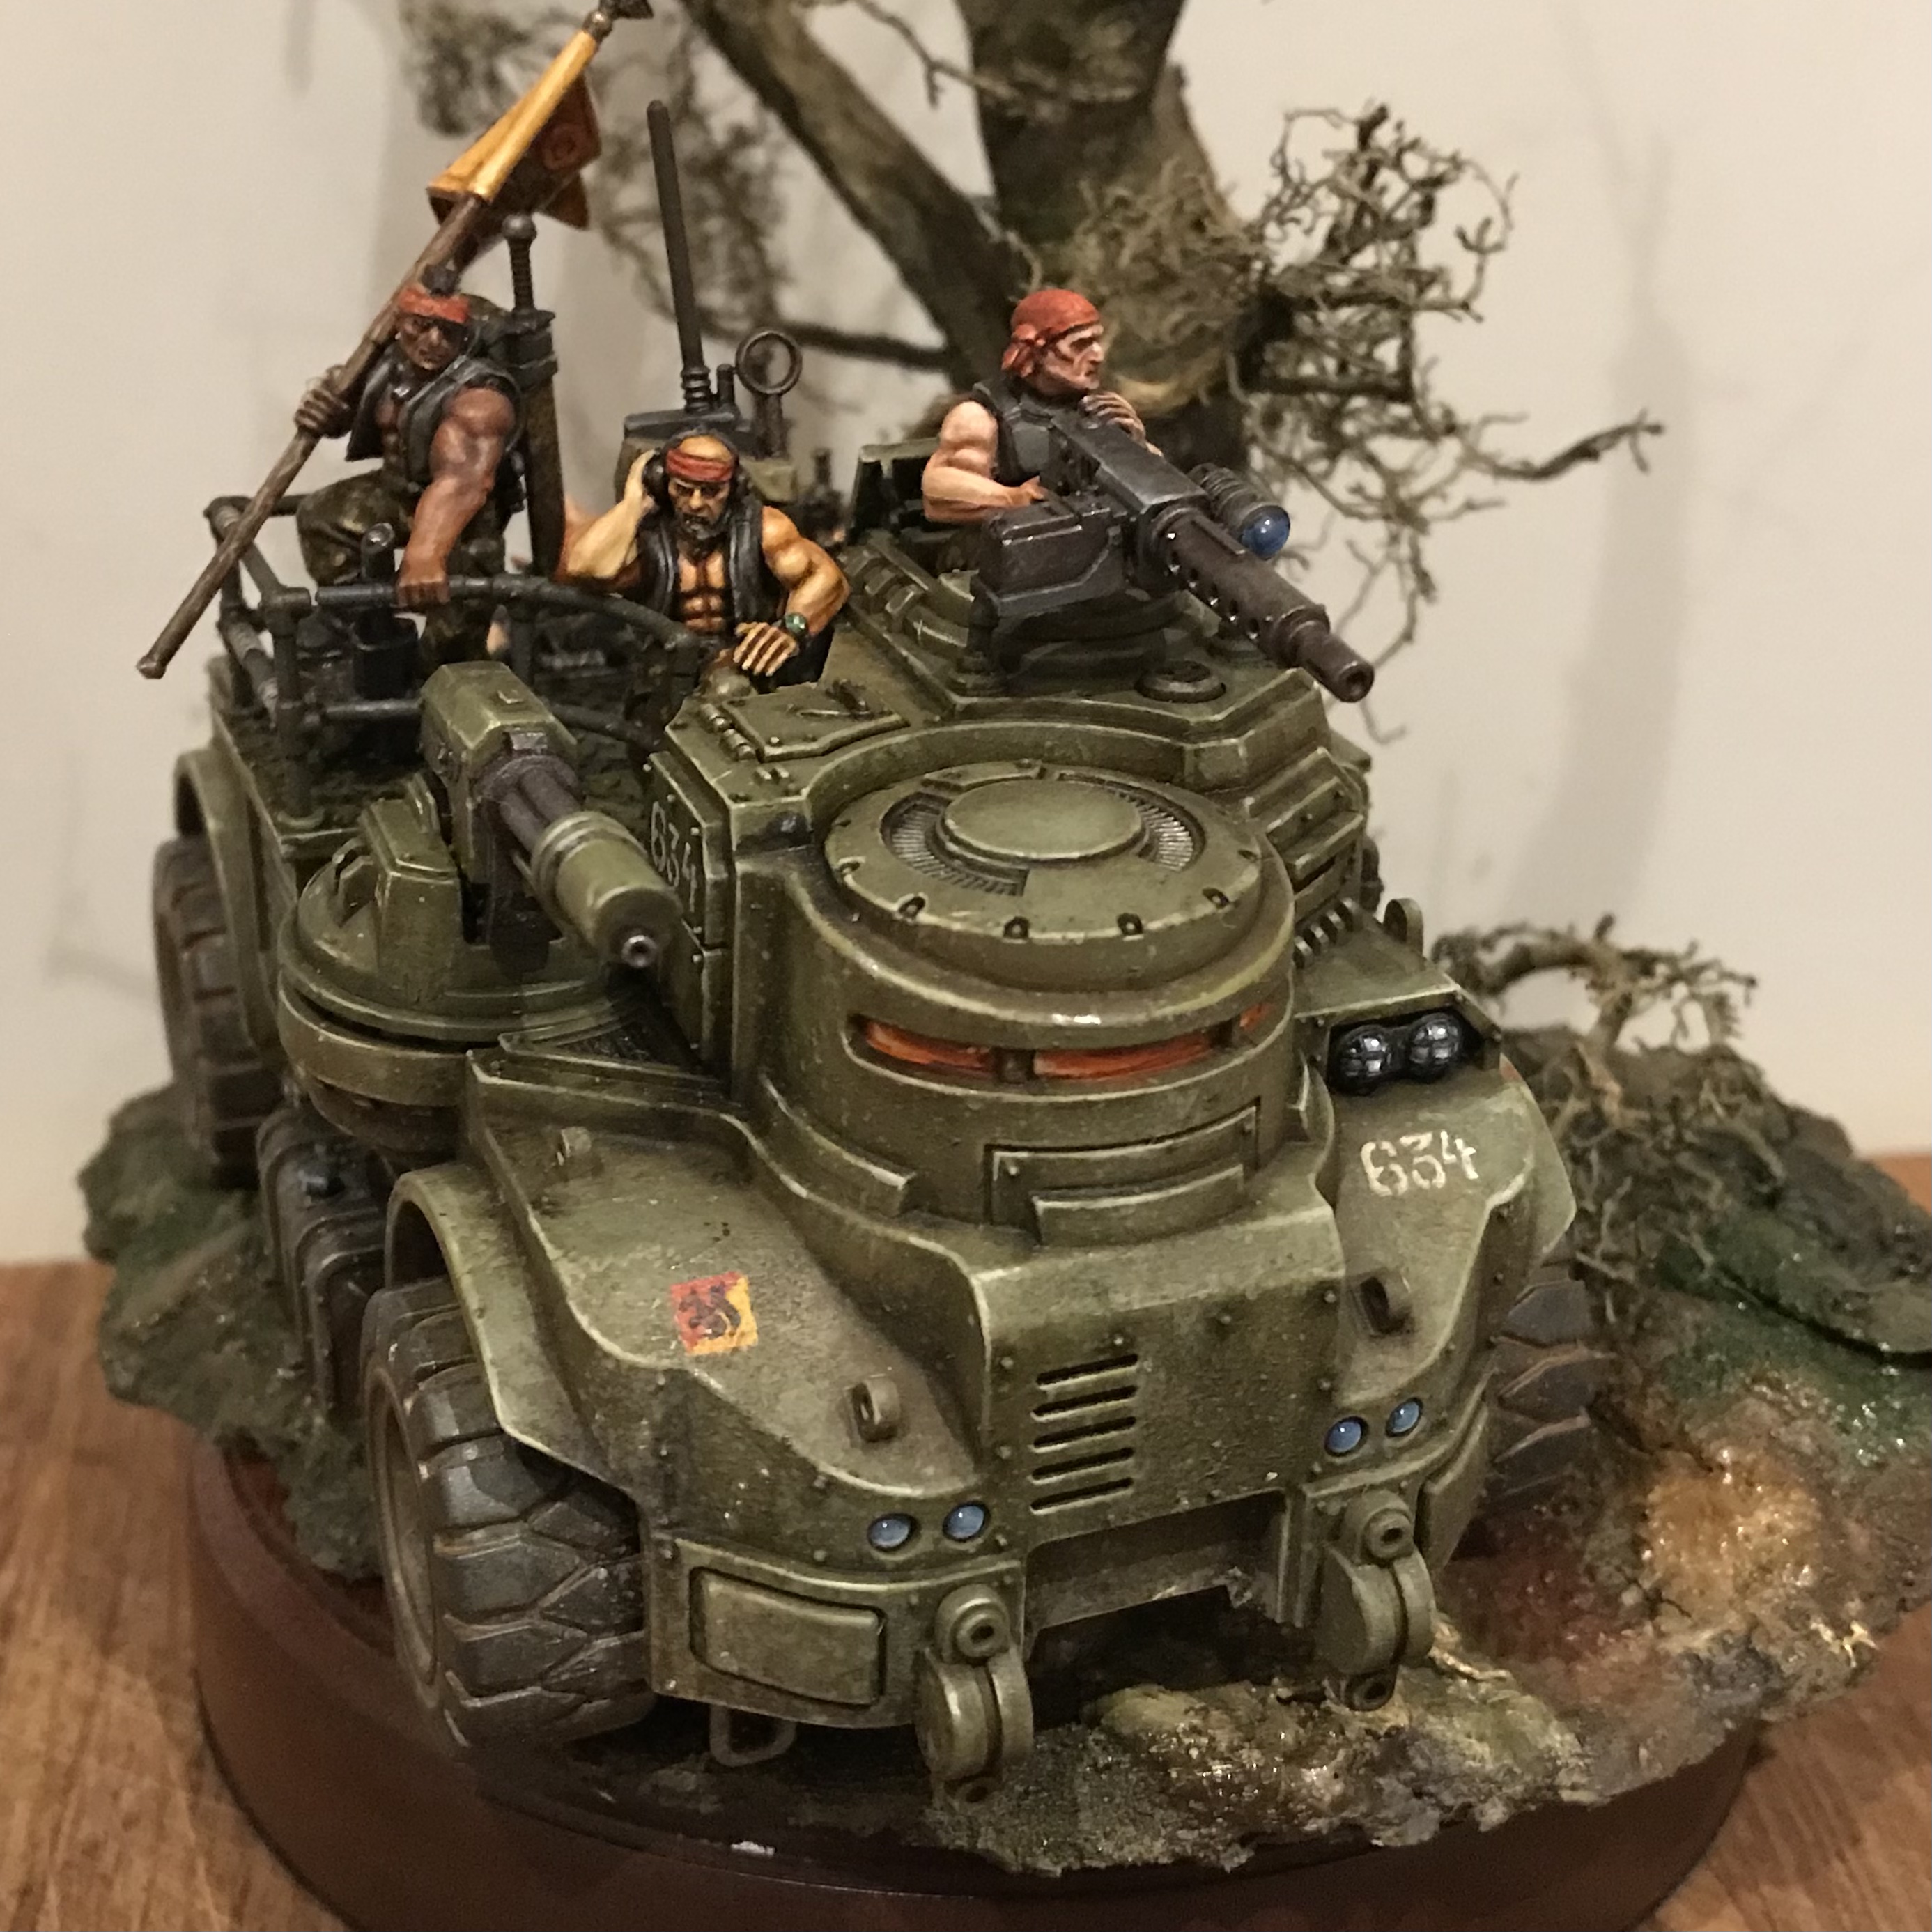
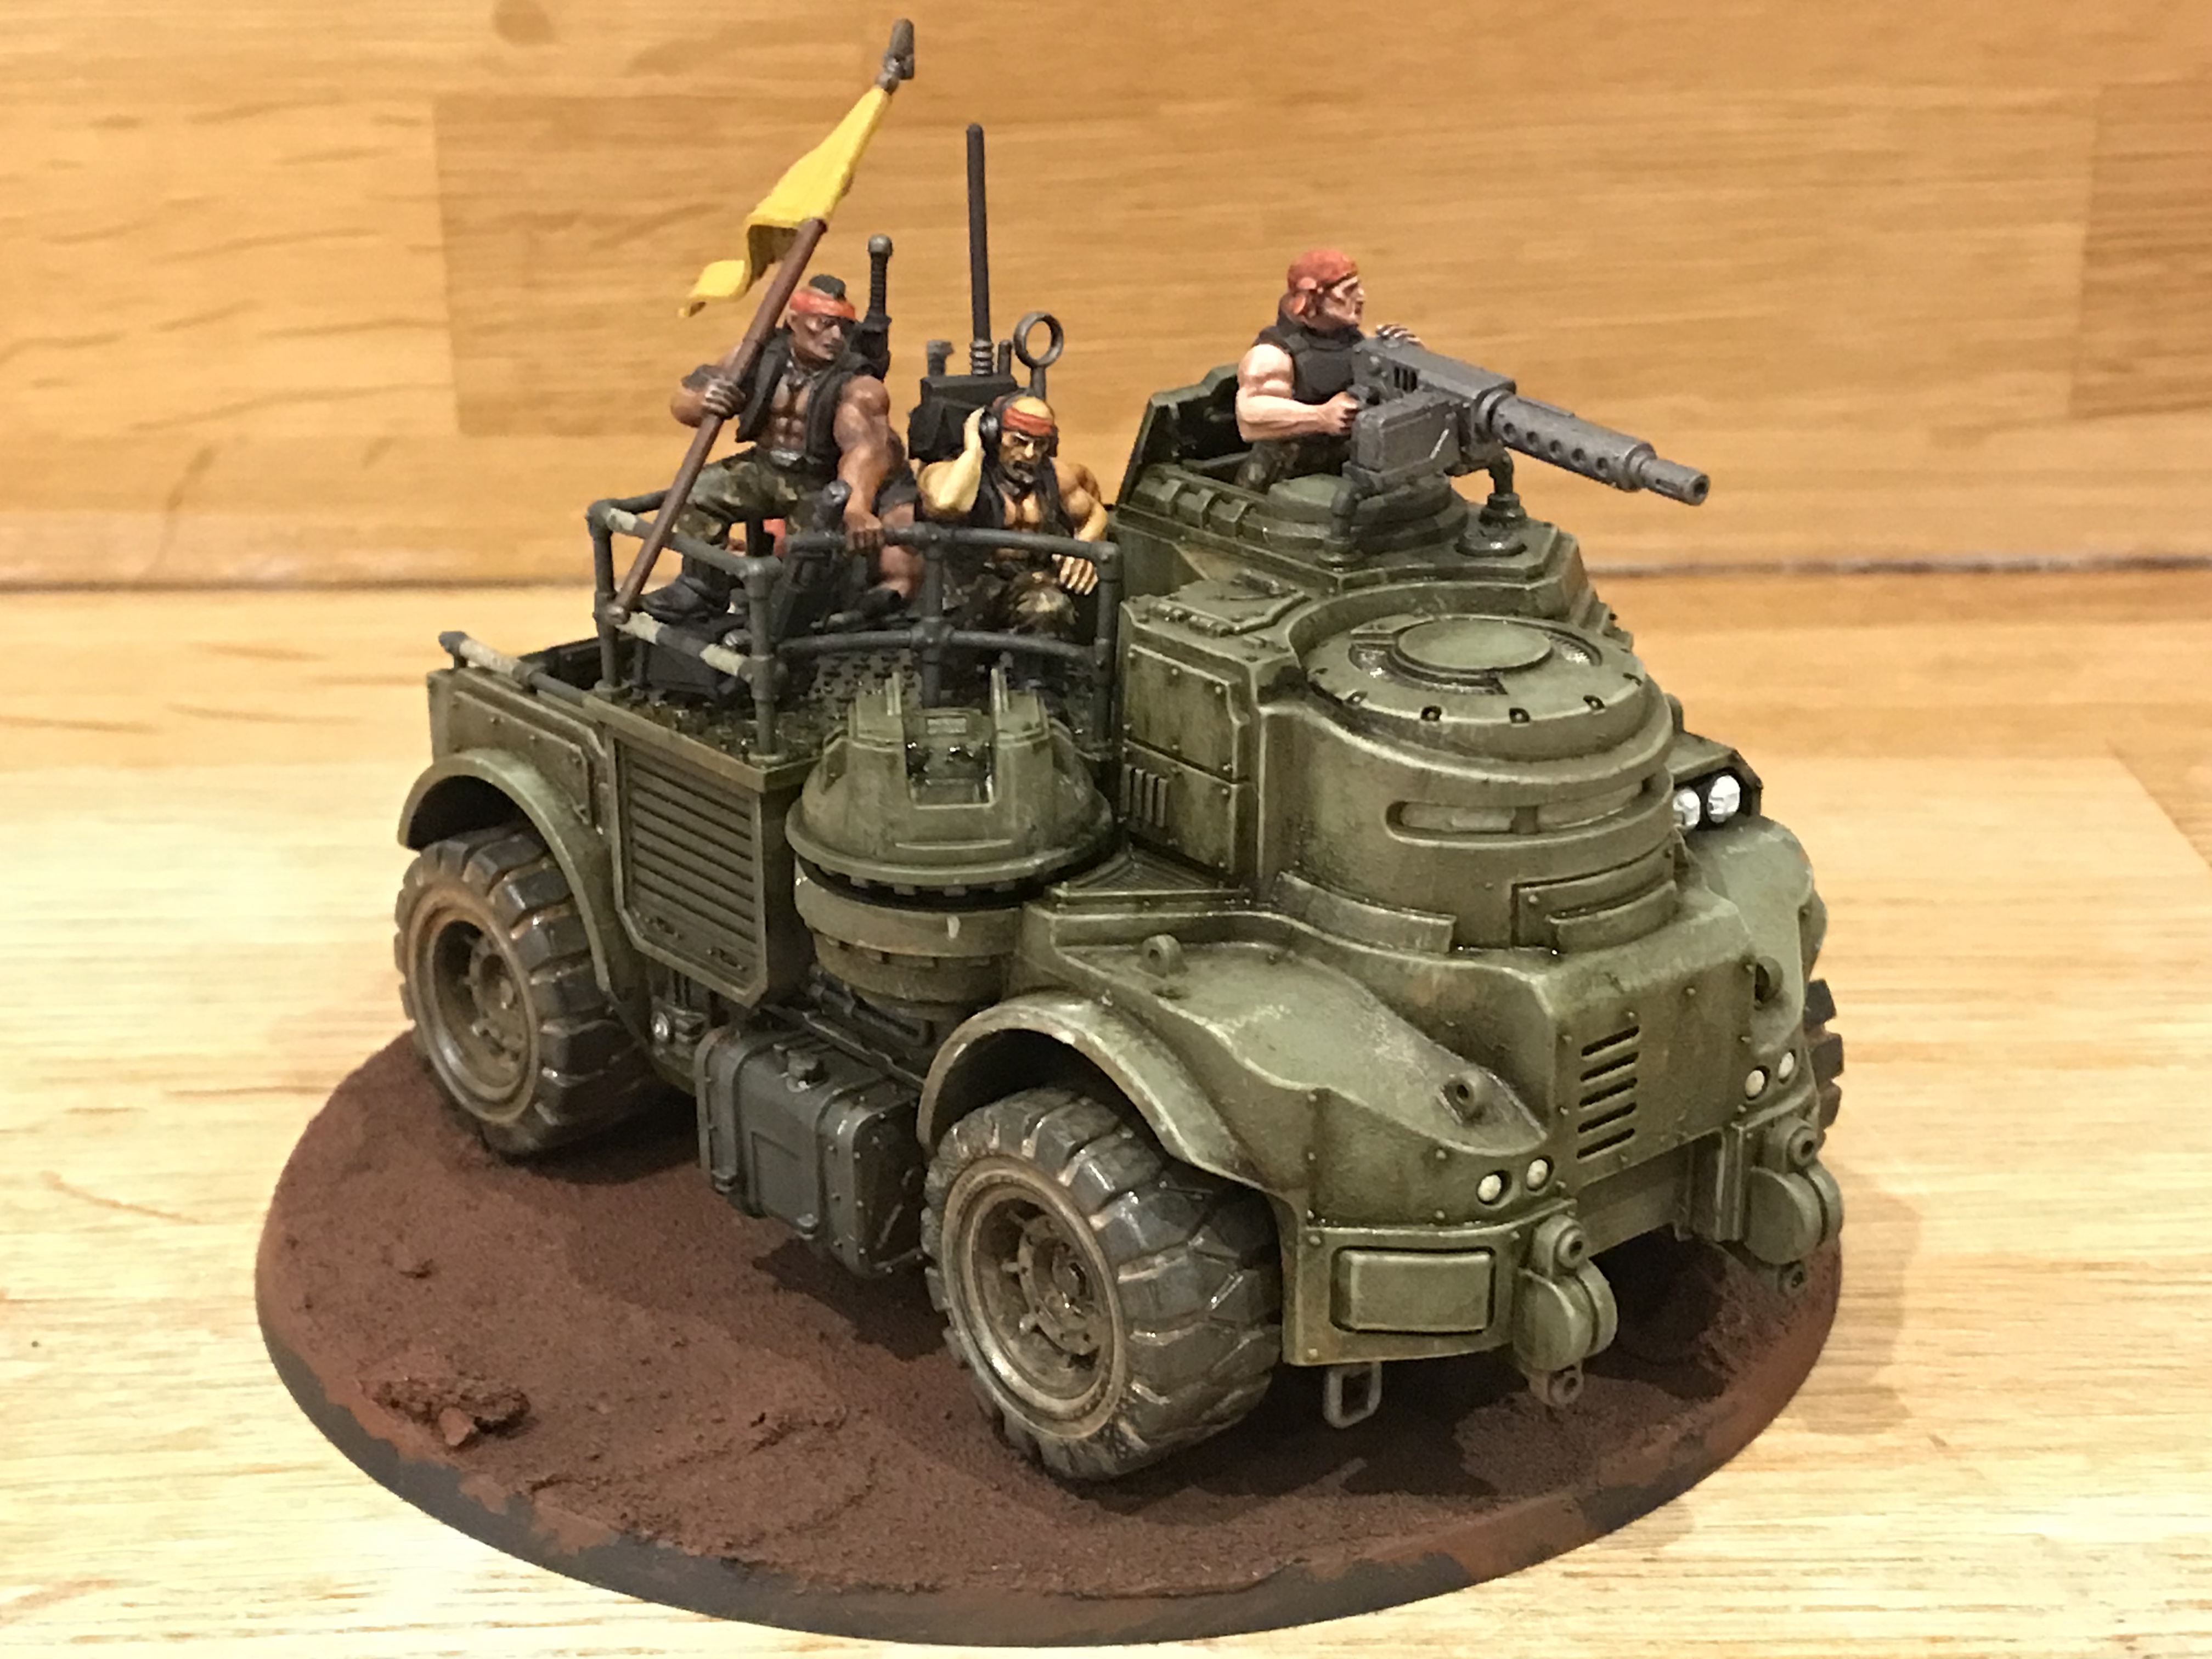
+ Not only is it a treat to see your model looking more as it'll appear, this stage is proving very useful, as it will give me a chance to make some tweaks. The base is not yet finished; I want to add lots of static grass to brighten things up, add a sense of life and bring in some tonal contrast to make the vehicle pop. +

+ If time allows, I'd also like to add some little details like a skull-headed bird, some evidence of an enemy (perhaps a sunken skull or an Eldar soulstone?) or a signpost, to give some sense of purpose to the piece. Then again, perhaps we're edging into diorama territory here... + 


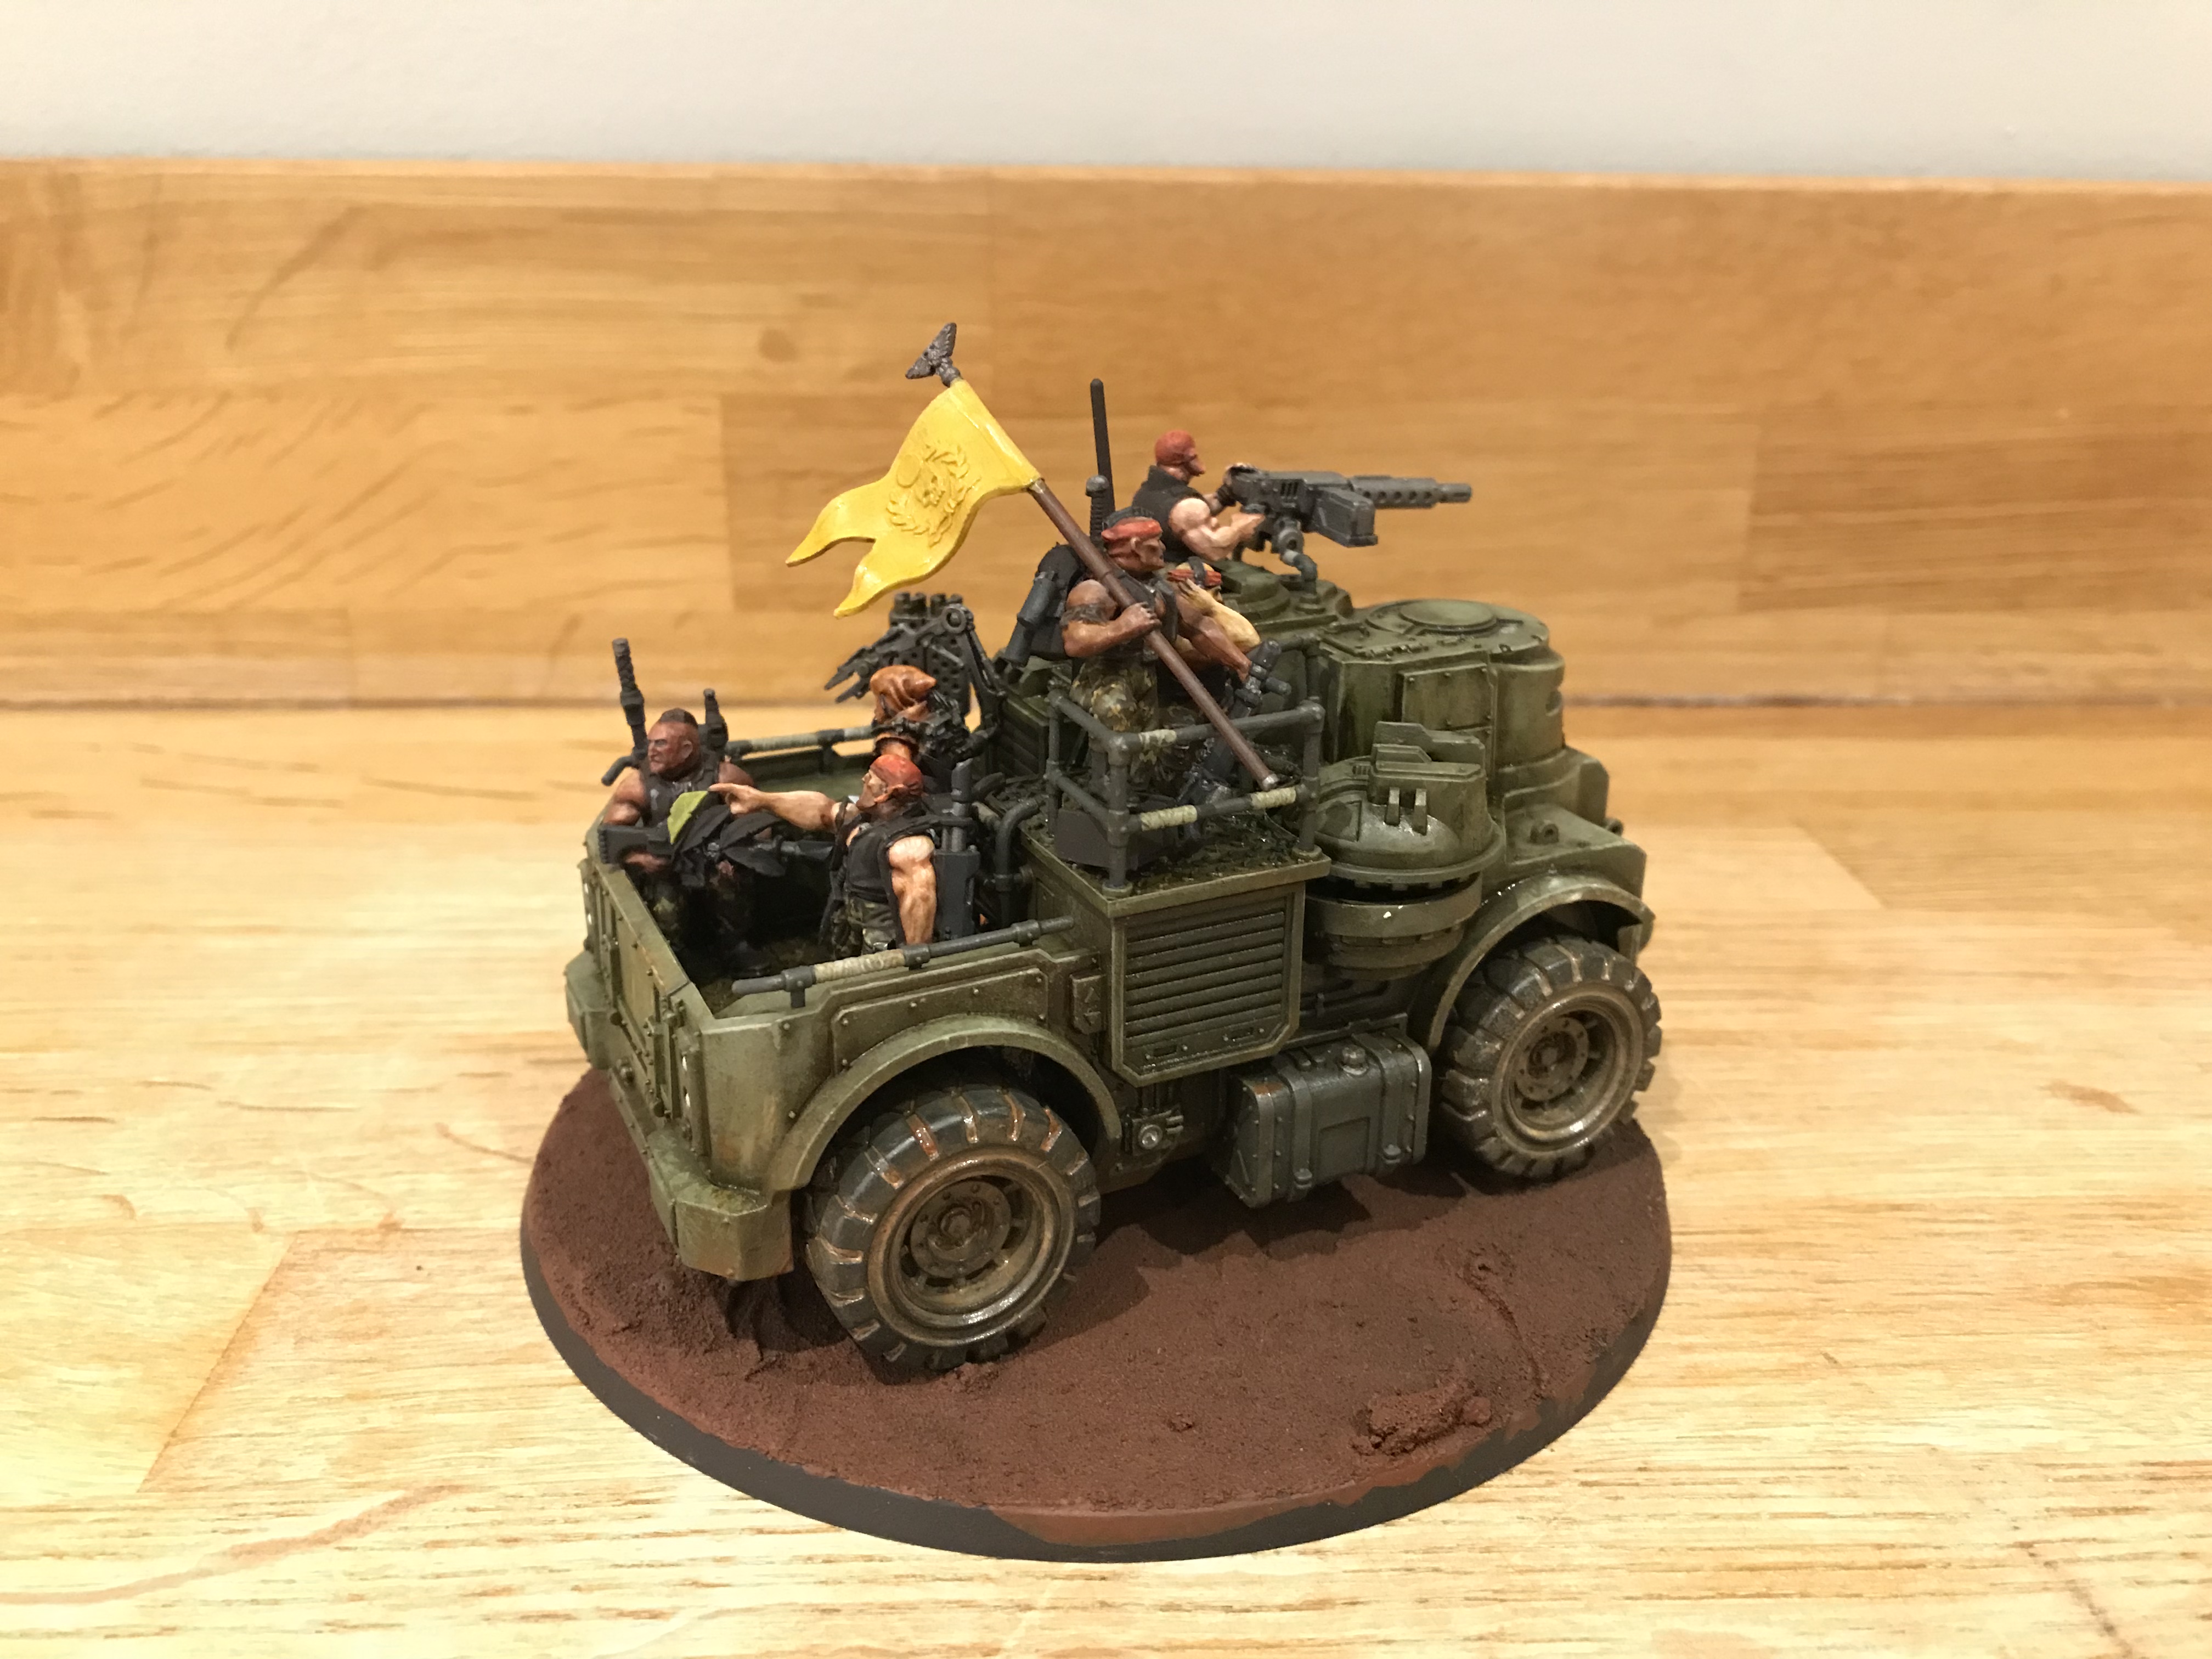
+ For the moment, I'll leave you with these work-in-progress shots. Here you can see the idea of the base – to give a sense of speed and forward motion, with the vehicle just about carrying itself over the lip of the textured area, and into space. +


+ Note here how the multilaser and flag lead the eye back in, and up towards the tree. I'm also pleased with the contrast between the wet, churned-up dark red-tinged mud on the trail and the dried, grey-yellow mud between the rutted tracks. I've used the same colours on the ground, tree and rocks – forest routes like this tend to merge into similar colours, and having everything so cohesive ensures the eye isn't drawn away from the vehicle. +


+ I always think it's a good sign when you find yourself grinning at a piece you've done. It's far from perfect, but I really feel like I've pushed myself and learned a lot in the process (with more to come!). Most importantly, I've genuinely enjoyed it. It's been a really engaging, enjoyable and engrossing project for me. I'm glad I spent all this time, thought and energy on it, whatever the result. +


+ *Vroom vroom beep beep!* +

+ This shot's a good example of how important it is to balance the markings. Too subtle initially, and they'd be lost when subsequent glazes are added. Too bold, and they'll stick out like a sore thumb. Too many, and you'll create a confusing finish; too few and it'll be a bit boring. Have I struck the magic balance? I dunno – but that's why it's good to have a day or two to ponder and consider in the cold light of day. +


+ Deciding something's finished is always a tricky call to make. You can keep on refining and tweaking and fixing – but these aren't always improvements, and it's possible to overwork the piece. Let me be clear that I don't think that's the case here – I can see quite a few little bits and bobs that could do with tidying up... + 


+ This shot shows my major concern at this point – the banner. It's just not coming together. At root, it's because I don't like the raised symbol on it. It's obtrusive, a bit (dare I say?) clichéd, and not particularly cleanly sculpted – the leaves of the laurel wreath in particular are blurry and soft. I should, perhaps, have cleaned it off earlier in the process, but you live and learn. +

+ It's perhaps too late to sub it out, so I'm going to have to adapt and overcome. The second problem with it, which is entirely self-inflicted, is that I've gone for a yellow field, which means I've made a rod for my own back in terms of colours. At the moment, I'm leaning towards adding some chequerboarding freehand and a black heralcic pale (that is, a vertical stripe down the centre) to give the skull and company sigil some contrast. + 


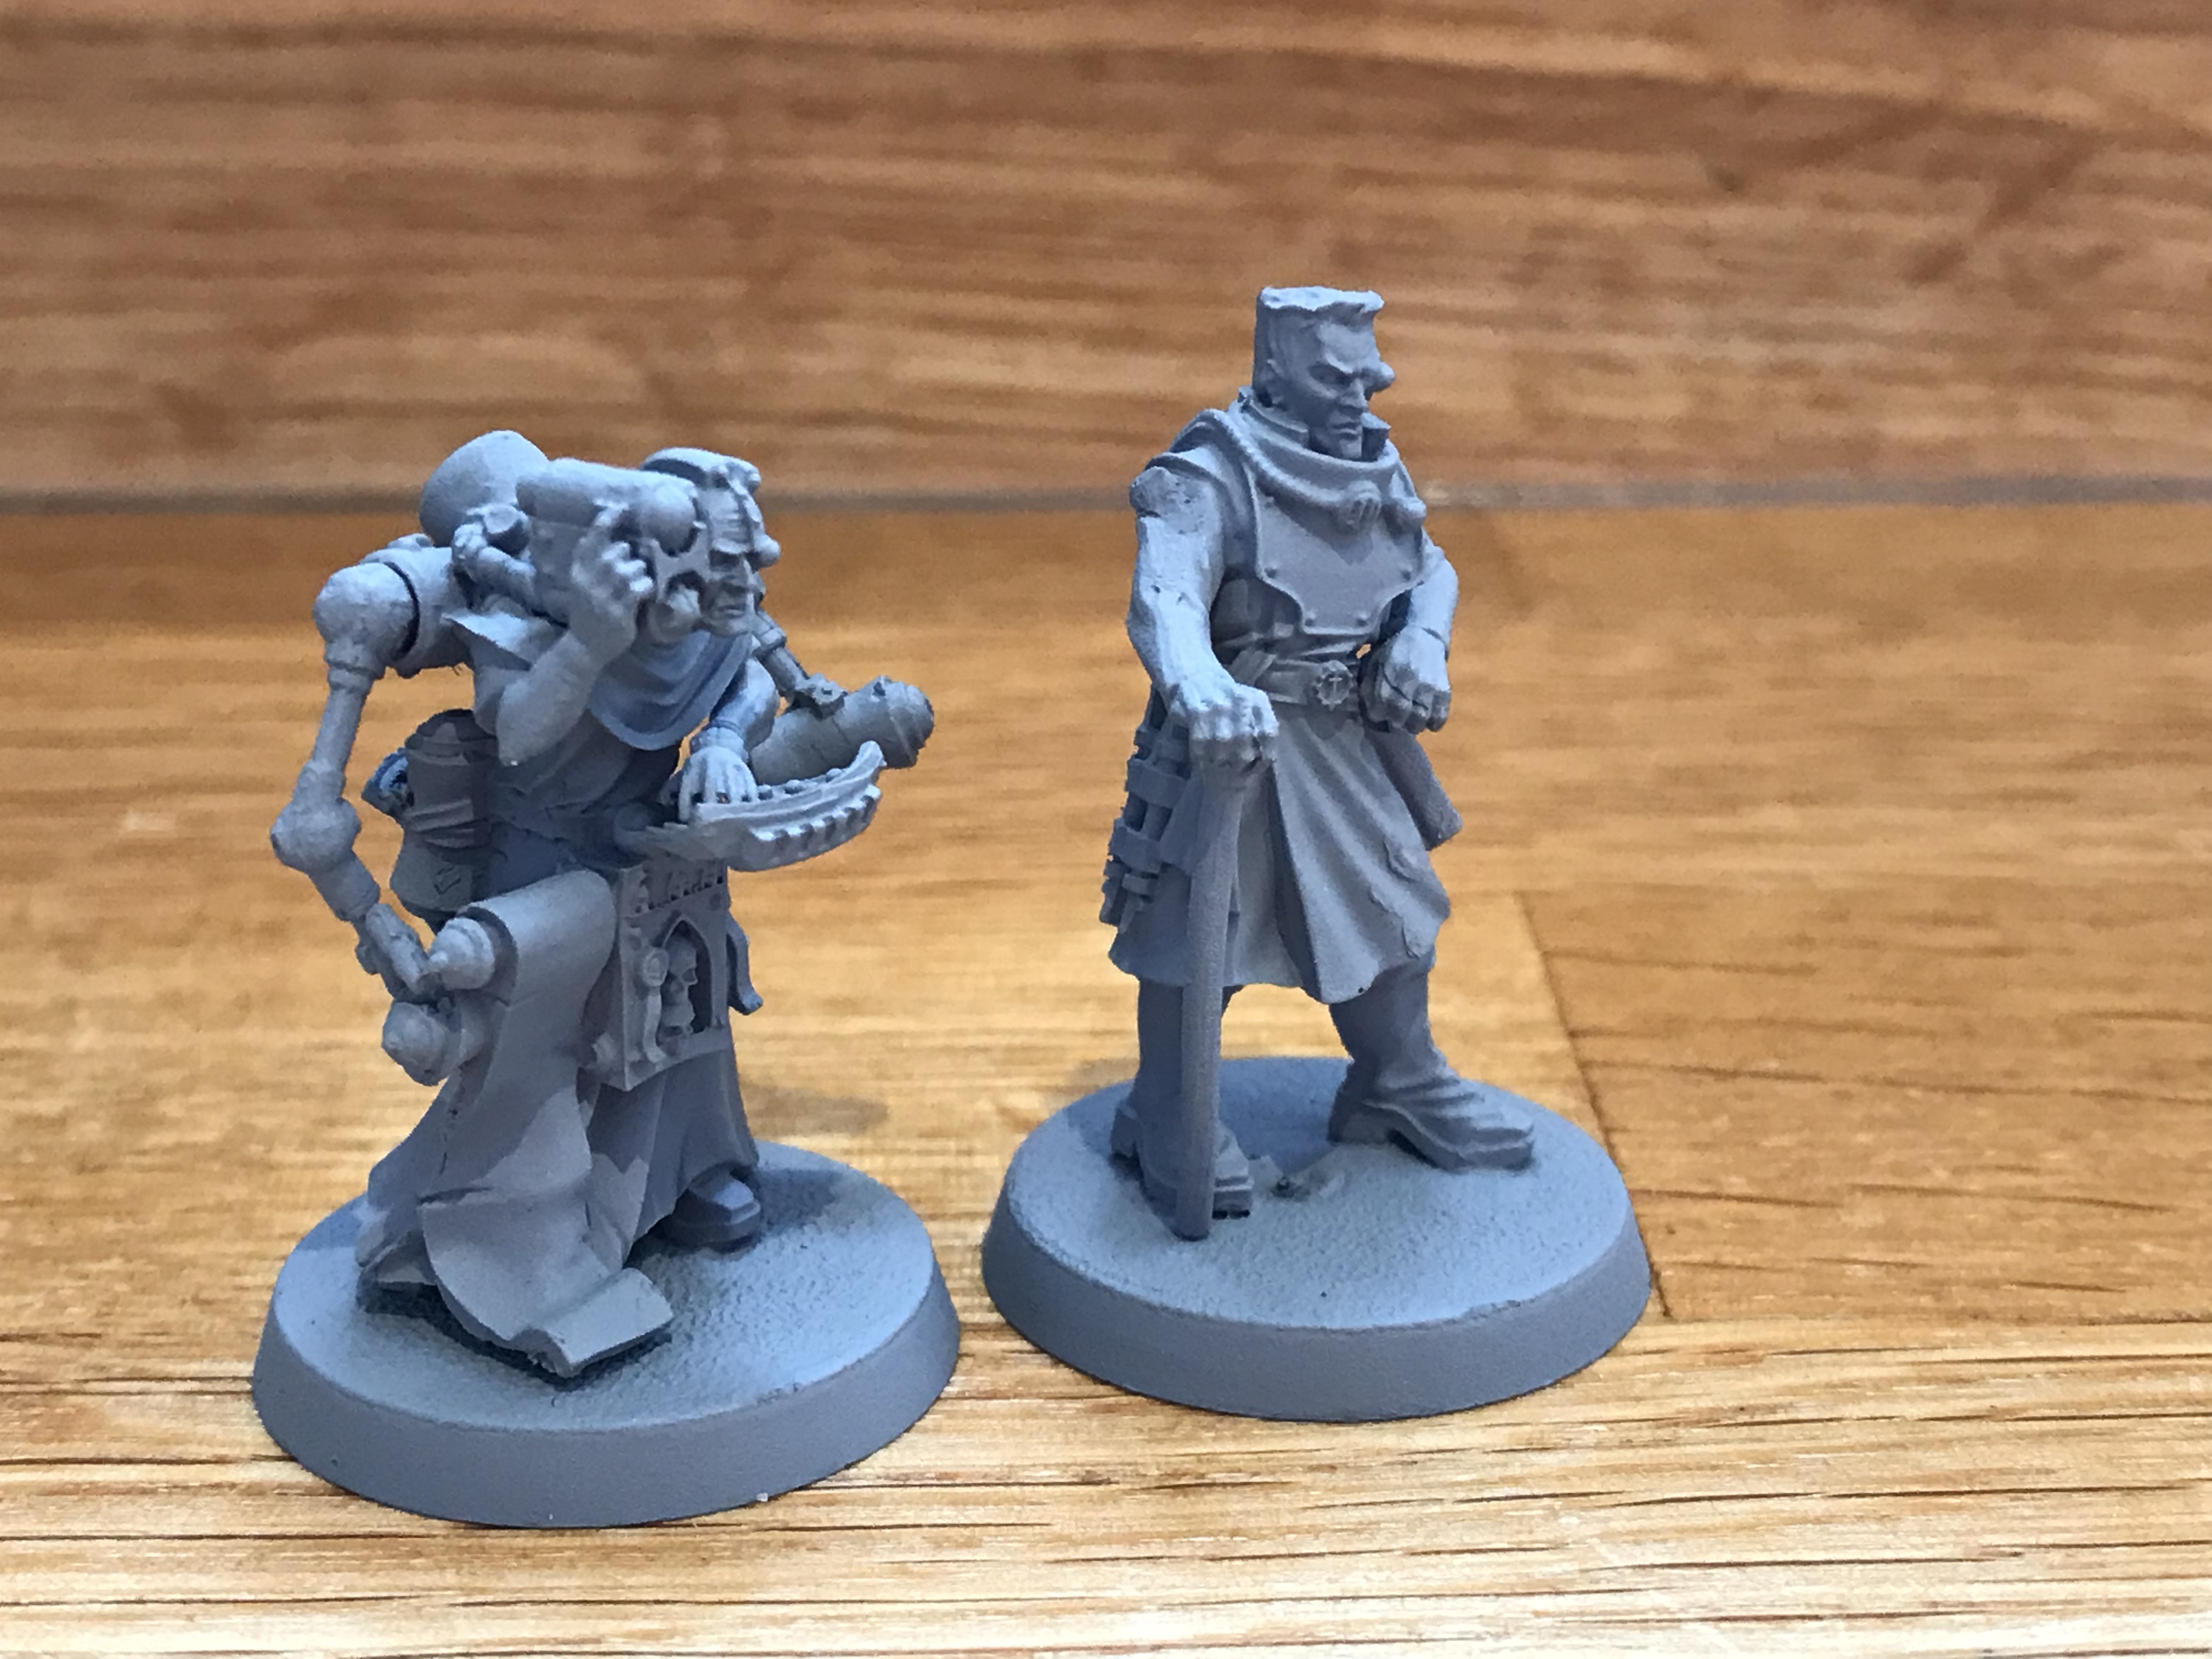
+ The other concern is that the big branch is obscuring the view of the techpriest. I do like the branch, but perhaps I need to move it elsewhere on the tree so it's less obtrusive. +


+ So, there we are. This is likely to be the last inload before Warhammer Fest, so wish me luck in getting this finished, and I'll see you on the other side. If you're planning to make the trip up, do let me know – would be great to put some faces to names. +

+++


Monday, April 24

+ inload: Cracking nuts the Catachan way +

+ 634th Catachan 2nd Co. Command Vehicle 'Nutcracker' +


+ T–4 days 'til I set off for Warhammer Fest, and I'm on the closing stretch with the Catachan Guntruck I'm taking along. Last night I started polishing off the details: things like the various lights and wires, as well as the markings. + 


+ The lighting's a bit stark (an unusually bright morning!), but perhaps the most obvious addition here is the multilaser, which came from the new Sentinel. More subtle bits include the wiring leading up to the multilaser turret, and the hazard marking on the turret itself. One of the things I'm weirdly pleased with is the blue cap on the reserve promethium tank (the grey box behind the front wheel). I've been keeping an eye out for little details like this on real-world vehicles to add some verisimilitude to this boxy truck filled with space muscle-men +. 

+ Theoretical +

+ I took a trip to the Tank Museum a few years back, and remember the various organisational markings being bold and simple and clear. They seemed a great thing to add – and offered an opportunity to add some colour and interest to what is otherwise a muted green box. It would also allow me to make clear this is a 40k vehicle, not a real-world one. +

+ The aim, then, for these markings is to give the impression that the vehicle is official, standardised and part of the grinding greater Imperial organisation – but have enough 'pop' to look good at scale. +


+ I've tried to apply the markings with some sense of how people of the same scale would interact with them. From the point of view of realism, there's little point in having these markings unreadable to someone at eye level. Equally, this has to be balanced against the fact this is a model meant to be judged, and so the markings have got to not be hidden away from the judges. +

+ The round squad marking on the door, shown above, is a good example of having the marking at the right placement for the crew. The only people who need to refer to this marking are the various squads who are assigned to Goliaths, so it's relatively small, and only appears on the door. In the company mustering point, anyone from squad 1 (for example), will know this isn't their ride – but that's not particularly important in a battlefield context. +


+ Things that do need to be immediately identifiable during combat are the Regimental and Company markings, as these are what will help friendly forces identify them at distance and at speed. These are therefore larger and more prominent than the squad marking. The big red and yellow square on the front here is also present on the back – whichever way it's travelling, friendly forces will immediately know not to fire. +

+ Partially hidden behind the multilaser's flash suppressor (or whatever the thing at the front is) above is the Regiment's number – 634. This is repeated on the front left of the cab, as shown below; though unfortunately the terribly over-exposed pict-capture here makes it almost invisible... I promise it's there! This is rendered in a simple white stencil-style effect, because it's not particularly necessary for it to be legible for anyone in the field: it's more for the Quartermaster or similar. +


+ Annoyingly washed-out in these pictures, I also painted the various lights and lenses, and am pleased with how they look. I opted for a blue-grey for these, as a balance between real headlights where they're turned off, and being interesting to look at as a model. The blue-grey also complements the orange used for the reinforced armourglass windscreen and windows. +


+ With slightly better lighting here, you can see the start of the leather effect on the knife holster and gunstrap, too. These will be built up with repeated layers of washes and stippling. Note also the company marking on the rear left-hand side, visible from the back and from the left of the vehicle. +

The banner remains one of the things to tackle, and I'll likely start on that tonight. I really wish GW did blank banners again, even if just as an option. It's annoying to have the sculpted-on detail force you in a certain direction. I'll use the red and yellow of the Company marking on the pennant banner, but probably as a red top and yellow bottom because a diagonal will look odd on the swallow-tail shape.+

+++

+ To do +

+ All of the markings need to be bedded into the scheme, and this will be achieved with oil washes. Before that, however, I'm going to make the Company marking a bit more interesting with some freehand – and this is a good example of how I've tried to balance having a plan with actually having fun while painting. + 

+ While I knew any such marking would need to be simple and iconic, I haven't really had a strong idea of what would go on there. Consulting the old Imperial Guard tank marking guide threw up some ideas of swords or skulls, but these are so iconic as to almost be meaningless. I wanted mine to stand out a little more. +

+ Taking some inspiration from the Regimental nickname, the 'Ever-Readies', I did some research on animals that symbolised readiness, and have decided to go for a squirrel. Not a particularly fierce creature, perhaps, but it has lots of cultural resonance – variously as a messenger or as a symbol of preparedness, alertness, wit and initiative – all qualities that well-represent the Catachans. +

+ From what little I've read, it seems certain Native American groups see the squirrel as quick-witted and energetic. Given that the Catachans are clearly a 40k pastiche of Vietnam War-era US marines, it seemed fitting to have an oblique nod to America without taking the viewer out of 40k – and the squirrel icon will allow me to include a wonderfully retro 40k Easter Egg – the ptera-squirrel – and give me a dreadful (and fittingly coarse) pun of 'Nutcracker' as the crew's name for the tank itself. +
+

+ Pict-credit: Flaticon [+noosphericexloadlink embedded+] +


+ The image above is going to act as the basis for the icon, which will be applied to the red and yellow square below (and the one at the front). +


+ Here's a last shot of the techpriest in position, mainly because I really like him as a detail of the overall composition, but also because it better shows the in-life appearance of the lights on the back (note here that the lower brake lights are in red, rather than the blue-white of the others). +

+ A quick checklist:
  • Banner
  • Leather
  • Develop the company markings
  • Glaze of oil
  • Flak jackets
  • Gun casing and equipment highlights on the crew
  • Weathering
  • Polyfilla and texture on the base.
+ Actually, yikes – that's quite a lot to do! +
+++

Wednesday, April 19

+ inload: Golden Demon entry – Catachan Guntruck +

+ Catachan 'Ever-ready' 634th – and the road to Warhammerfest +


+ Painting continues apace on the the gun-truck; and it's the reason for the recent lack of inloads – it's taking me quite some time! In a week-and-a-half's time I'll be heading up to Manchester for Warhammerfest along with some of the droogs from the PCRC. It's also the first time I'll be entering a model into a painting competition – Golden Demon. +

+ In all honesty, I've deliberately always steered away from competitions because I find it counter-productive to my way of working, and why I paint. I usually only paint to please myself; for commission work (the closest equivalent I can think of to painting for an competition) for example, I really have to steel myself to sit down and actually do some painting. Otherwise it's all procrastination and planning and delaying... anything other than actually sitting down and enjoying it! +

+ Here then, I decided I'd try a bit of a change of mindset. Rather than over-focussing on the end result to the detriment of enjoying the process, I'm trying to treat this Golden Demon entry more as an excuse to paint a model to the best of my abilities – and in my own style [+noosphericinloadlink embedded+]. I harbour no illusions that I'll win anything – but equally I don't want to regard that as defeat: if I am happy with the finished model, then I'll count the whole exercise as a success. More importantly, I'll have enjoyed the time spent doing it, explored some new ideas and techniques, and generally had a healthy amount of harmless fun. +

+++

+ Painting the Goliath +

+ I had vaguely intended to hold off posting updates in favour of a grand surprise reveal – but then thought that's precisely the sort of approach that adds unneeded pressure on the enjoyment of my hobby time. As a result, I haven't got an exhaustive set of photographs, but I did take some pictures to show the PCRC and get their feedback. I also find it handy to use photographs as reference for shading and lighting, so a combination of these are shown below. +

+ I set myself some goals for this project. Breaking things down helped to make things a bit easier to approach:
  • Try painting in sub-assemblies
  • Explore oils more
  • Ask for feedback
  • Be more patient with vehicles
  • Create a complex base.
+ As I had built the model a while back without the intention of using it for competition purposes, it was already fully-assembled. I therefore kicked off by roughly snapping carefully removing the Command Squad from the Goliath – I didn't fancy trying to get my best painting on the back recesses of a leg (or whatever) cramped behind a bit of the tank. +


+ I then successively used Halford's brown and Tamiya olive drab spray paint to basecoat the model, figuring this would minimise both brushmarks and loss of detail. It would also serve to give some very early zenithal highlighting. After that, I began blocking in the major colours. I took a lot of inspiration from real-world military vehicles, but coupled that with industrial/everyday lorries and so forth to avoid it being a complete sea of olive green. +


+ While the first lot of oils dried on the tank, I turned my attention to the figures. I love painting skin, and where better to try to push myself than at what I consider my strength? Each of the figures had an evening or two dedicated to their skin, to make sure it's as good as I can make it. +


+ A key part of this was the variety of skin tones. Not only does this add realism, but it also helps the eye to work across the model. Note above how the skintones start out from the same light base colour, and are then developed through a number of washes and glazes to build up warmth and depth. +


+ The same figures, as they currently stand. I've used a common palette for the majority of the project, and that's to ensure harmony across the piece as a whole. The Command Squad remains unattached to the vehicle at the moment (hence the broken handrail!), but I keep popping them back in to ensure the light and colours are working. +


+ Another before-and-after, here's the 'golden angle' – the way the piece is meant to be viewed. The stubber, flagpole and aerial all serve to stop your eye drifting across the tank, and instead point back down to it, framing it. +


+ These are taken in rather poor lighting, but even here you can see the difference the glazes are making to the tank – and how the decidely non-realistic 40k-gothic accents of the yellow and red help to create hot spots and catch the eye. +

+ My intention is to complement these with retro 70s orange lenses on the windscreen. I had intended a more realistic blue-grey glass look, but on reflection think that I want to make sure the tank draws some attention, too. +


+ Back at the earlier stage, you can see the remaining two members of the command squad – and again compare this base skintone with how they later develop. +

+ I mentioned the Golden Angle above, but I've worked hard to ensure wherever you look at it, there's some narrative and interest. Much of the detailing work will be to enhance the implied story of the vehicle and place it in a warzone in the far future. +


+ The tyres aren't very glamorous, but are worth a mention as they've had lots of oil work on them. Not quite happy yet, but I don't think I'll be able to polish them off 'til I get the base worked up. +


+ A shot from the front shows the textural work. This is a combination of physical texture (created by agitating the surface with polystyrene cement to get a cast-iron look) and visual texture – that is, variation in hue, value and saturation on flat surfaces to create the impression of detail. +

+ This textural work is in contrast to freehand texture, which will – I hope! – enhance what's there. This will include the vehicle's markings, regimental badge, campaign markings and similar. I'll be attempting to sit these into the texture, and then work back over with more oils and weathering to ensure they work as an integral part of the design. +


+ This shot shows the Techpriest Enginseer. Not part of the original build, I added him (her? it?) for a number of reasons:
  • As noted above, I wanted the piece to work from all angles, and the techpriest emerging from the cabin gives a focal point to this angle. The warm orange robes stand out and – I hope – will keep the judge's eyes on the entry.
  • He adds some much-needed gothic weirdness to what's otherwise a fairly believable (well, for certain values of believable!) piece – and I want this to feel distinctly 40k, not just a generic sci-fi vehicle. 
  • He's valuable from a narrative perspective. Is he a WIP the Catachans are protecting? A simple attachment to the Command Squad? Here to inspect the vehicle? 
+ You'll note that, unlike the other figures, he's not interacting with anyone else; all his focus is on the vehicle, which he's fondly stroking. I felt that it was important to make him feel 'Other' and distanced from what could be his comrades. You'll note all the Catachans are turning their back on him – perhaps subconsciously – and my intention with that is to lean into that discomforting vibe that the tech-priests give off. +

+++

+ What's left to do? +

+ Thus far, the painting's taken me three weeks, on and off in bursts. I think I'm getting there, and want to have it polished off this week so I have a week to step back and consider it in the round – and, of course, build and paint the base... *gulp* +


+ To hit that target, I've got to do the following:
  • Metallics and equipment  Gun casings, exhausts, knives, banner poles, vox etc. 
    • This stage also includes quickly converting and attaching the main gun. This was a heavy bolter from the old Heavy Weapon kit, but I've now got the new Sentinel and thought I might use something from there.
  • Flak jackets  I'll likely keep these a very dark green, similar in tone to how they currently appear.
  • Backpacks and stowage  I'm tempted to do these in a similar camouflage to the trousers. I'm pleased with those, but they're barely noticeable in the assembled kit.
  • Banner  This may get purple additions, but I'm rather liking the look as-is. I don't want to introduce too many colours, and so this may be purely yellow, or incorporate some red.
  • Markings  As mentioned above, I'm going to add some freehand identification markings here and there over the vehicle.
  • Lenses and armaglass  This includes the various headlights as well as weapon scopes – and the techpriest's eyes.


+ Still quite a bit to do, but I'm fairly confident I can 'git 'er done' as the 634th themselves might put it. If you've got any thoughts, suggestions for markings, questions or generally want to comment, please let me know here or on the Facebook group +Death of a Rubricist+ +

+ Oh – and wish me luck! :) +

+++

Tuesday, March 28

inload: Eldar Titans and Ork Gargants

+ Eldar and Orks for Adeptus Titanicus +

+ Rules, playtesting and a plea +

+ With v0.4 of the document up and ready on the files section [+noosphericexloadlink embedded+], it's now out there for you to playtest. If you have any feedback, ideas, questions or critique of the Eldar Phantom and/or  Ork Gargant rules, please post them up on the Facebook group [+noosphericexloadlink embedded+], or as a comment below. It's particularly helpful if you've had a chance to playtest them live, as it were, to experience them in the round. +

+ Likewise, if you've built or painted any Eldar Titans or Ork Gargants, I'd love to see them – it'd be great to feature them on the blog, or use them in this Eldar and Ork expansion. +

+++

+ Models +

+ Rules are all very well, but models are what this is really about. With all these xenos popping up, it's looking like it's time for a Great Crusade, right? +


+ What little painting time I've had recently has been concentrating on the Catachan guntruck thingie, but I have been able to build and undercoat the Revenant Titans above (and below). +


+ They are 3D prints, and a very kind gift from PCRC stablemate Lucifer216. The kits went together very smoothly, and I've based them on 60mm rounds – I toyed with 80mm bases (like Warhounds), but the lithe alien war engines just looked utterly lost. +

+++

+ While we're talking about building, my brother sent over the WIP pictures of the Gargants he and his boys made – thought I'd share them here so you can see the materials and ideas that went into them. +


+ The rear shot shows some neat little details – I particularly like the use of the Genestealer cult Goliath drill-shield thing as the rear balcony. +


+++


Monday, March 27

+ inload: Ork Gargant rules for Adeptus Titanicus +

+ 'Ere We Go! +

+ Ork Gargants in Adeptus Titanicus +


+++

+ Ork Gargant rules for Adeptus Titanicus +

+ I've been beavering away polishing and tinkering with the rules for running Gargants in Adeptus Titanicus. They're now in a playable state, and the playtest pack can be inloaded for free from the files section of the +Death of a Rubricist+ Facebook group [+noosphericinloadlink embedded+]. +

+ The pack, entitled ATEC v04, contains:

  • Full rules for using Ork Gargants in games of Adeptus Titanicus
  • Print-ready Command Terminals for Gargants and Great Gargants
  • Print-ready double-sided weapon cards.
  • Info for submitting playtest notes, but do just feel free to have fun with them!

+ The rules are an iteration of those that I've been exloading here on occasion. Feel free to use the Insphere Contentsieve search function in the left-hand column of the blog to look for 'Gargant' if you'd like to read over some early thoughts. In summary, however, I've followed the following general design principles:

  • Being orky, Gargants should be tough, and kick out a lot of firepower. 
  • Unsubtle but entertaining, they should be generally less reliable than their Imperial equivalent, but have the potential – with luck and good planning – to outshine their opponents' equivalent War Engines.
  • Playing a mob of Gargants should feel like you are an ork Kaptin managing his krew, and reward aggressive play.
  • Playing a mob of Gargants should not be a frustrating experience.
  • Using Gargants must abide to the core rules as seamlessly as possible while maintaining character.
+++

+ Playtesting da Waaaagh! +

+ Had a very enjoyable weekend over at my brother's house. I'd sent him and my nephews a pile of bits and a letter (faithfully dictated by Nikkit the gretchin) from the Warboss asking his meks to build him some dead snazzy Gargants to krump some spiky gitz. +

+ Well, the Meks came good and the Warboss was greeted by a proppa stompy Gargant Mob to take into battle. I think they're just brill – each very distinctive and full of orky character and creativity. They were built using air-drying clay over household bits and bobs. Couldn't have asked for better results; well done, ladz! +

[+{APPENDNOTE=This autoscribe humbly apologises for forgetting to note down the ork's own names for these beasts of steel, so presented here are my loose human translations – do correct me and I'll update the names!+]

Great Gargant Zodwort's Revenge. +


Gargant Waaagharella. +


Gargant Orktimus Prime (and a dead sneeky stompa). +

+ It was a particular treat to see this banner waving over the Great Gargant, as it's been recycled from my brother's old ork army, Waa-Zodwort. Nice to see it taken into battle again. +

+++

+ Playtesting and designer's notes +

+ As my part of the deal, I'd brought along the playtest document above, along with all the terrain and Titans to fight. While keen 40k players, none of them had played Titanicus – but they took to it like ducks to water. +

+ I'd been running the dice every so often to check how things were working, but – lacking any finished gargants – the nearest I was able to come to physical testing beforehand was the rather shonky-looking affair below, with my own mournful half-finished Gargant. +

+ Still, it did the job, letting me try out the Command Terminal and make sure that all the basic mechanics worked. I sent the poor armless Great Gargant out to take on a Warlord and a Reaver – not a fair fight, but a good way to assess the damage mechanics of Krew and Fires. +

+ The Command Terminal on the right of the picture shows an early-game snapshot: just one fire having begun, and plenty of krew remaining. +

+ The late-game example of the Terminal (below) illustrates a snapshot of how the mechanics work. In short, Gargants start with a pool of dice representing Krew, which perform a variety of functions. The quality is determined at the start of each Strategy Phase by rolling the dice, before the player places them on the relevant spaces on the Terminal. This mitigates (but doesn't eliminate) the random hand of luck, giving player agency and decisions to make. Secondly, it gives the player an equivalent to the Imperial decision-making processes throughout the turn – their decisions at this stage affect how the Gargant will behave. +

+ The Command Terminal has a number of negative effects on the Krew spaces – No Full Stride, for example, in one of the boxes on the legs. You ignore these effects by covering them with Krew; so there's no additional book-keeping: you apply only what you can see at the time. A fully-crewed Gargant is a fearsome thing! +


+ Ork players must decide where, and how many, mobs will be assigned to a region. Need to move quickly? Better get enough krew down in the legs, and ensure a good-quality mob are manning the head so the order will go through. Just won a proper scrap? Make sure you max out the Krew in the body, as they're better able to stoke or vent the boiler, or effect repairs throughout the Gargant. And if you just need something killed, load up the gun decks as well as the main weapons! +

+ Ork Gargants make a virtue of their relative lack of sophistication. They're got heavy armour and a long damage track, and critical damage doesn't have a chance of one-shot killing them. There are, Imperial players will be relived to hear, a number of downside to this, however. Damage modifiers come in early and build up quickly. Fires can break out and occupy the Krew spaces. Unlike Krew, fires don't cancel the negative effects, so even one fire in a region can be a pain. Worse, if you've packed the krew into a region too tightly, they'll get consumed by the fires, making your job of managing the Gargant that much harder. +

In the early game, Gargants will have krew and shields to spare – but unlike their Imperial equivalents, there's no way to replace or repair them. Krew can be killed off throughout the game as a result of damage, fires or critical effects, so as the game goes on, you'll have to make difficult decisions on what to prioritise. This diminishing pool mechanic means that orks are encouraged to be aggressive – though this needs to be balanced against keeping the Boiler in the green, too. Ork Power Fields might be strong and effective, but if the Boiler's under strain or too cold, their effectiveness will waver (I like to picture the lights in the Gargant dimming and brightening as the boiler struggles). Also, unlike the relatively reliable servitor clades of Imperial Titans, ork bosses have a zero-sum game of managing repairs and the boiler (reactor) alongside the basic functions of moving and shooting. +

+ Trying to strike the right balance of getting the boiler in the right place is engaging and fun. If you're planning on doing lots in a turn, you might want to vent the boiler to a greater extent – but that will temporarily drop the protection the shields offer until you can activate and start pushing... giving your opponent a chance to strike while you're building up a head of steam. +


+++

+ First playtest findings +

+ The first playtest saw the Great Gargant fell the Warlord, before being destroyed in turn by the Reaver. More importantly, it was a lot of fun! +


+ I was concerned that the Krew would add too much complication to the game, but I'm pleased to report that it felt about right. While there's a bit more thinking in the Strategy phase, the mechanic itself is quick and intuitive, and fills a few gaps that account for other mechanics. +

+ It all felt rather orky – and rest assured that doesn't just mean random. There are meaningful decisions to make. The real test, however, would be using it in a proper game.+

+ Second playtest findings +

+ The Gargant mob above faced a Warlord and two Reavers of Legio Sumer-Nikator. I'm afraid I didn't take any pictures of the game, as I wanted to concentrate on enjoying this rare chance to play with my brother and nephews. +

+ I got some really good feedback, and I was pleasantly surprised that no hiccoughs or odd interactions seemed to arise. The main thing, though, is that we all thoroughly enjoyed ourselves and had big grins on our faces throughout – probably the best result all-round! 

+ Victory went to the orks. Zodwort's Revenge was ablaze from stem to stern (though not quite out of the fight), while Waaagharella and Orktimus Prime had felled one Reaver. The Imperial battlegroup was thoroughly beaten up, but the result was close, and tense. +

+ Thanks to all involved, and hope you enjoy playtesting the rules further. +

+++

+ 'Ere we go! +


Monday, March 20

+ Collecting Titan crew +

+ On Long-Range Sensors + 

+ White whales, holy grails... We've all got that one figure that we've been after seemingly forever. Perhaps it's nostalgia for a particular model that got you into the hobby, finishing off a particular set, or perhaps it's as simple as the model going out-of-print before you could find a copy. +

+  In my case, I've been collecting Titan crew from Forgeworld for fifteen years. Aside from these models, I'm not really much of a collector per se – I'm usually far too ready to chop things up! This range, however, is small enough that it's been quite fun hunting them down, and I've kept them largely unconverted. You can read a bit more about the others in the range here: [+noosphericinloadlink embedded++


+ As you've probably guessed, I've managed to lay my hands on two of the outstanding figures – quite literally 'outstanding', as they're the two crewmen that stand on the upper deck of the Warbringer Titan. They're both rather lovely figures, packed with character. They came ready-assembled and primed (beggars can't be choosers), but certainly appear to be genuine, rather than recasts. +

+ As you'll spot above, they'll need a little cleaning up and prep-work – the casting gate is still present on the right-hand figure's shoulder, for example – but given how rarely they come onto the market (not surprising, given the fact you normally need to buy a £950(!) Titan to get them), I'm happy to do a little additional prep. +


+ Listed simply as 'Officer' and 'Servitor' in the instructions for the big model, it's a little unclear which crew members they're meant to represent (or perhaps they're simply being transported?) Personally, I'm choosing to interpret the right-hand figure as one of the Moderati of the Titan. Adeptus Titanicus has lovely schematics of the various Titans that list the crews (an example through this link: [+noosphericexloadlink embedded+]. These mention specific roles that the Moderati have like Sensorius, Tacticarus etc. +

+ Since these two seem to have lots of range-measuring devices, we assume they're something to do with directing the targetting of the Warlord-weight weapon on the top of the Warbringer-Nemesis. Not being designed for this sort of weapon, perhaps the Titan's head doesn't have physical space or the right equipment, necessitating a Moderatus to stand to? Who can say? +

+ Painting-wise, these will join the Legio Sumer-Nikator (Sons of the Temple). Having gone to the bother of collecting them all, it seems silly to split them up! +

+ These were the models I was most keen on getting. The others in the collection are mainly the seated models, which I'm not quite so interested in. Having said that, if you know of a Titan crew model that you can't see either here or in the earlier inload, do let me know – these figures are quite hard to find pictures of online. +
+++