
+ Catachan 'Ever-ready' 634th – and the road to Warhammerfest +

+ Painting continues apace on the the gun-truck; and it's the reason for the recent lack of inloads – it's taking me quite some time! In a week-and-a-half's time I'll be heading up to Manchester for Warhammerfest along with some of the droogs from the PCRC. It's also the first time I'll be entering a model into a painting competition – Golden Demon. +
+ In all honesty, I've deliberately always steered away from competitions because I find it counter-productive to my way of working, and why I paint. I usually only paint to please myself; for commission work (the closest equivalent I can think of to painting for an competition) for example, I really have to steel myself to sit down and actually do some painting. Otherwise it's all procrastination and planning and delaying... anything other than actually sitting down and enjoying it! +
+ Here then, I decided I'd try a bit of a change of mindset. Rather than over-focussing on the end result to the detriment of enjoying the process, I'm trying to treat this Golden Demon entry more as an excuse to paint a model to the best of my abilities – and in my own style [+noosphericinloadlink embedded+]. I harbour no illusions that I'll win anything – but equally I don't want to regard that as defeat: if I am happy with the finished model, then I'll count the whole exercise as a success. More importantly, I'll have enjoyed the time spent doing it, explored some new ideas and techniques, and generally had a healthy amount of harmless fun. +
+++
+ Painting the Goliath +
+ I had vaguely intended to hold off posting updates in favour of a grand surprise reveal – but then thought that's precisely the sort of approach that adds unneeded pressure on the enjoyment of my hobby time. As a result, I haven't got an exhaustive set of photographs, but I did take some pictures to show the PCRC and get their feedback. I also find it handy to use photographs as reference for shading and lighting, so a combination of these are shown below. +
+ I set myself some goals for this project. Breaking things down helped to make things a bit easier to approach:
- Try painting in sub-assemblies
- Explore oils more
- Ask for feedback
- Be more patient with vehicles
- Create a complex base.
+ As I had built the model a while back without the intention of using it for competition purposes, it was already fully-assembled. I therefore kicked off by roughly snapping carefully removing the Command Squad from the Goliath – I didn't fancy trying to get my best painting on the back recesses of a leg (or whatever) cramped behind a bit of the tank. +

+ I then successively used Halford's brown and Tamiya olive drab spray paint to basecoat the model, figuring this would minimise both brushmarks and loss of detail. It would also serve to give some very early zenithal highlighting. After that, I began blocking in the major colours. I took a lot of inspiration from real-world military vehicles, but coupled that with industrial/everyday lorries and so forth to avoid it being a complete sea of olive green. +

+ While the first lot of oils dried on the tank, I turned my attention to the figures. I love painting skin, and where better to try to push myself than at what I consider my strength? Each of the figures had an evening or two dedicated to their skin, to make sure it's as good as I can make it. +

+ A key part of this was the variety of skin tones. Not only does this add realism, but it also helps the eye to work across the model. Note above how the skintones start out from the same light base colour, and are then developed through a number of washes and glazes to build up warmth and depth. +

+ The same figures, as they currently stand. I've used a common palette for the majority of the project, and that's to ensure harmony across the piece as a whole. The Command Squad remains unattached to the vehicle at the moment (hence the broken handrail!), but I keep popping them back in to ensure the light and colours are working. +

+ Another before-and-after, here's the 'golden angle' – the way the piece is meant to be viewed. The stubber, flagpole and aerial all serve to stop your eye drifting across the tank, and instead point back down to it, framing it. +
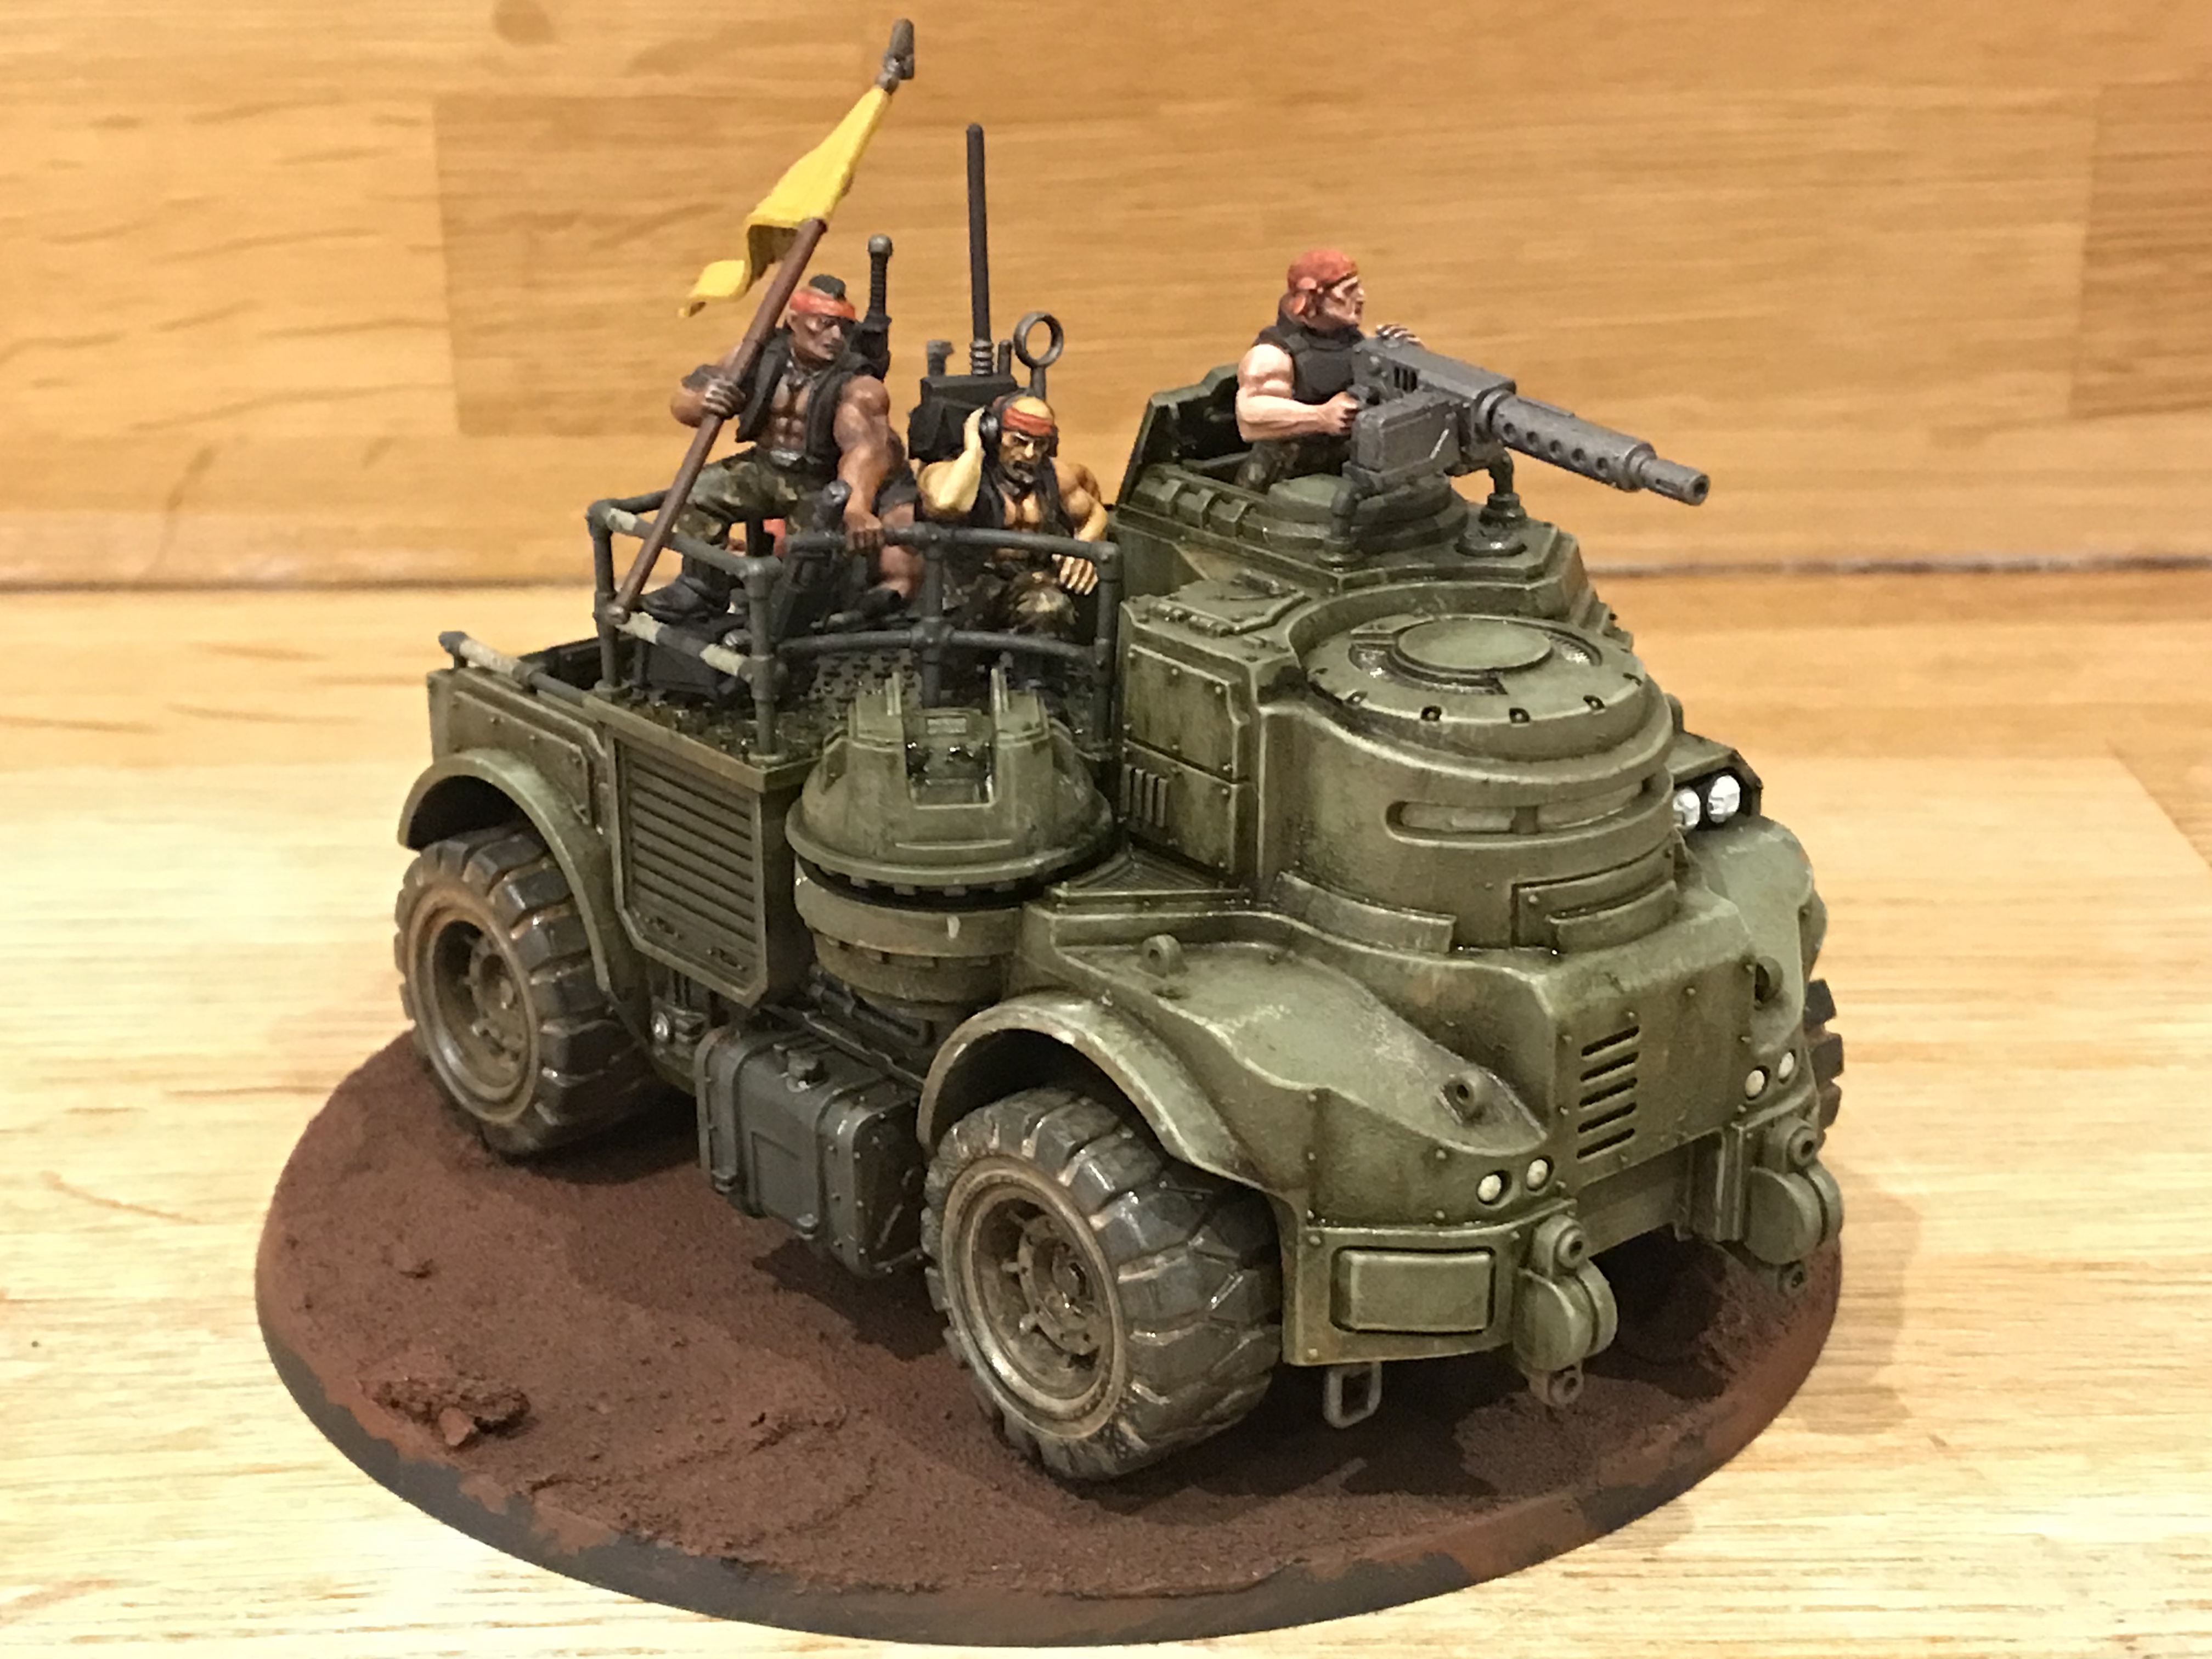
+ These are taken in rather poor lighting, but even here you can see the difference the glazes are making to the tank – and how the decidely non-realistic 40k-gothic accents of the yellow and red help to create hot spots and catch the eye. +
+ My intention is to complement these with retro 70s orange lenses on the windscreen. I had intended a more realistic blue-grey glass look, but on reflection think that I want to make sure the tank draws some attention, too. +

+ Back at the earlier stage, you can see the remaining two members of the command squad – and again compare this base skintone with how they later develop. +
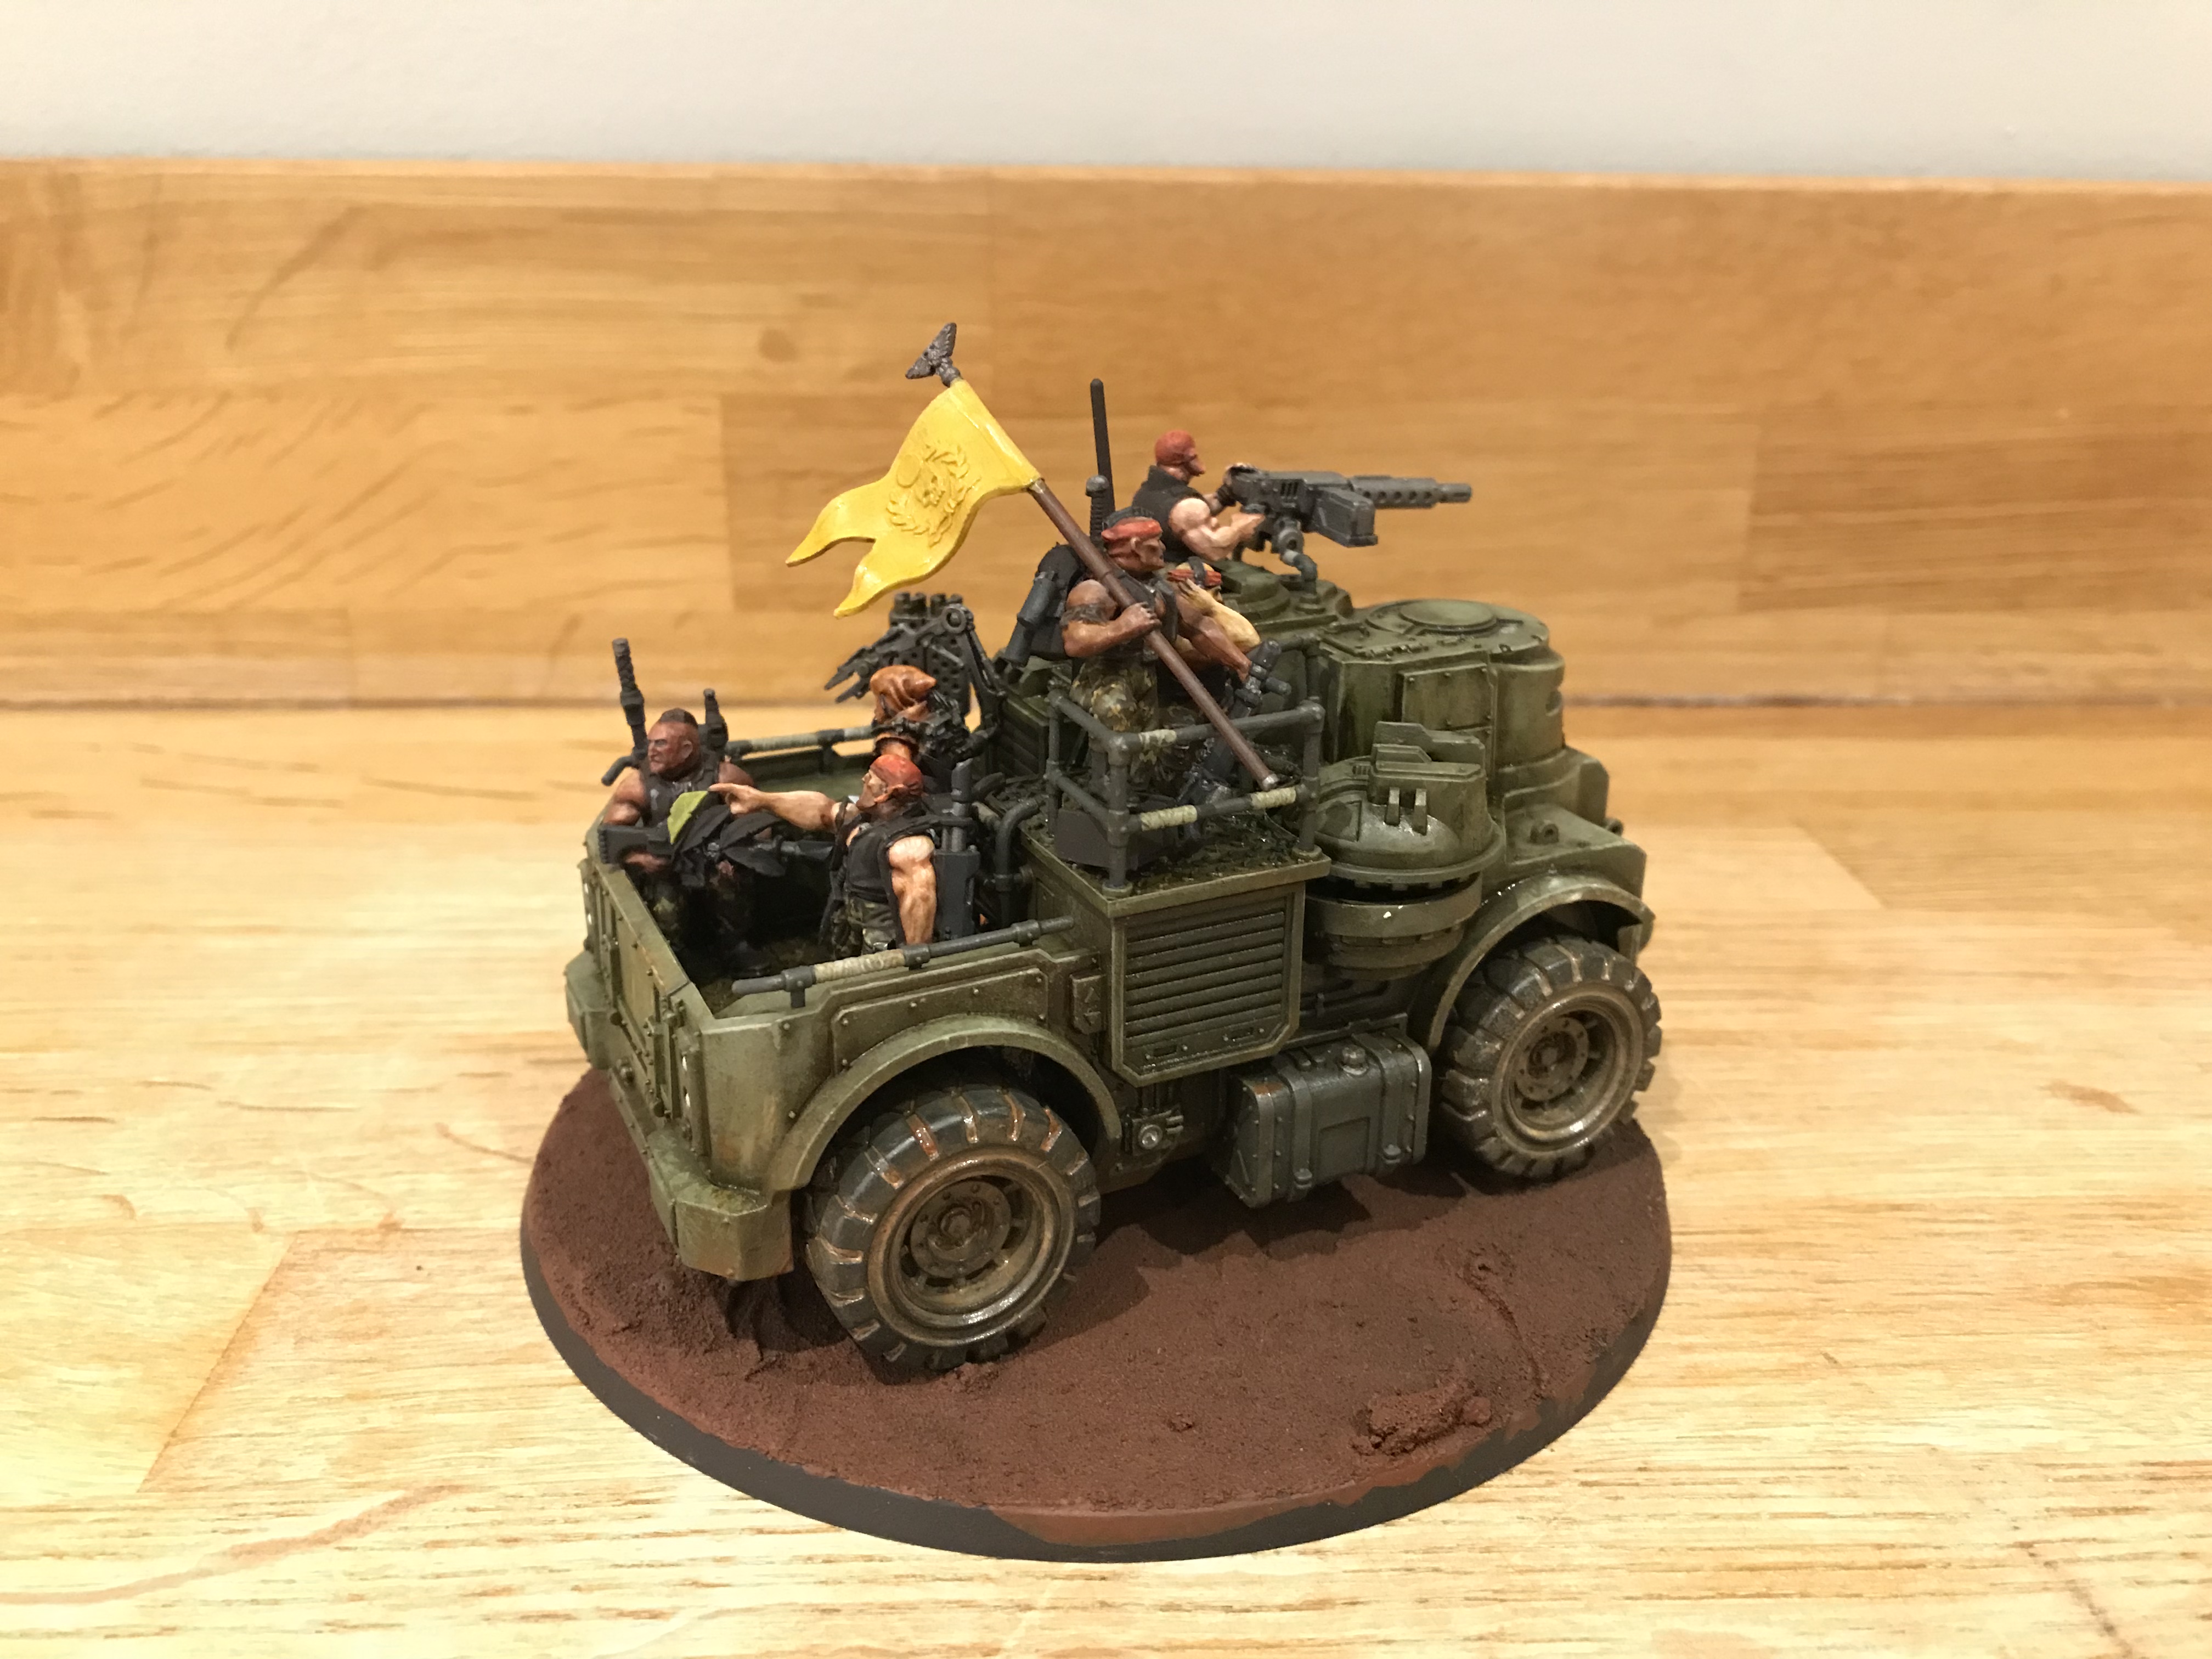
+ I mentioned the Golden Angle above, but I've worked hard to ensure wherever you look at it, there's some narrative and interest. Much of the detailing work will be to enhance the implied story of the vehicle and place it in a warzone in the far future. +
+ The tyres aren't very glamorous, but are worth a mention as they've had lots of oil work on them. Not quite happy yet, but I don't think I'll be able to polish them off 'til I get the base worked up. +

+ A shot from the front shows the textural work. This is a combination of physical texture (created by agitating the surface with polystyrene cement to get a cast-iron look) and visual texture – that is, variation in hue, value and saturation on flat surfaces to create the impression of detail. +
+ This textural work is in contrast to freehand texture, which will – I hope! – enhance what's there. This will include the vehicle's markings, regimental badge, campaign markings and similar. I'll be attempting to sit these into the texture, and then work back over with more oils and weathering to ensure they work as an integral part of the design. +

+ This shot shows the Techpriest Enginseer. Not part of the original build, I added him (her? it?) for a number of reasons:
- As noted above, I wanted the piece to work from all angles, and the techpriest emerging from the cabin gives a focal point to this angle. The warm orange robes stand out and – I hope – will keep the judge's eyes on the entry.
- He adds some much-needed gothic weirdness to what's otherwise a fairly believable (well, for certain values of believable!) piece – and I want this to feel distinctly 40k, not just a generic sci-fi vehicle.
- He's valuable from a narrative perspective. Is he a WIP the Catachans are protecting? A simple attachment to the Command Squad? Here to inspect the vehicle?
+++
+ What's left to do? +
+ Thus far, the painting's taken me three weeks, on and off in bursts. I think I'm getting there, and want to have it polished off this week so I have a week to step back and consider it in the round – and, of course, build and paint the base... *gulp* ++ To hit that target, I've got to do the following:
- Metallics and equipment Gun casings, exhausts, knives, banner poles, vox etc.
- This stage also includes quickly converting and attaching the main gun. This was a heavy bolter from the old Heavy Weapon kit, but I've now got the new Sentinel and thought I might use something from there.
- Flak jackets I'll likely keep these a very dark green, similar in tone to how they currently appear.
- Backpacks and stowage I'm tempted to do these in a similar camouflage to the trousers. I'm pleased with those, but they're barely noticeable in the assembled kit.
- Banner This may get purple additions, but I'm rather liking the look as-is. I don't want to introduce too many colours, and so this may be purely yellow, or incorporate some red.
- Markings As mentioned above, I'm going to add some freehand identification markings here and there over the vehicle.
- Lenses and armaglass This includes the various headlights as well as weapon scopes – and the techpriest's eyes.

+ Still quite a bit to do, but I'm fairly confident I can 'git 'er done' as the 634th themselves might put it. If you've got any thoughts, suggestions for markings, questions or generally want to comment, please let me know here or on the Facebook group +Death of a Rubricist+ +
+ Oh – and wish me luck! :) +
+++
Looking great so far. What about tattoos or other marking on the skin?
ReplyDeleteGood luck! Hope you enjoy the show, and get a chance to test out 10th Edition (or Epic!)
looks awesome! love the detail about the Techpriest being isolated
ReplyDelete