Showing posts with label terrain. Show all posts

Thursday, November 16

+ inload: Painting The Ashes of Armageddon gameboard +

+ Third Army: The Wastelands of Armageddon +

+ A Steel Legion Heavy Bolter team hopes to chalk up some kills against the orks of Waa-Ghazghkull. +

+ No, not the Steel Legion 3rd Army Group described in this article [+noosphericexloadlink embedded+] on The Ashes of Armageddon blog, but the Third Army of wargaming: the tabletop scenery. +

+ Armageddon Wasteland terrain +

+ I've been threatening to repaint my second-hand Realm of Battle board for ages. I bought it painted in a white polar scheme, and used it for many years for various games. In fact, the Steel Legion I'm currently repainting were originally painted white specifically to have an army to use on it – and since they're getting a glow-up, I thought the board ought to follow suit. +


+ This was a surprisingly swift process. I used a dish sponge to apply some slightly diluted raw sienna acrylic over the surface, excluding only the exposed rock, which was already painted grey from its previous incarnation. I used Pebeo studio acrylics, which are affordable and tough enough to stand up to the inevitable bumps and bashes of tabletop warfare. +

+ Once dry, I repeated the process with raw sienna and buff titanium – not in an even mix, but allowing them to mix and mingle on the surface, leaving the pure raw sienna visble in recesses. I then gathered some sprays – black primer, camo brown and camo green from Halfords, plus GW's Wraithbone spray and used them to add some quick smoky detail here and there. +


+ Once that had all dried, I went back in with a large soft brush and buff titanium to pick out some texture with dry brushing. I then heavily diluted some Skrag brown and Liche purple (I think Phoenician purple is probably the modern equivalent) and used these to work into the cracks and crevices to boost the contrast in tones. +

+ I also used these very dilute mixes to add a few discoloured patches – surface vegetation? Chem-waste pollution? Dirt and debris? – it doesn't really matter which, as such additions are mainly there to avoid weird blank gaps in the surface. +

+++

 + The board in use +


+ Here's a couple of shots of the finished elements of my gradually-being-repainted Steel Legion force:


+ These details show two things of note: firstly, the importance of contrast between your models and your table if you want them to make an impact. The rims of the bases frame the model and make a statement, while the dark armour, guns, gloves and boots define the features and make the models 'read'. That's even the case here, where the figures are intended to read as camouflaged. Without that built-in (and unrealistic) framing and contrast, the models would be literally camouflaged against the surface, and you'd lose a lot of the visual appeal of a game. Bear this in mind when deciding on your schemes! +


+ Secondly, the difference between basing and terrain. One could, of course, prepare and paint the whole board using the same paints and techniques as used on a model's base, but it'd be considerably more time-consuming and expensive, not to mention more likely to be fragile. You'd end up with something more akin to a diorama rather than a playing space. +

+ The 'Third Army' needs attention, but it also need a slightly different mindset – happily, a more forgiving one, for the gaming table will rarely garner as much attention as your models, and thus can be treated with less attention to detail. +


+ While explicitly intended to represent one of the many Wasteland areas of Armageddon, the finished result is pretty flexible, and can pull double-duty for other games – or simply as a pict-capture backdrop. +

+++

Monday, August 20

+ inload: Adeptus Titanicus board-building +

+ Welcome to Calth: building an Ithraca board for Adeptus Titanicus +


+
Sound the warhorns! Like me, lots of happy hobbyists received their copy of Adeptus Titanicus over the weekend, and I spent my spare time reading over the rules, poring over the models, and generally enthusing. I haven't played it, but the genuine enthusiasm that the designers have poured into the game is obvious. The rulebook is littered with thoughtful designer's notes that make it clear this new game is a love letter to its forebears, but it has been redesigned from the ground up, streamlined and generally combining the best bits of history to make something very impressive (entirely fitting for the Adeptus Mechanicus!) +

+ There are lots of reviews and discussions on various aspects of the game, so I thought I'd exload some thoughts on building a board, along with what little advice I can offer. The third army is something I think will be vital to a good game of Adeptus Titanicus which, like Epic, appears to be a game of manoeuvre. +


Look at how the Titan is given context as a giant within even this work-in-progress cityscape.


+ Theoretical +

+ First off, why build a board at all? The answer to that is fourfold, and it ties in with the different ways of playing listed in the rulebook. 

+ Open Gaming  This most accessible way to play, when you simply pick models and get going, is sometimes sneered at; but I think it's the core of play. It's simply more fun to play on a pleasing-looking board, and if you're looking for new people to try it out, having something beautiful is more likely to attract and interest them. Adeptus Titanicus is also aimed at older games, who may well have children of their own. If they're interested, Open Gaming is a natural way in; and what better way to get involved than with the art and craft of building a board? +

+ Narrative Gaming  From a narrative point of view, a modelled gameboard helps with immersion. It's much easier to imagine yourself as a Princeps stomping through a city when there are some tiny walls, car-parking lots (or the distant future equivalents) and so forth to suggest scale. Building a new board for every game you play is all but impossible, but creating something for a specific campaign – whether all the way through, or for a special scenario – will help set the scene and make your storytelling all the sweeter. +

+ Matched Gaming  You can, of course, use an existing table or board, but the more you use a board or mat, the more familiar it becomes. Testing your skill as a general in the real world is as much about mastering the terrain as your troops; and having a new board will give you some and your opponent new challenges. +

+ Finally, if you're not confident with your painting skills, then be assured that fielding even the most basic models will be hugely enhanced by a nice gameboard. In the same way that a good frame can gives a touch of class and status to an average painting, a proper gameboard will enhance your work and show it off to best effect. The converse is also true: even the most beautiful models are made to look less interesting on a undecorated table surface. This really gets to the root of tabletop wargaming as a visual spectacle: models are small (well, duh!), and from a gamer or spectator's viewpoint, they have much less impact than the board itself. +

+++

+ Practical +

+ To hobbyists used to lavishing hours on a single model, it can look exhausting even to consider modelling and painting such a relatively large area. However, building a useable board can be surprisingly quick. Remember, don't think of it as the artwork; think of it as the frame. A good frame enhances the focus, but doesn't draw it. Unless you're going for all-out one-off visual spectacle – as in the astonishing Legen project of (the equally astonishing) Gardens of Hecate [+noosphericinloadlink embedded+], and Iron Sleet's brilliant Thorn Moon project {+noosphericinloadlink embedded+] – you don't want to overdetail an all-purpose board, as it'll draw attention from your models, and be less versatile, giving it a shorter gaming lifecycle. +

Board-building can be cheap: I built this Ithraca board using junk from my garage, some DIY materials and a few select bits from my bits box, but to make a similar board from scratch would cost just a few quid.

+  It can also be spontaneous. Having built my first Warlord (see below), I took it downstairs to prime, and got completely carried away. A bit of texture gel, PVA and polyfilla later, I'd turned a spare bit of thick MDF into a serviceable little board. It's an odd size – roughly 3½ft square – but that's right in the middle of the suggested sizes for smaller Titanicus games. +

+ While I do encourage you just to get stuck in, as I did for Ithraca Calth, If you do want to make a board, here are some practical considerations that can help make your board more useable for Adeptus Titanicus in particular:


+ Keep texture subtle  Gluing sand down is a time-tested way to create texture on the board; but for smaller scale gaming, it can look too coarse – particularly for urban areas. Instead, try skimming the surface with polyfilla or similar [+LINGUOSERVITOR APPEND+I think Spackle is the US equivalent] will approximate tarmac texture and give visual interest to large flat areas. Plaster will also work, but make sure to 'key' (i.e. rough up) the surface beforehand to prevent it flaking off. This is a lesson learned from my Purefinder Chanterwick boards [+noosphericinloadlink embedded+], built for Court of the Sun King project [REF: pagetab above]. Heavy texture looks great, but it's awkward to place large buildings on, particularly if they themselves have a flat base. You end up with wobbly or awkward placing, which breaks the immersion. +

+ Consider incorporating a feature  A focal feature is optional. Leaving it off will make your board more flexible and versatile, but less characterful. I chose to add a large crater, which I embedded into the surrounding polyfilla, to help hide the ugly edges and improve the immersion. A crater is anonymous enough to add to the visual without completely taking attention. Other features like hills or parkland would work similarly. If you're building a feature board, you might consider something more eye-catching, like a mine entrance, landing pad or other definite feature. +

+ Break the lines  Avoid placing roads, rivers, canyons, building foundation plates and similar features at right angles to the edges of the board, and each other. A grid system feels 'safe' and will allow you to tile your board with others more easily, but always looks less interesting and natural. It's also bad for Matched Play, as it allows for metagaming distances etc. Keeping the terrain at angles other than 90º will keep you and the other player guessing. Similarly, avoid placing features too near the centre, as it makes for predictable games. Having a clear area here gives maximum versatility – remember you can always place scatter terrain or a standalone feature here. +

+ Use manufactured materials  For Ithraca, I laid down some mesh tape to indicate the roads. When I skimmed polyfilla over the top, it leaves a subtle ordered texture – using regularly-textured materials like duct tape, aluminium mesh or cross-stitch fabric helps to quickly build up large convincing areas of man-made (or xeno-made) construction that subtly break up the otherwise featureless plain. I incorporated some mountcard offcuts as raised concrete platforms/building plates for similar reasons. +

+ Scale-appropriate detail  I mentioned above not wanting to draw attention from the models, but a few hints of detail will make a huge difference to the overall effect. A few linear strips of low-standing ruins – from the old Epic: 40,000 base sprue – and some gravel and sticks from the garden give the impression of rubble and broken trees, helping to sell the specific scale. Of course, this does somewhat restrict the board's use to a particular game or scale, but I think that's a feature, not a bug – if you're going to the effort of making a board for a game, I think you should go the whole hog, or you risk making a halfway house that isn't particularly interesting. +

Coropedion, Legio Sumer-Nikator (Sons of the Temple)
+ Leave space  Don't overfill the board. Remember that you're creating a framing effect, and that you'll be playing a game on it. The more you cram onto the board, and the more complex road/canal/river systems you create, the less space your models will have, and the less versatile the board will become in terms of buildings/scatter terrain. However, this needs to be balanced. Part of the reason for building the board is to create interesting tactical challenges. You might intentionally restrict the space between two flat areas. This will allow you to create a narrow street that only certain models can fit down in some games by adding free-standing buildings on either side. In others, you can simply leave the flat area open as a market square or gathering area. +

+ Wobbly model syndrome  Due to the size of the Titan bases, texture is particularly important to bear in mind for Adeptus Titanicus games. It's partly for this reason, and partly to help sell the setting and scale of a ruined city, that I've kept the board mostly flat. Having your Titans canted awkwardly highlights their model nature, and generally causes problems. Give your Titans room to walk. +

+ Storage  Consider what space you have to store the board. The realtively small size of an Adeptus Titanicus playing area means it's potentially practical to create and store it as a single piece (as I've done), but you might want to break it into two or more parts. Consider also he height and delicacy of the details you incorporate – keeping things low and building them sturdily is essential if you have to store your board upright or against something. However, if you have the space to leave it set up, or to store it flat, then feel free to go to town on modelled-on mountains and spires!

+++

+ Conclusion +

+ I hope that's given you some ideas – and it helps you avoid mistakes I've made in the past!+

+ The sample set-up below shows the sort of thing you can then create on your board with scatter scenery. Even very simply primed, it's already looking interesting with some WIP buildings on it. +


Monday, October 2

+ inload: Scenery building for Necromunda +

+ Scenery for Golgotham +

This one's name was Viggsy Carbolic, a verti-docker working the breach from the filtration districts down to where the Chemsalt Opens began. Every morning he woke up to the distant cry of ratowls out over the cavernous sea chambers; eyes sore, muscles tight across his back.

Muscle. That's what Carbolic could provide. He'd be introduced to me as a useful man to have in a tight spot; ex-ganger, ex-dealer, ex-enforcer – in-house, of course; the 'Ficials wouldn't have taken a second-look at him – and ex-criminal. 

'That's a lot of exes,' I'd commented, when we'd met at last. His scarred old face had pulled up into that sad, distant half-smile I'd later remember him by.

'You should meet the ex-wives.' 

I'd grinned. In truth, Carbolic was over-the-hill – an old man of nearly thirty, and already showing the greying skin of oxide build-up that takes us all in Water IV. Still, there was something about him; and the Throne alone knew that I couldn't afford to turn down a proper ganger; not when the rest of the block was skinny, excitable juves and a few loosescrews who couldn't make ends meet elsewise.

'So why the change of heart, Carbolic? What makes you want to get back into the game?'

Again, that sad smile. He didn't catch my eye; kept looking down at the pitted old table.

'You don't choose gang life, Fito. Gang life chooses you.'


+++

+ Water filtration district +

+ A small gathering of the PCRC at the weekend saw us beavering away to build some terrain for the upcoming release of Necromunda. +

+ Between Warmtamale, grahamgilchrist and myself, we've put together a very dense little 2 x 2 board – or more likely, enough to cover a 4 x 4 in a more practical fashion. +


+ The core of the water filtration district is one of the individual Sector Mechanicus boards that GW sell for their Armies of Parade event. A swift bit of hacksawing down one side of the road gave us an imposingly large wall [+vis-ref above+], which we then built up into a box with a spot of impromptu carpentry. +


+ The concept for the piece is a water-processing facility; one of thousands in the hive. Wickerwater, in the Vice IC district, has been loudly chugging away for the past four millennia or so, converting chemsalt- (and worse) polluted water that condenses and trickles and collects down the hive into potable (well, 'potable') water for the industrotech workers nearby. +


+ There's still a lot to do – greebling on the 'top deck', tidying, and of course painting, but we're really pleased at it so far. +


+ The underlying structure is essentially a huge pipe that just out of the wall, passes in front of the huge aquila – for, after all, the water must be purified spiritually as well as physically. +


+ We wanted to create a sense of 'monolithic claustophobia' – huge basic structures that are covered in a tangled wormery of pipes and walkways that have grown up like weeds over the centuries, so we included bits from a variety of sources to give a hotch-potch feel of varied tech-levels. +

+ Timber repairs – perhaps once temporary, but now as essential to the structure as anything else sit alongside the crumbling mechanical sections and dangling chains. +

+ There's a lot of height here – I think the highest point is about two foot off the surface! – which I hope will make for fun gaming. There's a balance to be struck between spectacle and playability; so a number of large chunks of the piece are separate, so that we can disguise the underlying pipework structure to a greater or lesser degree. Thus, Wickerwater will be able to double up as other areas; and is also practical for full scale 40k games, where such dense terrain is not always so desirable. + 

Thursday, August 31

+ inload: Resupply – Galvanic Servohaulers mini-review +

+ Scatter terrain +


+ I'm not sure if GW's 'Galvanic Servohaulers' [+noospheric inloadlink embedded+] count as models or terrain, but they're certainly very cool. Much larger than I had anticipated – check out the night watchman lurking nervously amongst the piles of crates, stacks of barrels and mini tractor/crane things I painted last night. +

+ The servohauler kits are simple but with more detail than I'd expect from terrain; they'd make a great basis for genestealer cult, ork or skirmish-game conversions and kitbashes. I like the fact that the trailer on which the crane stands is compatible with the big crates of the Munitorum Armoured Containers box I reviewed a while back [+noospheric inloadlink embedded+]. +

+ The crane and tractors have some lovely details, but if you're happy to overlook or remove the Adeptus Mechanicus symbol, they're generic enough to work in most sci-fi or steampunk genres. After all, there's nothing particularly sophisticated about rugged building equipment. +

+ The models painted up quickly – rather a rush job, in truth – but the grimy, battered look built up with block-painting, washes and smoked highlights suits the spirit of the set. The depth of recesses on the crane meant that this piece was far more time-consuming than the tractors, even taking into account its size. +

+++

+ Conclusion +

+ As with the Munitorum Armoured Containers kit, the Galvanic Servohaulers get two mechandendrites up (out of three),for much the same reasons. It's another detailed, versatile set of models that provide perfect scatter terrain for sci-fi, post-apocalyptic or near-future settings. +

+ Like the Armoured Containers, these would be great for dioramas and vignettes; and also offer a lot of potential for kitbashing and conversion work. +

Tuesday, May 17

+ inload: Objectives +

+ A selection of objective markers, painted for my Officio Monstrosa project: 


+ These models are from the ill-fated Studio McVey game, Sedition Wars. I bought into the Kickstarter mainly for the models, but when they turned up the models held none of the appeal of the sublime metals and resins I'd previously bouht from the McVeys. With hindsight, this was probably foreseeable, and I hold no ill-feelings towards the game or studio. +

+ These bits of terrain were a silver lining to the affair. Nice, chunky tech-gizmos and crates that paint up very quickly and effectively. These were based on 25mm bases – I wanted these objectives (unlike terrain) to be based in order to make it clear they are playing pieces rather than backdrop. They were sprayed with Halford's grey primer, then quickly painted with block colours from GW's Foundation paint range: Iyanden Darksun, Charadon Granite etc. +


+ More than normal figures, objectives and terrain shouldn't be too eye-catching, in my opinion. For that reason, I kept them muted and low contrast. For example, I avoided white on black for the computer screens, instead opting for greeny-greys. To produce the green, I added Daler Rowney sepia ink wet-in-wet into yellow on the pod thing (back row, third from right in the image below) and on the computer screens to make a subtle olive green. +

Monday, October 26

+ conceptinload: Plans afoot +

+ Worldbuilding +

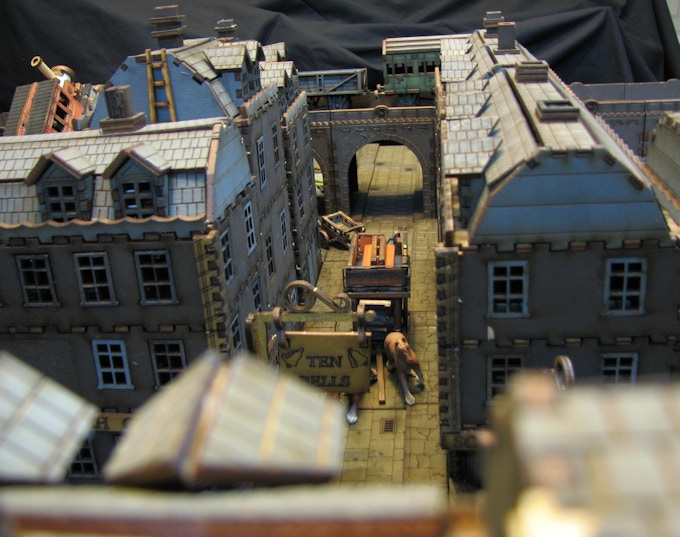
+ Buildings – structures – rubble. These are what turns a wasteground into a settlement. A few people have asked what sort of buildings I'd like for my new board, Purefinder Chanterwick. Here's the plan:

+ Gloomy streets +

+ Victoriana is not as well represented in gaming terrain as some other themes, but there is stuff out there. I recently stumbled upon this current kickstarter campaign [+noospheric inload embedded+], which has some fantastic buildings. I've pledged for the tenement set, which can be seen here (amongst some other bits):


+ As you can see, it looks like it should fit nicely with the other stuff I already have, so I'm looking forward to receiving it. +

+ Renaissance Miniatures, who are running the kickstarter, have a number of successful campaigns under their belt, and look like a lovely little company – so I hope this turns out to be another successful campaign for them. +

+ Existing material +

+ Bought a while back, this selection of Micro Arts terrain, from their Wolsung kickstarter, will form the core of the board's structures:

+ I've already attached the large buildings to baseboards, which you can see here on the WIP board: +


+ I also have another structure from Microarts; one from their range intended for Corvus Belli's Infinity. It's mounted on a larger square, and will probably make for a slightly more interesting game. I want to include a variety of architectural styles to give a sense of history and overbuilding. +


+ What else? +

+ I'll be producing a step-by-step on Word Bearers, akin to the Iro nWarrior one I did a while back. +

Tuesday, October 6

+ inload: Worldbuilding – The exciting bit +

+ Purefinderre Chaunterwyck +

+ With the base sanded down, it's time to prime it and get into the... oh, no – apparently it's time to put buildings on and start pushing toy cars around my little town. +

+ Yeah, after all the work I'd put in, I felt I deserved a chance to put some panels and buildings on and get a preview of the town. As well as sanding down the roads (I used a coarse/fine sanding block bought from B&Q), I've secured some washers to the pavement surface with superglue and blended them in to the surface with a little additional sand. These will be contact points for scatter terrain like phone boxes, streetlamps, trees, benches and the like. I also added a couple of other patches of sand so that the dirt and rubbish didn't pile up unnaturally around these features. +


+ I also used the same sand and some spare tiles to texture the baseboards of the scatter boxes, which you can see on the far left of the pict-capture above. These will have greenery and scrub on top; both to act as terrain and – more importantly – to add some much-needed colour to the board. Urban spaces tend to have a lot more life in them than some typical urban boards, and that goes doubly for feudal worlds like this. I'm aiming for fairly scrubby looking greenery – a sort of urban planting that's gone to seed over long years of neglect. +


+ The buildings are from Micro Art Studios District-5  [+noospheric inload embedded+] and Wolsung [+noospheric inload embedded+] ranges. While very different in detail, they share much in common in terms of wall thickness, square corners and similar design features; so I think with the right paint scheme they'll fit together naturally – just like modern and older buildings fit in together in the modern world. +

+ The panels you see creating a little platform are a vague idea that came to me as I moved the paintpots (little tester emsulsions) I'll be using for the board. I may work the empty paintpots into columns once I've finished with them. That'll let me support a second level on the board at the same height as the Wolsung walkways. +

Monday, October 5

+ inload: Worldbuilding – mean streets +

+ Men at work +

+ I wrote last time about being a little unsure about the size of the paving stones, so I decided to break up the road surface with smaller stones and little cobbles. The small slabs are made exactly in the same way as the large ones, but cut slightly smaller; and fitted in wherever they'd comfortably go. The cobbles (shown in the picture as dark grey patches near the front) are simply tiny balls of ProCreate putty pressed into place and slightly flattened with the eraser end of a pencil. ProCreate's not very sticky at the best of times, but the eraser end works a bit like a flat silicone clay shaper and makes sure they don't stick. +


+ This was quite a time-consuming stage, though not as bad as I'd feared. I think filling the rest of the road and the pavements took about two hours in total; and that included lots of cutting tiny stones. The cobbles proved handy to fill in awkward curved areas, but I was careful to include some larger sections to help them 'read' and ensure they were spread believably across the area. The pavement nearest the camera here has thinner narrow slabs to represent a kerb. It also has a small are of cobbles represented by textured wallpaper (picked up for a song at Hobbycraft) abutting the board edge. This was a nice quick way of texturing the surface, and I was tempted to try it on the building pediments. +

The paving completed.

+ Pediments and grouting +

+ In the end I decided to use a simpler texture, akin to concrete, for the pediments. This keeps the areas anonymous, so that whatever is placed on top gets the limelight. I used a mix of Daler Rowney Acrylic texture paste [+noospheric inload embedded+] and coarse pumice gel by Golden. [+noospheric inload embedded+]. It's scraped fairly thinly, and you could just as easily use textured paint. In fact, I'd recommend you do for large flat areas like this, as I ended up using an entire (and quite expensive) pot :s  +

+ However, the pumice gel did prove ideal for grouting. I accidentally spilled some on the paving, and ended up rubbing it it while trying to remove it. Taking a step back, I realised it worked really well to fill the gaps, so ended up applying it across the road and pavement, as shown to the left. As you can see, it rubs in well, filling the fine gaps. There's a bit remaining on the surface, but I'll give it a going-over with a sanding block to smooth off the rough edges before sealing it.+


+ This angle shows that the pavements are now at the same level as the road, with recessed guttering. +


+ Small stones, cobbling and grout fill awkward ares such as those shown here. The manhole covers now fit in a lot more naturally. This shot shows the drop from the paving to the ground level. +


+ The board as it currently stands (bottom) compared with an earlier stage. +


+ Another shot of the grouting. Any areas missing large slabs (such as directly below the blue manhole cover) will be filled with lichen, grass tufts and so forth, to add a little life to the scene. +

Tuesday, September 29

+ inload: Worldbuilding – a load of old cobbles +

+ Purefinder Chanterwick +

Imperial Fist soldiers oversee construction.
+ Progress continues on the gameboard [+noospheric link embedded+] I'm building. A loose part of the Court of the Sun King project, I've given it a little bit of background. +

+ Purefynderre Chaunterwycke +

+ Wherein the deck ys stacket +

Finding his place, he began tracing a finger through the uneven pages of the old history. 
"The style is a little florid, I'm afraid, but that was the accepted style –" the underscribe stopped as he saw Northgrass' eyebrow rise and mouth set sternly. "Perhaps another time." He coughed, and began:
'Lamplit and now largely derelict, the settlement of Purefinder Chanterwick has, like most of the City, served many purposes over drawn-out centuries. Of its origins, none can be sure, for histories have been written of its histories; and much now is lost that might once have been remembered. '"
"'For now, it suffices that it sits between the docks and the leathermaker's district; and on a thoroughfare that connects more important parts of the city to one another. A fairly anonymous area, it encapsulates the lot of the Imperial peon. This is the domain of the Purefinders, a vital part of the leatherman's art; for it is they who gather the nuisances used in 'bate'; an infusion of fecal matter from animal species used to soften hides for tanning. The transit of equids, riding-dogs and cavalieravans as they pass through means that much of the road is filled with – unpleasant – giftings of these riding and draft beasts.'" 
Having finished reading out the extract, Ferlinghetti closed the book slowly. The old leather cover sat awkwardly on the yellowed and buckled pages. Veck smiled inwardly as the underscribe placed the book down slowly and unconsciously wiped his metallic fingers on his robe.
The Inquisitor rose to his feet.
"So, dwellings in the dung district, Ferlinghetti? You've come up in the world." He said, wryly. "Unglamorous, under the web. Why, Manderghast'll make an agent of you yet.'

+ As well as being fun to write, making up a story about the location necessarily makes it a bit more personal – much like making up a name for your general. It will also start sparking ideas. Here, for example, the idea of the area sitting on the outskirts of the leathermaker's district might spark some ideas for shopfronts; the sort of rubbish that'll be scattered about, and so forth. I like the idea of stringing up some washing lines, too – purefinders probably like a good scrub! +


+ Practical: paving +

+ With the roads in place and board dry, I took it outside to get rid of any stray bits of glue or sand using a scraper. +


+ A few minutes work left me with the bare streets +

+ I then began the process of paving the streets, following this tutorial [+noospheric link embedded+] from Rob Hawkins' Hobby Blog. To add a little extra detail, I decided to add some manhole covers, which are made from small decorative wooden bits from Hobbycraft. These were glued in place first, aligned with one another. + 


+ I then began gluing on the paving slabs, placing a couple of larger ones and building up the shapes around and between them. +


+ I gradually began filling in the gaps with smaller pieces. In hindsight, I wish I'd made them all a little smaller to enhance the sense of scale (these are fairly huge at 28mm/32mm), but I think it works quite nicely. +


+ A couple of hours – and a couple of cups of tea – later, it was starting to look a bit more developed. You'll notice that I've added smaller stones around the manhole covers. This has a practical purpose (covering the area around a cirle), but also looks much prettier. +


+ Here's the board at the end of the evening. The bulk of the roads are done, though I now need to go back add fill in some spaces with smaller stones. I'll leave a few gaps for broken or missing slabs, but I hope the addition of tinier stones will help sell the scale. The picture above also shows the pavement started on the lower side (bottom of the picture). For this, I glued stones of varied size along a line, roughly 5mm (¼in) away from the gutter. I'll fill this line with kerb stones, and fill the space behind the main slabs with smaller cobbles. +


+ I couldn't resist playing with toy soldiers at this point, so I'm going to pretend that this shot is to demonstrate the different levels and show the scale. The marine on the left is standing in the gutter, and the second on the pavement step. While only 25mm wide, you can see that a 30mm base still sits steadily on it. When the paving is added to the pavement, the drop will be even less. The sergeant (with the banner) is on the pediment. As you can see, there's a nice height difference between the different levels. +


+ A slightly arty shot of the streets, this also shows one of the buildings on its own base. Again, this base gives some extra levels and height. I don't think this will cause much in-game effect, but it'll improve the realism of game photographs, and add to the sense of immersion. +


+ A closer (if very dark!) look at the building across the road. +

Thursday, September 24

+ inload: Worldbuilding: mean streets +

+ Progress on the gameboard +

+ I've used strips of pine to add the shapes of the roads, pavements and to add some structure to the board. Not an exciting-looking stage, but I hope putting in multiple levels like this will go a long way to helping the finished board look more realistic. +


+ I bought some 7/8ft strips of pine from B&Q for a couple of quid each. Pine is cheap, easy to cut, and comes in lots of different shapes. After measuring and cutting the pieces, I secured them to the board with wood glue and held them down with some dumbbell weights overnight. +

+ The next stage was to run PVA down the gutters and fill them with sand. I used a pot of sand that I've pre-dyed by pouring in brown ink and swirling it around. It's lasted years, and gives a nice dark base to paint upon – useful for hiding gaps in recesses when priming or minimising the effect of chipped paint or damage. +


+ This close-up detail shows the road (the broad strip of lighter wood on the left), the gutter (filled with PVA and pre-dyed sand), the pavement (the double-layered section on the right. The pavement is currently lower than the road, and this is because I'll be paving this with thick card, which will bring it up to the same height. The D-shaped  section adds detail and helps to provide a step between the pediments (the original big square board panels, which are the dark wood on the right), and the paving. +


+ Here's one of the broader 'hard shoulder' gutters that border the central strip of road. I could have had a double-width road, but I think this will add more visual interest, and keep a bit of consistency.  I imagine this area would be used by market stalls, people parking their horses, travellers and the like. A little bit of inefficient use of space is both realistic (look at the waste ground on any industrial or housing estate, for example) and interesting from both an aesthetic and gaming point of view. These areas can be left open, or filled with scatter terrain barriers like trashpiles, parked cars, barricades or decorative flowerbeds, which should help keep things fresh. +

+ Durability and playability are important considerations. I've tried to ensure the pavements are at least 25mm wide so that most infantry bases sit securely on each of the five levels (squares, pavement step, low pavement, gutter, road). You'll also notice a glossy effect in the picture above. This is diluted PVA. Once the sand was glued in place with pure PVA, I let it dry then ran a diluted mix of warm water and PVA over the gutter areas, encouraging it to spread and settle. This should provide one more layer of security by flowing between the sand and binding it together. +

+ Paving +

+ The next stage is to pave the streets. I'm using this tutorial [+noospheric inload embedded+] from the fantastic Rob Hawkins Hobby Blog in order to prepare the paving slabs. On the left of the picture you'll see a red-textured panel. This is one of the 'bases' I had cut, which are intended to provide variety of ground height (some are 3mm thick, some 6mm). +


+ Ground height is a bit of a weird concept, but one I think adds to the ground-level aesthetic. A perfectly flat board has the advantages of being completely stable (for terrain and models) and more compact for storage (particularly if your board is modular or on a mat). Conversely, having a variety of ground heights has the advantage of visual interest and realism. Balancing the two is important to get a good game – I don't want my models to tip over and get chipped in the middle of a game; let alone my guest's! +

+ In this instance, the table will vary from gutter level (the lowest point), paving and road level (2mm off the ground), step level (4mm), pediments (6mm), low building bases (9mm) large building bases (12mm), and large building bases with low building bases on top (15mm). That's before we add any terrain! These are small increments, but I think they will add up and both look and 'feel' good when playing. +

+ Perhaps more importantly, I'll be able to add details like leaf litter, rubbish etc. safely in the lower recesses while protecting them a little so they won't get knocked off in storage. +