Showing posts with label Warhound Titan. Show all posts

Thursday, July 23

+ inload: Painting Legio Tempestus Stormlords +

+ Storm brewing +


+ [inloadfeedVAL={plans for a Legio Tempestus maniple, and some painting colour theory}//] +

+++

The PCRC are off to Warhammer World! In a few weeks! And I've decided to paint up a new Titanicus maniple!

...which means, after the initial excitement fades, I need to get planning and painting – gulp! 

+++

+ Theoretical: so why a new Maniple? +

Not that I ever need an excuse to paint more giant robots, but this Tempestus project has been bubbling away at the back of my mentat-unit for a while. In building the 40k-scale Scythian [+noosphericinloadlink embedded+], I've felt that my approach to painting might benefit from a little more planning and experimentation, and what better place to try things out than on a mini version of the Titan? 

Secondly, it'll help dig into the backlog of poor unpainted God-Engines spoiling for war; and thirdly it'll give me some Traitors to face off against my Metalica Titans [+noosphericinloadlink embedded+] for classic 'red vs blue' games – ideal for anyone who wants to try out the game.

+++

+ A change is as good as a rest +

With that in mind, I want this maniple to have a notably different approach to the Metalica one. That was a Fortis maniple: heavy Titans that benefit from sticking together. This Tempestus maniple will be led by the models that are ready to paint, and I'll then work outwards from there to give the maniple an identity.

Because I tend to prefer simple, robust and reliable approaches, at the moment I'm considering either an Axiom or Precept maniple. Both have minor benefits to Command Rolls and/or Orders, which is easy to keep track of. Both also include a variety of Titan types for interest. 

With a fringe benefit of being easy for new players to understand (in case they're used for teaching games), I hope this maniple will also let me play around with some weapon loadouts based purely on 'rule of cool'. My Metalica Titans were an homage to the 90s studio ones featured in various battle reports, and so the weapon choices were dictated by the originals. Here I can just have fun with stuff that's dubiously effective, but awesome and leaning into the fun of Adeptus Titanicus.

With a Warlord, Warbringer Nemesis, Reaver and Warhound to play around with, this is a great opportunity to try fielding more of the newer weapons that weren't around in the initial release. I've had great fun with the graviton guns on my Metalica Engines, and think it'll be fun to try some newer stuff.

+++

+ Practical: Painting the Stormlords of Legio Tempestus +

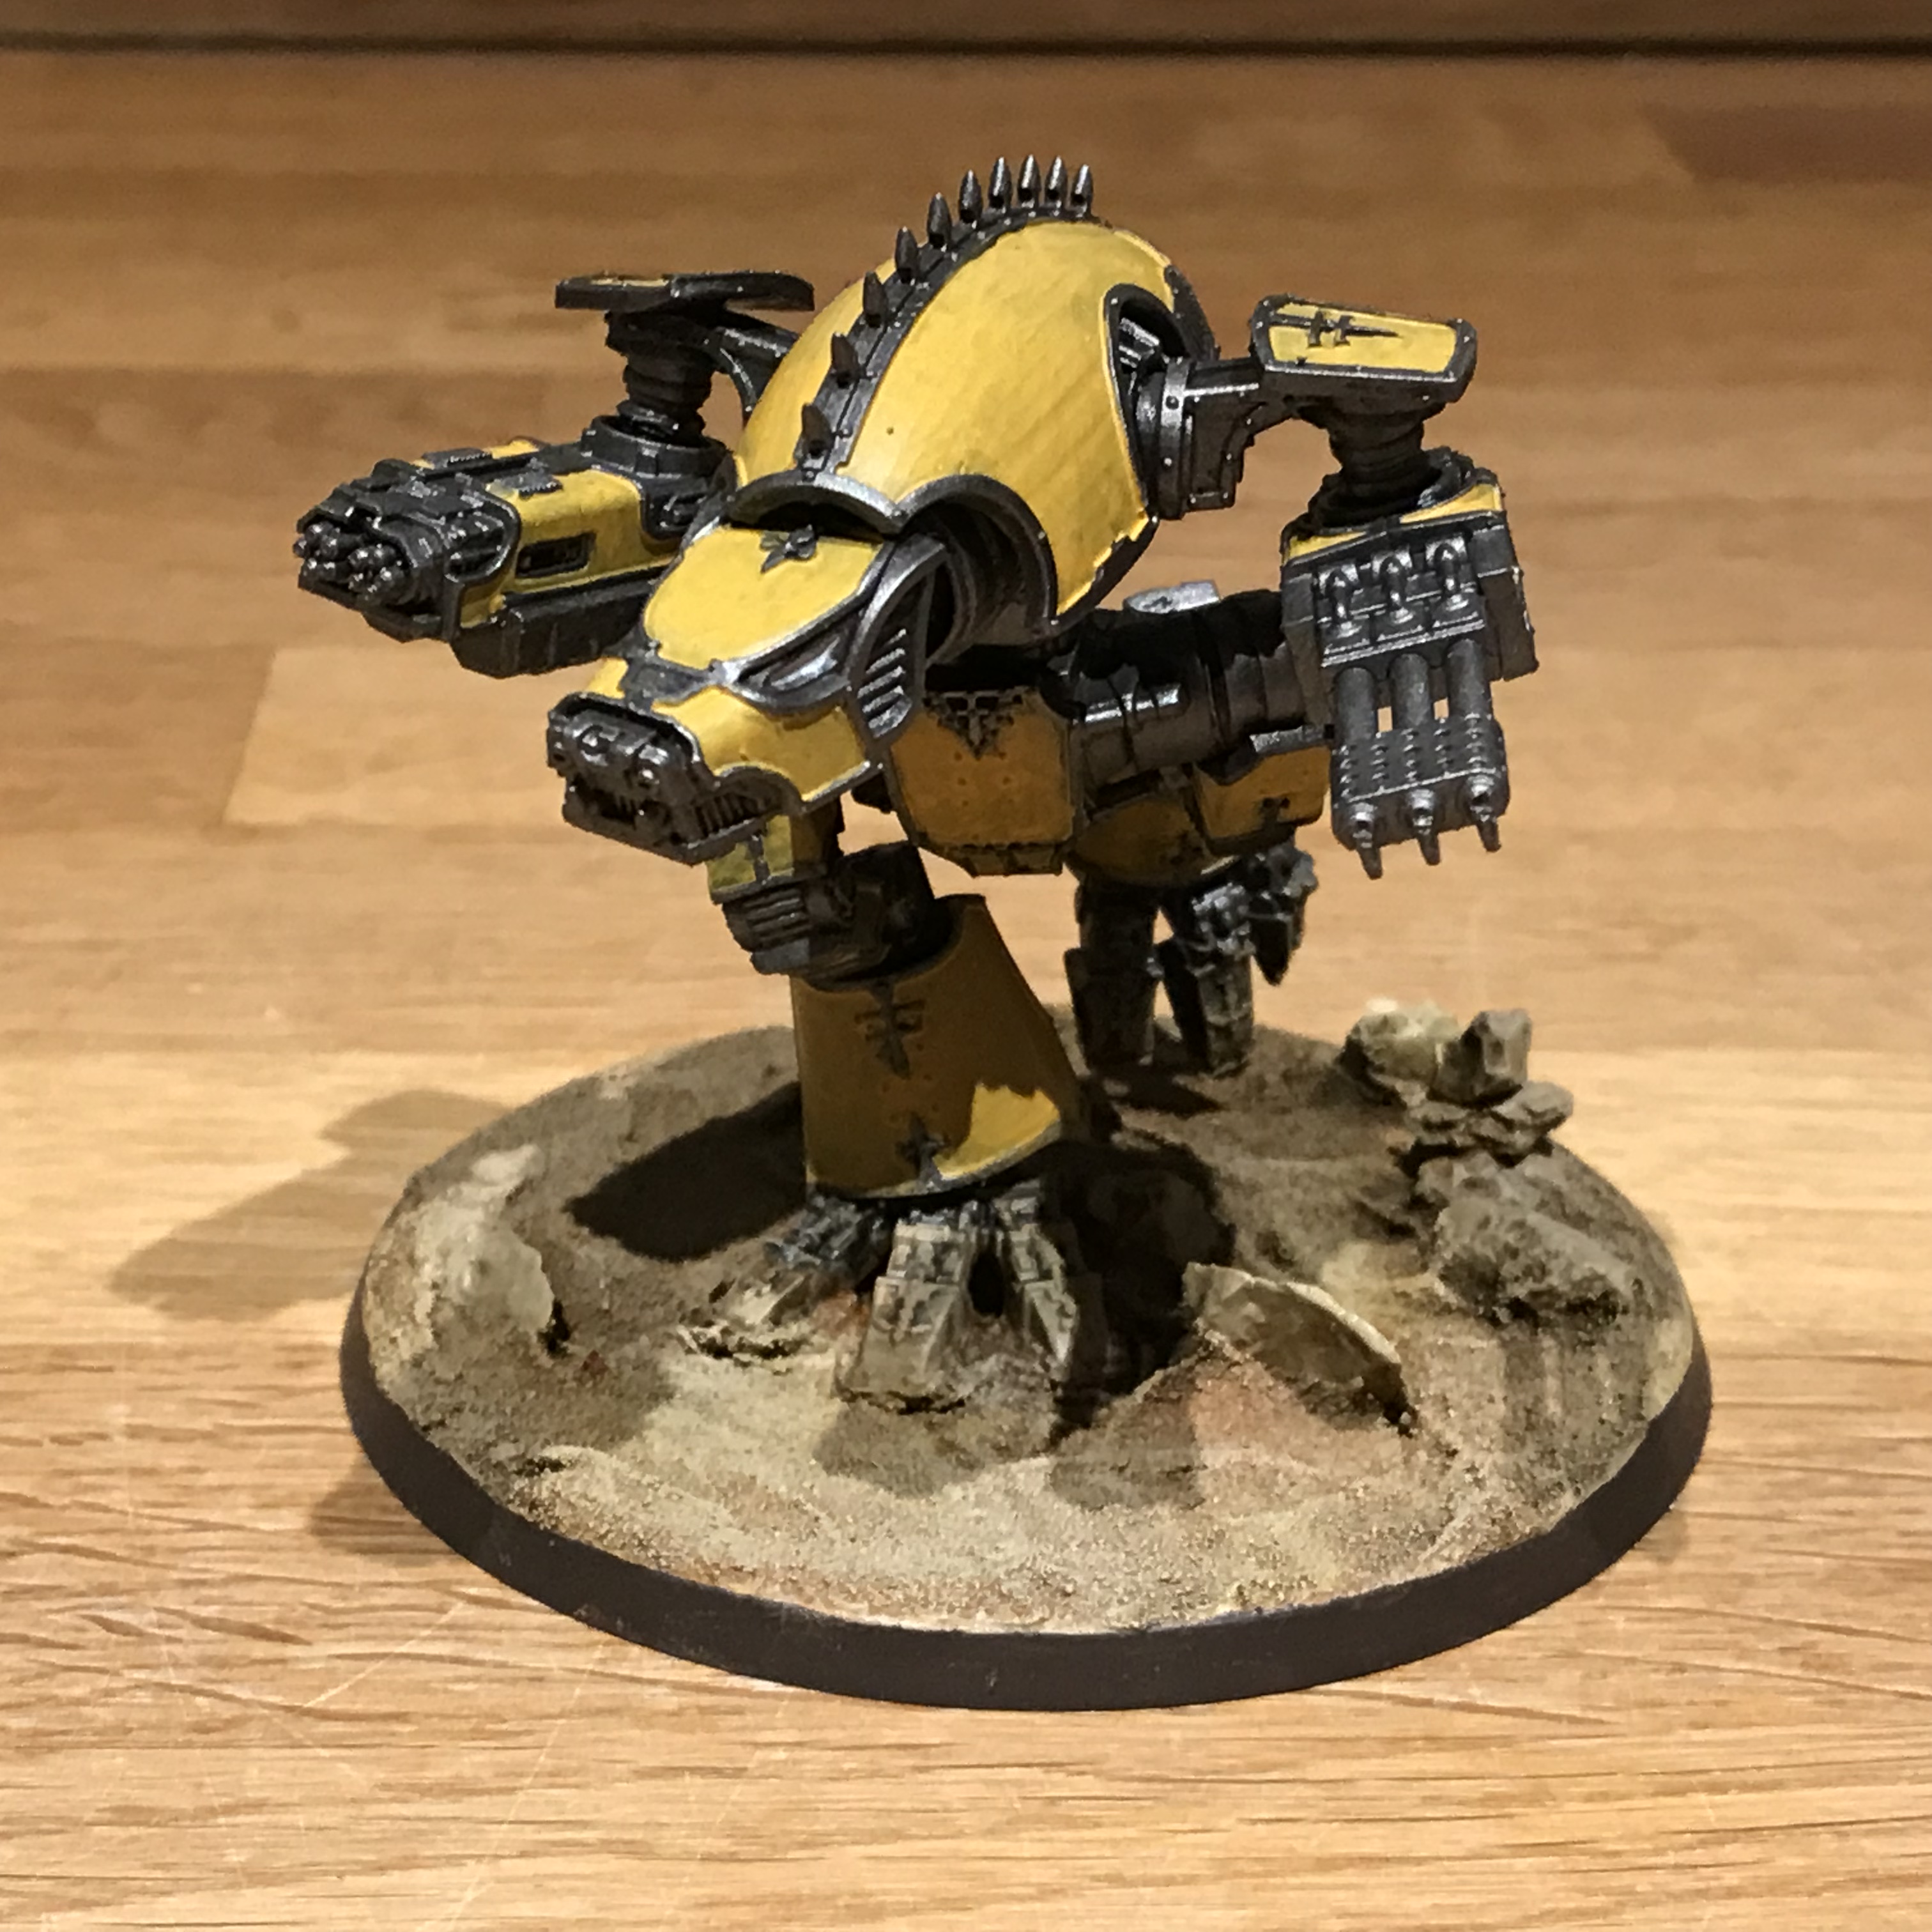
The first on the blocks are a Warhound, Urtica Morifolia, and a Reaver, Faultfinder. These are testbeds for the Legio Tempestus scheme I'll be using on their bigger-scale brother, Scythian (time allowing there'll be a mini-me Scythian included in this group).


These were already primed black with the metals picked out, and I've established the blue with Prussian blue (I'm using Golden fluid acrylics for this basecoat).

'Proper' Prussian blue is a rich, deep inky blue that – unfortunately – doesn't show up very well on screen. It has the pigment code PB27, and has slightly greenish undertones. It's used in oils and watercolours where it's intensity, transparency and richness makes it great for glazing. 

In acrylics, however, it's usually use a hue (that is, a combination of other pigments that closely match the inspiration) made from phthalocyanine blue, because the pigment doesn't play well with the binder. That's the case with this Golden acrylics version, which uses: PBk9, PB15:0, and PV23 in combination. 

What does this mean? Well, all paints contain impurities – that's why mixing lots of colours together tends to result in mud. If you use paints that start with lots of pigments, there's more going on and it's harder to get clean, vibrant mixes as certain pigments start to overpower others or combine in unexpected ways. That's not normally a problem for everyday painting – particularly if you want a grimy, earthy feel – but I'd quite to to try getting a nice intense blue.

I'd usually add yellow to highlight Prussian blue in oils or watercolours because of its greenish undertone, but because the Golden acrylics version is a hue that contains a violet pigment (PV23), I think adding green will make things murky. 

Adding white will make it chalky and lose the transparency. The combination of pigments in the Golden acrylic Prussian blue means it's semi-transparent, rather than transparent... which means that it's not quite so good for glazing. This combination of things gives us a dilemma!


Fortunately, the nature of acrylics means that we can layer things cleanly, and that's the approach I'm experimenting with here. I'll leave the Prussian blue as a vivid underlayer and build up the blue gradually with 

Faultfinder here has Citadel's Macragge blue layered over the Prussian blue. Annoyingly, Citadel – like most miniature painting ranges – don't publish their pigment codes, so we're forced to rely on our eye. I think that Macragge blue is based on cobalt blue, which is a neutral (neither red-leaning and warm nor yellow-leaning and cool) blue. That means I can add pretty much any lighter-toned colour to tint it without muddying things. White is the safest option, but that will reduce its saturation, making it more of a pastel.


You can see in the pict-capture below the effect of one layer of thinned Macragge blue on the top part of the the rear panel (top left of the picture), and the untouched underlying Prussian blue on the lower part. It's a bit blotchy at the moment, so it'll need another layer or two of highlighting to get a smooth finish.


Once that's done, the plan is to go back over the whole area with glazes of Prussian blue to enrich the colour, knock back the chalkiness and bind the area together.

I can then varnish the area and apply any transfers, before re-varnishing and applying oils for weathering. 


+ Gaming +

Sharing the picture of a Warhound with a turbolaser and inferno gun raised some eyebrows from Omricon, but as these are magnetised, I'll be able to play around. At the moment I'm thinking pairing shield-stripping Swarmer Missiles with a Graviton Destructor would make Urtica Morifolia a versatile hunter. 

Both have a high long range (38in and 40in), meaning the Warhound can hang back to support the other Titans or dart in opportunistically. At closer range, the Swarmer has a negative modifier, but if it's getting that close the plan will be to push forward under the targets' shields and use the graviton to make things awkward. Crucially, neither weapon is draining, meaning the notoriously short Warhound reactor track can used for movement and shields.

I will probably pair Urtica with Faultfinder on the field, as the two Volcano cannon build is probably going to struggle to defend itself!


Friday, February 17

+ inload: Full Stride – Legio Interfector +

+ Amber Kings and Murder Lords +


+ You go decades without building a Warhound then four come along at once. I've been enlisted to construct and paint a Maniple of Murder Lords (Legio Interfector), starting with a pair of Warhounds. In addition, my Gallicaedes upgrade kit arrived – you can see him above left. +

+++

+ Gallicaedes upgrade kit review +

+ Designed by Grim Dark Terrain [+noosphericexloadlink embedded+], I bought my print from  the licensed DarkMaterialsMinis shop [+noosphericexloadlink embedded+]. Lovely little kit that will be joining my Legio Validus. +


+ This adorable little Death Chicken is a conversion kit for the GW plastic Warhound Titan. It goes together very nicely. The feet and weapons are straight swaps, and there's an additional plate that fits between the waist and hips, giving it a bit of extra height. +

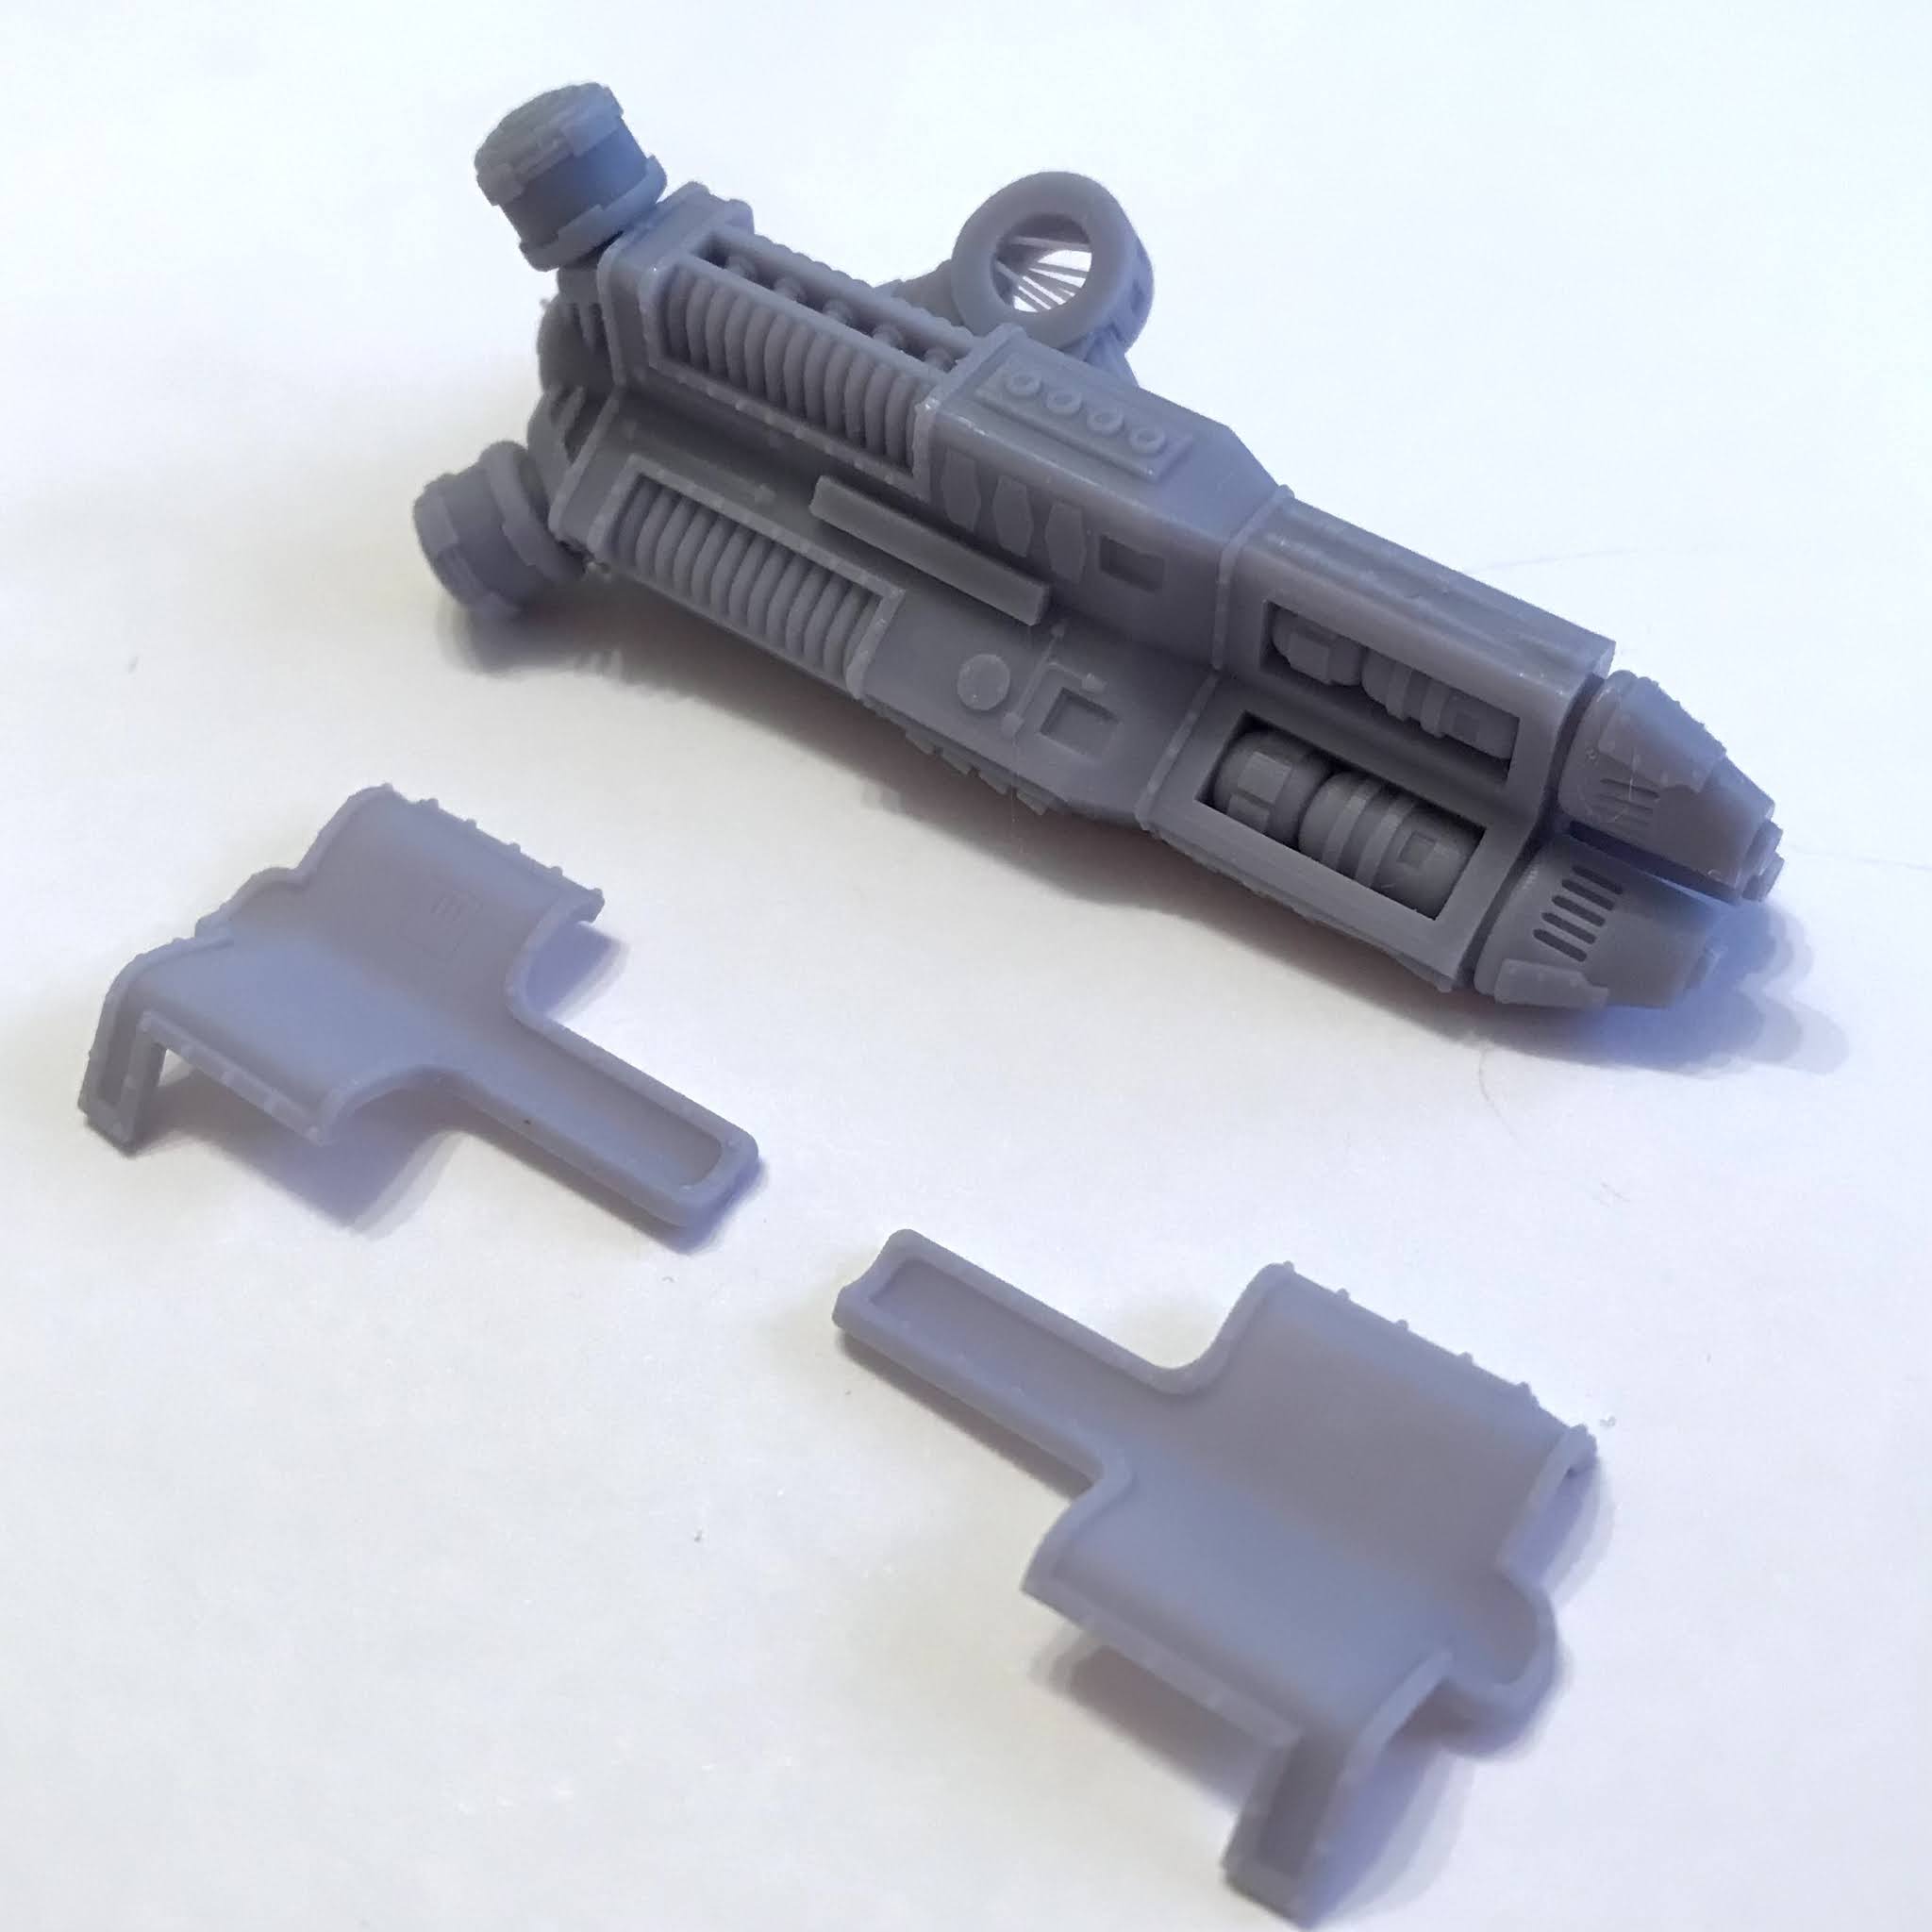
+ The shoulder plates replace the weapon mounting tops, and the big gun comes in five pieces: mounting, two braces, the gun itself, and a rear power cable. The main mounting slots neatly into the recessed gratings on the top of the plastic kit, and two big bracing pistons sit in the spaces at the top of the weapon mountings – so don't be too hasty when building: you need to leave the top plates off. The power cable then slots into the back and the gun in the spot. +

+ The gun fits very snugly – I opted to glue mine, but there are recesses for 5mm x 1mm magnets built in, so you can swap it out. The full kit comes with two additional head options (for three in total) and a volcano cannon option to swap out for this neutron laser. +

After that, the other bits, like the head, just stick on. Some additional targeters etc. help to disguise the Warhound origin, and the result is a nice distinct Dire Wolf equivalent. I'm impressed both with Grim Dark Terrain's design and DarkMaterialsMinis service – the print was lovely and clean and that lovely Fraser chap sent down two base toppers as a bonus: nice! +

+++

+ Murder Lords – Legio Interfector +

+ There is no sensible way to say 'Murder Lords'. The name pretty much demands Mëtäl üml
äüts and headbanging – and that's just as it should be for a game involving giant robots smashing into each other. +


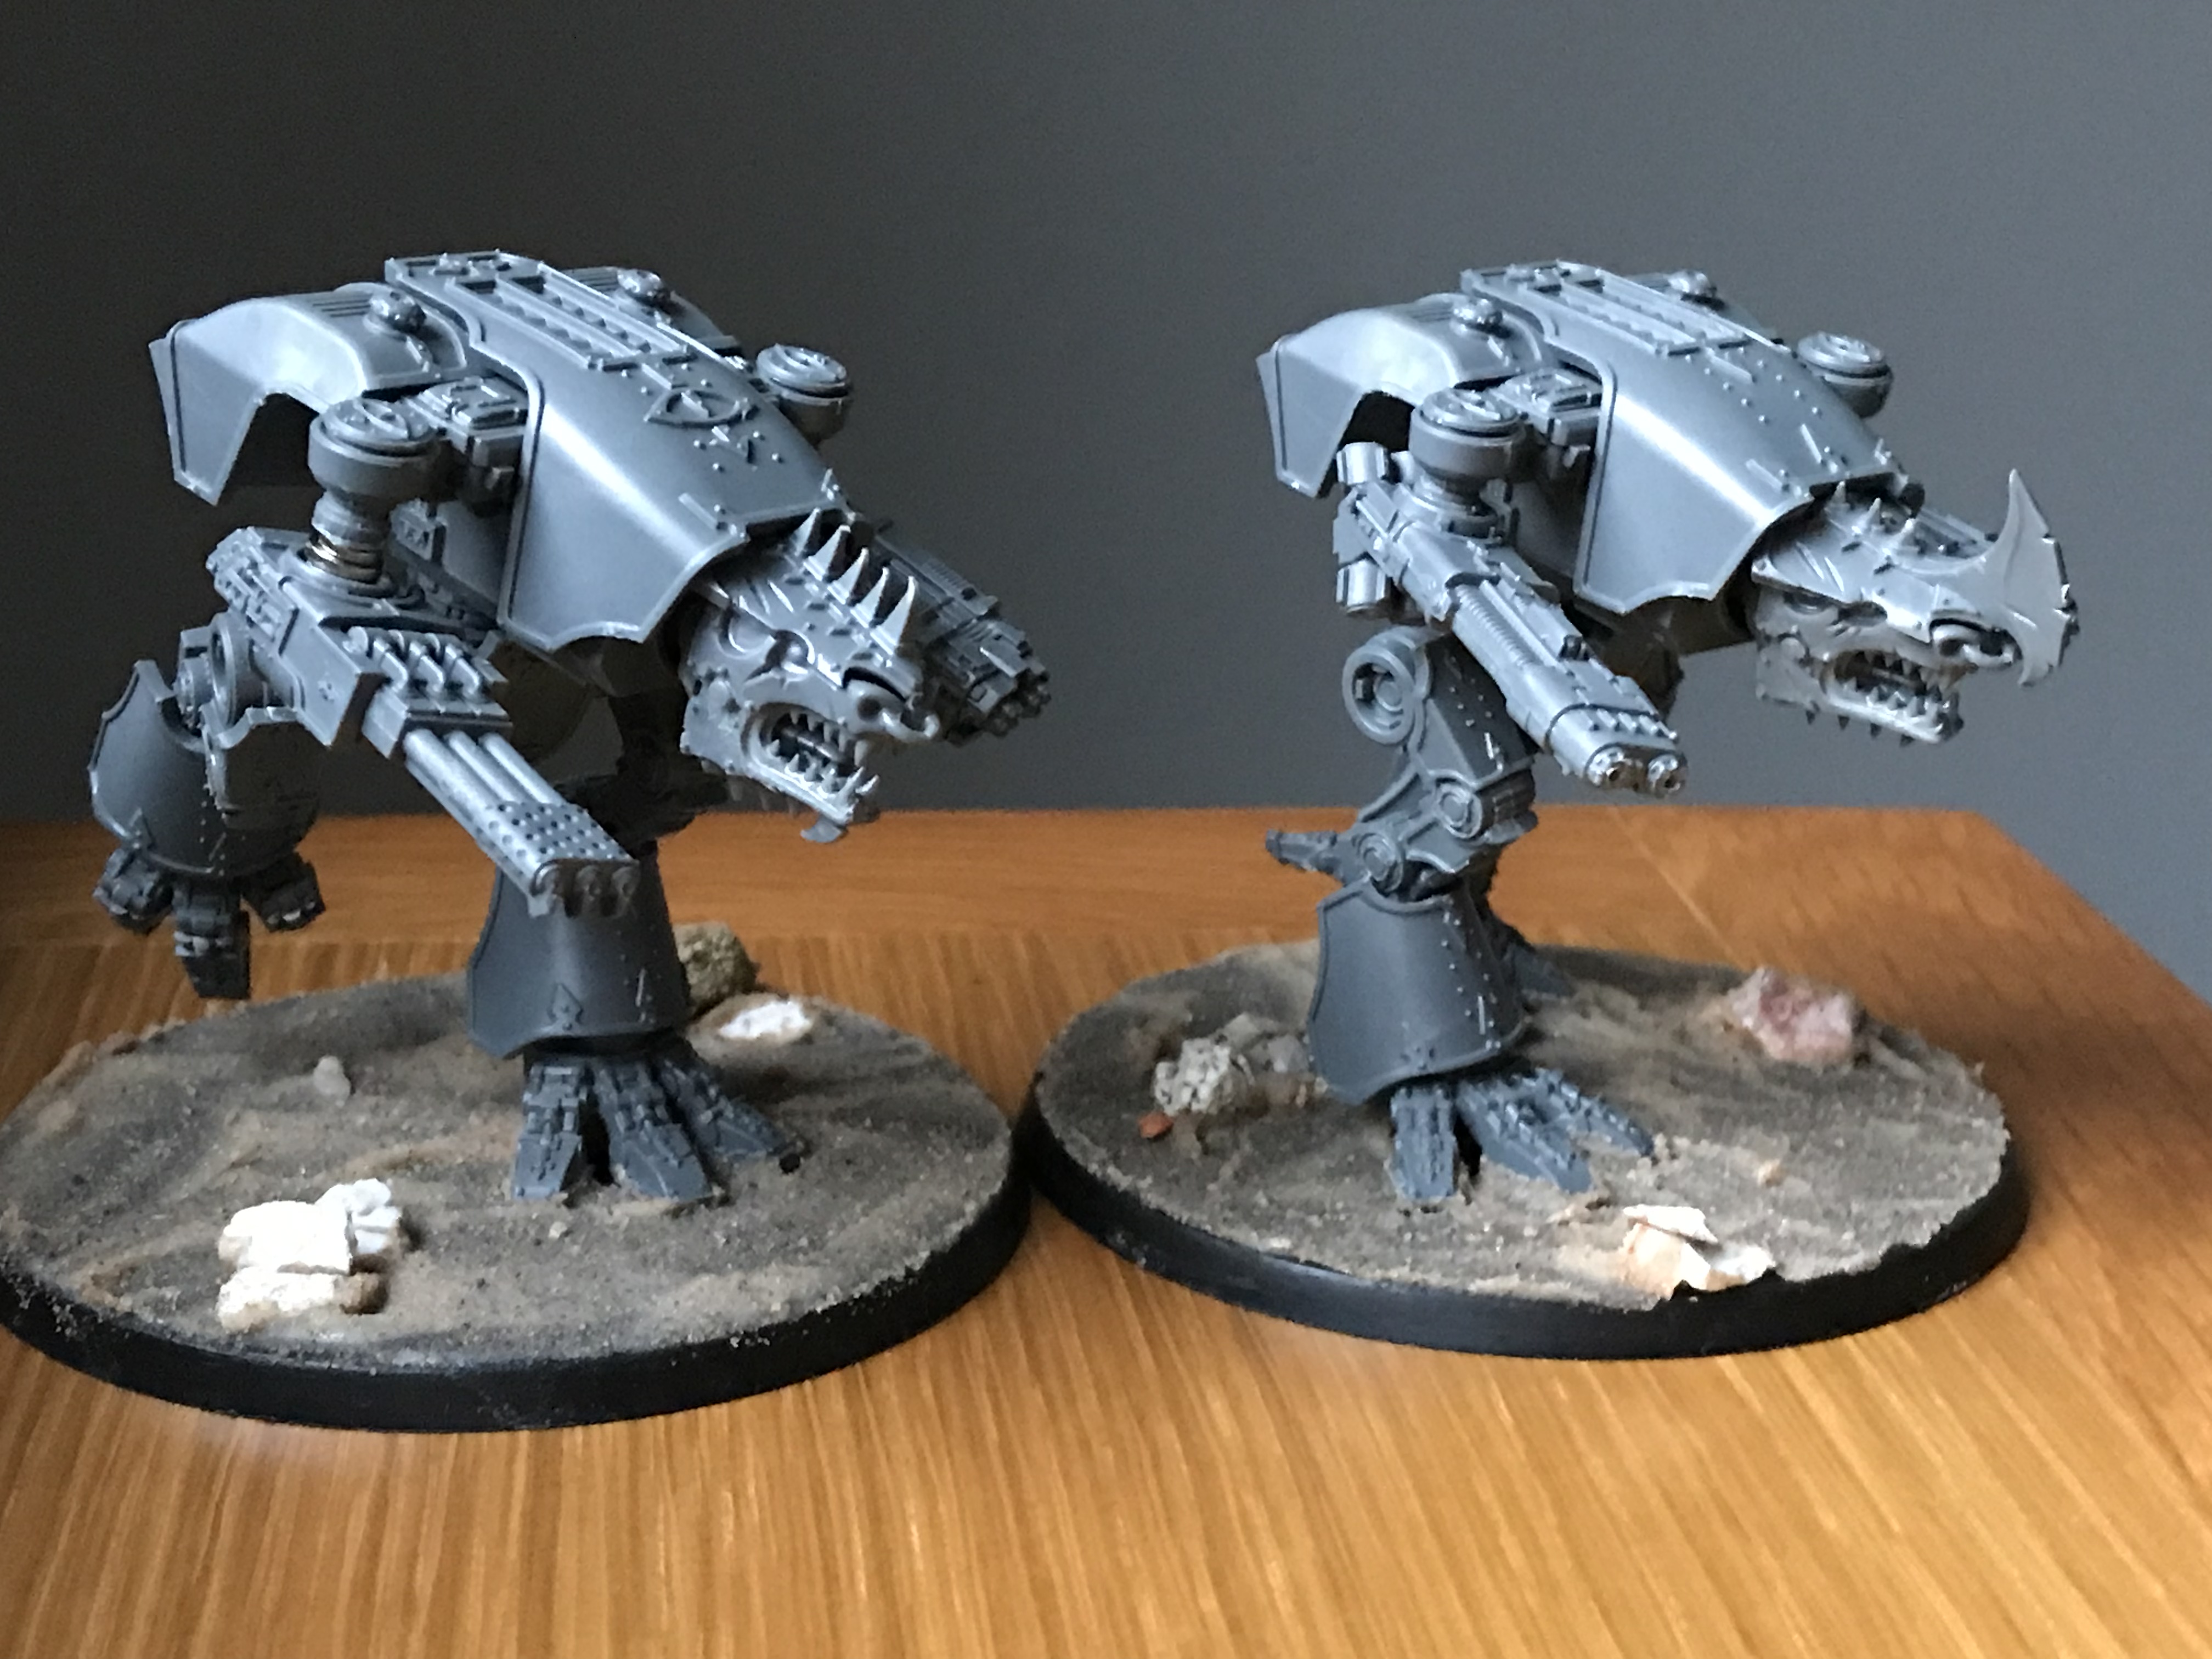
+ Leaning into this, I though Khorne Juggernaut heads would look appropriately aggressive for this lunatic Legio. The conversion's relatively quick and easy – the Juggernaut head is assembled as normal, and then the back of a Warhound head is attached to fill the void. +

+ The Warhound head comes in a few parts, so I found the two halves of the 'mounting ball' and glued those together. Once the poly cement had set, I set to with clippers, trimming away everything except the flat back of the head and the mounting ball. It was then a case of carefully cutting away the edges until it fit snugly into the back of the juggernaut head. You don't need to be particularly neat, as the way the head sits in the carapace ensures it's mostly hidden anyway. +


+ As with my own Titans, I'm magnetising these. I've used 3mm magnets on the necks and on the weapons. The latter required me to trim away a little of the ball joint on the bottom of the weapon mount. This was then glued into the relevant weapon to ensure flat surfaces on both sides, before magnets were glued on using superglue. +


+ The models were then based using the technique detailed in this step-by-step tutorial [+noosphericinloadlink embedded+]. Once this has dried, I'll prime them with Halford's brown camo spray and get painting. +

+++

Friday, February 10

+ inload: Legio Validus rules +

 + Legio Validus +


+ Had an 1,250pt game of Adeptus Titanicus last night, which was a blast. No pict-captures, I'm afraid, as I was busy juggling rules, terminals and all sorts. I had a Warlord, Warbringer and Reaver, and was facing a Warlord, two Reaves and a Warhound. A very enjoyable game, which ended in my defeat – but close 'til the end, and full of cinematic moments. +

+ I was lending out some of my Titans, so it was mostly a Legio Sumer-Nikator civil war, but – as the Sons of the Temple currently lack any Warhounds – I did a quick get-you-by paintjob on the next Warhound for Validus. +

+ Basic colours in place; tabletop ready +

+ Some more work and the Warhound will be a little more refined, like this Reaver. +

+ I also took the opportunity to update the lore and rules for Legio Validus on the PCRC website [+noosphericinloadlink embedded+], and so here's how they work:

Legio Validus are a loyalist Crusade Legio force for Adeptus Titanicus, and use the following rules:
  • Legio Trait: Masters of Defence
    • After being charged and attacks have been resolved, the Titan can make a move of up to 3in within rear arc at full speed, then take one point of heat.
  • Legio Trait: Elite Magos
    • Reroll a single repair dice in the damage control phase.
  • Legio Strategem: Locomotive Override (1)
    • A Titan of scale 9 or 10 can use this in the combat phase to turn up to 180 degrees and then suffer 1 point of Critical Damage to its legs. Note it’s Critical Damage, not a Hit, so you don’t advance the track.
  • Legio Wargear: Plasma Rifling
    • A global upgrade on a Titan, applying to all Laser or Plasma weaponry for 15 points. It allows you to push to give +6” to the short and long range of those weapons.


+ You'll spot a rather glaring Eye of Horus on this Loyalist Engine's shoulder pad – a relic of when the Engine was earmarked for Sumer-Nikator, before I realised I'd probably get more value if I had two smaller Legios than one big one. While the pad could be explained in background terms, I think I'll probably just replace it at some point. +

Monday, February 6

+ inload: Warhound, Phantom and Reaver Titans +

+ On the Hunt +

+ Titanicus enthusiasm continues ahead of some weekend gaming. Having favoured Battle Titans (and especially Reavers) since I first heard of Titans, Legio Validus is the beneficiary of my first Warhound. +

+ Battle Bling Oldeus-pattern Warhound +

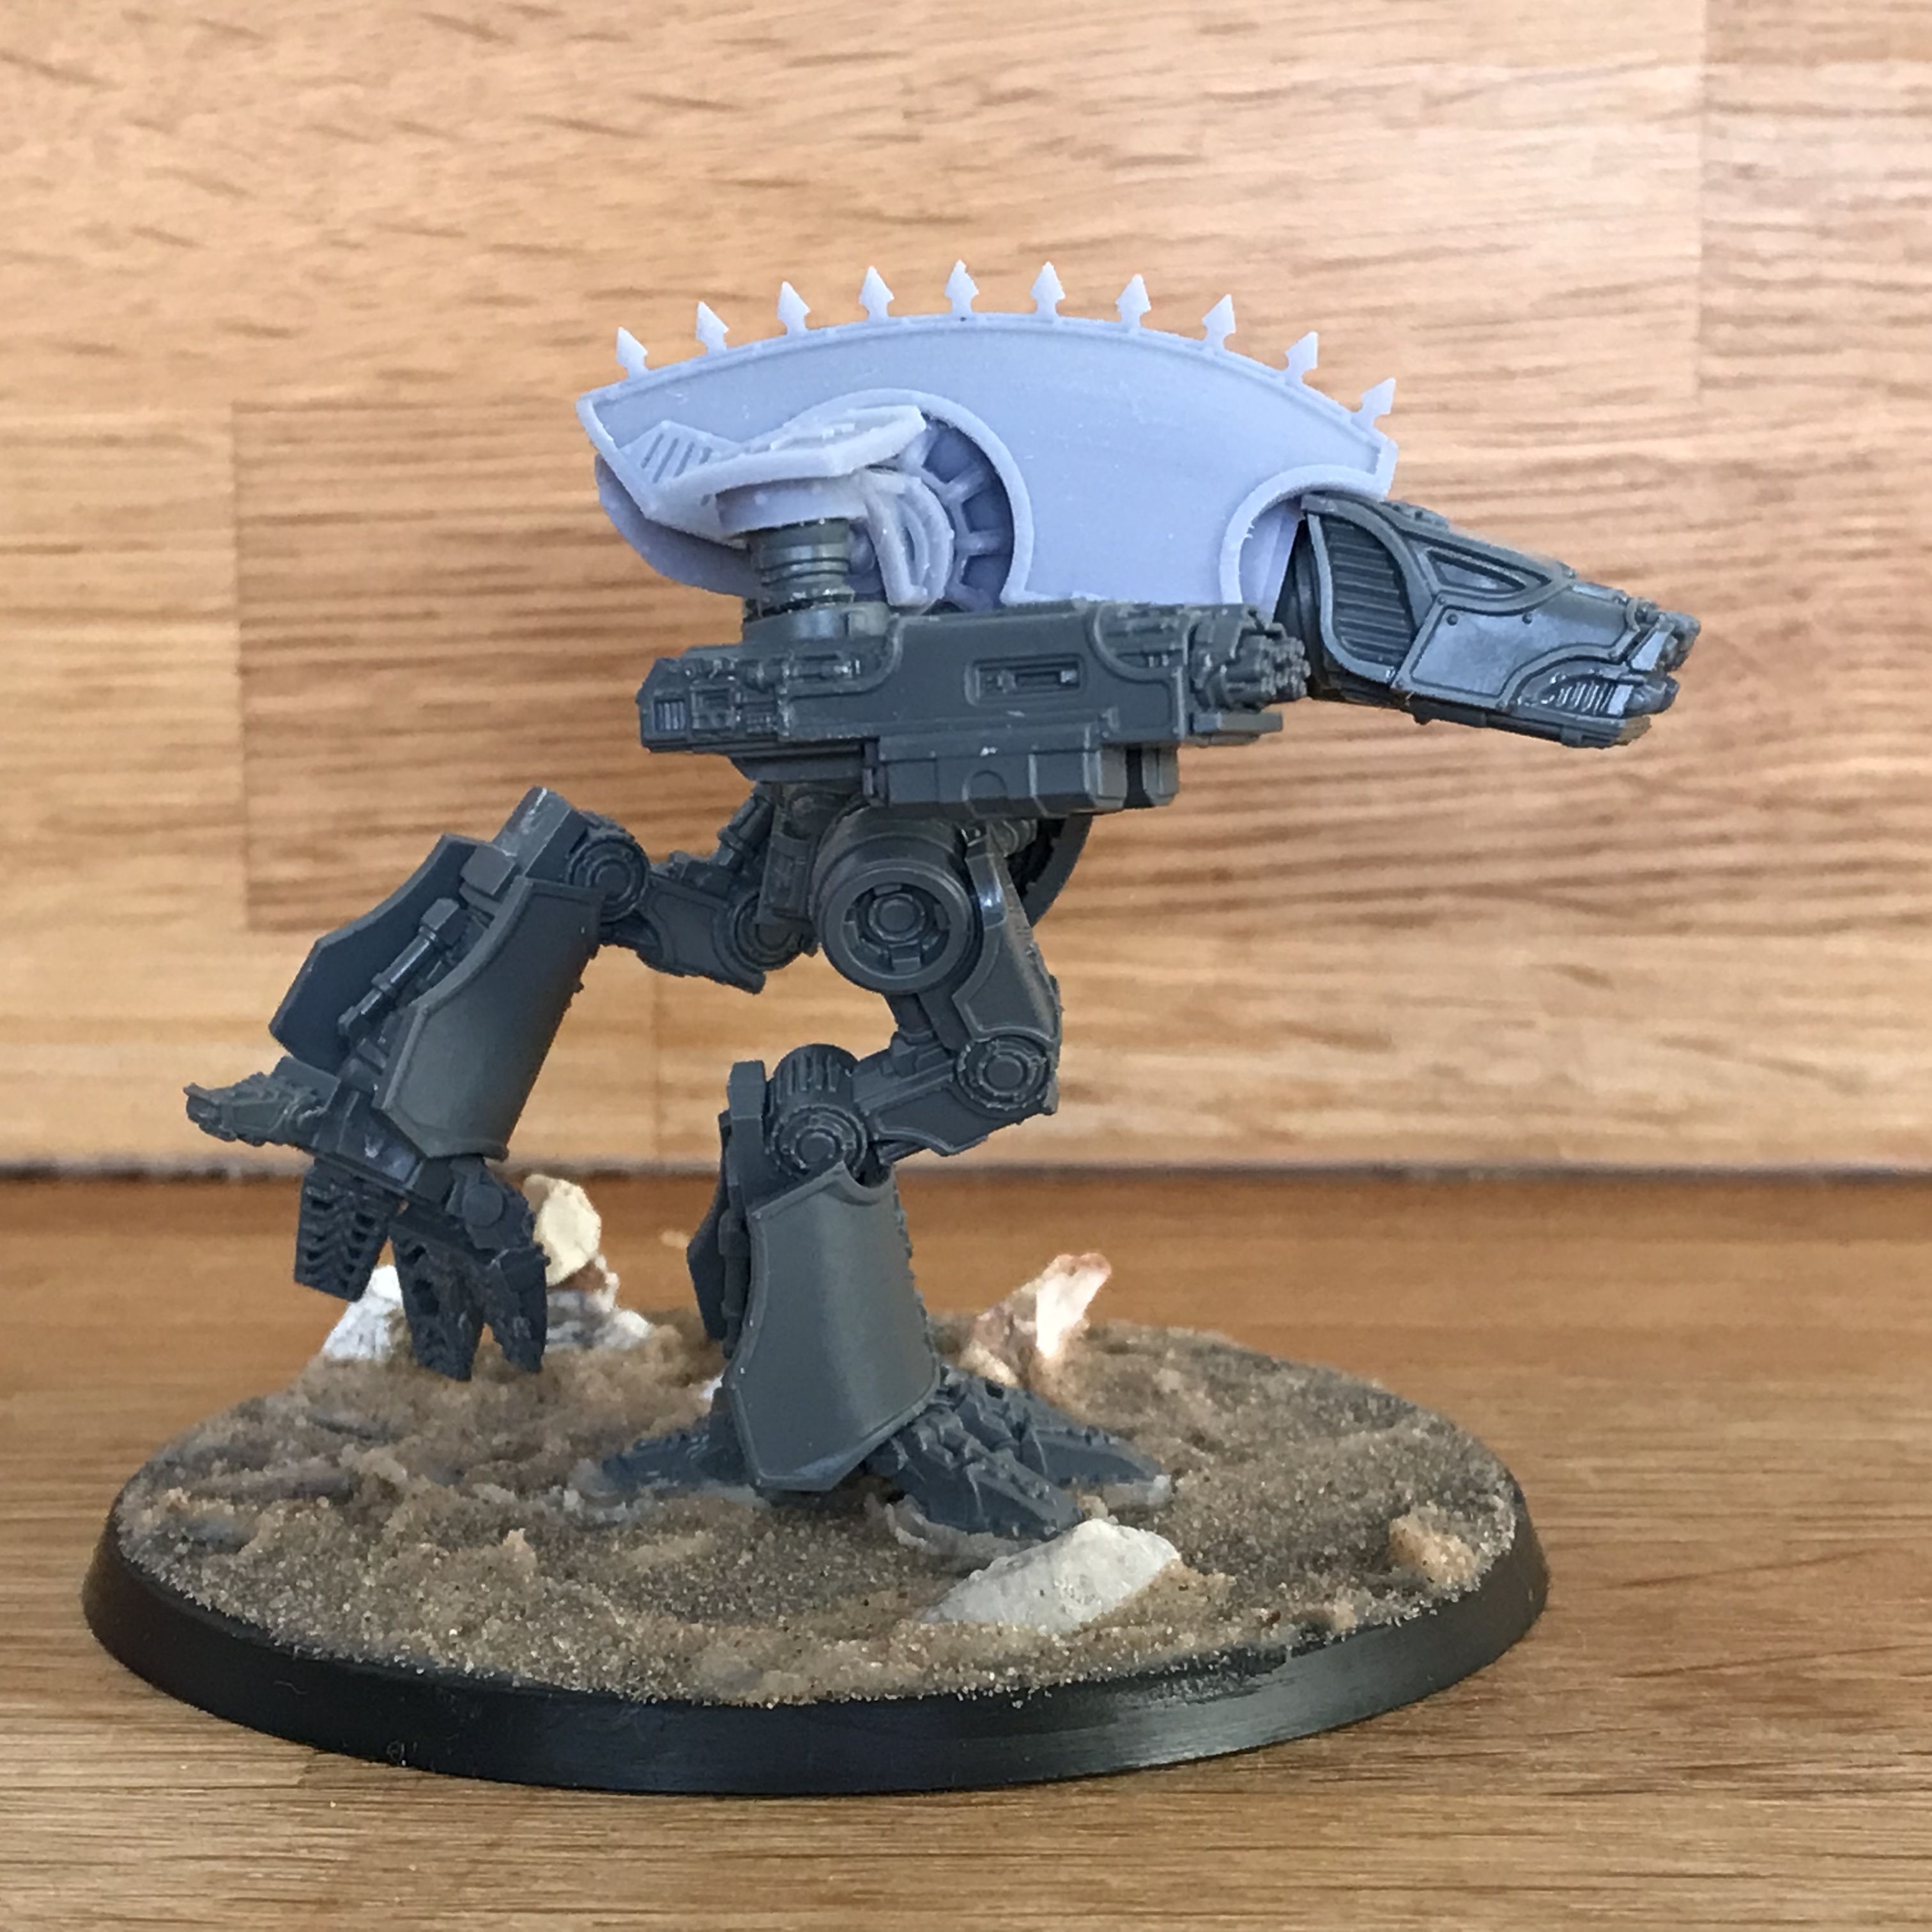
+ I bought a Precept boxed set (a bundle that included every type of Titan then available for a hefty discount) a couple of years back, but have only just got round to building the Warhound – more fool me: these Scout Titans are great little kits. I've used Battle Bling's Oldeus-pattern conversion kit [+noosphericexloadlink embedded+] to get more of a retro flavour. The main reason for this is that I'm going to use the other one of the pair for a Dire Wolf conversion using Grim Dark Terrains' Gallicaedes upgrade kit [+noosphericexloadlink embedded+], so this will help to give a little more visual differentiation. +

+ Both the plastic kit and 3D-printed resin upgrade went together beautifully. I couldn't resist adding a bit more motion to the Warhound, which mainly involved careful trimming around the hips and repositioning the toes. +

+ When re-posing like this, I find the two most important parts are:

  • Doing lots of dry-fitting and testing before you commit to glue.
  • Having a strong mental image in your head, and sticking with it.
+ Reposing like this can throw up some moments that feel wrong – like putting the foot right in the centre of the base – but it's this that gives the right support for the centre of gravity. Dry-fitting is what will let you check. +

+ I've magnetised the four weapons (plus an Ursus Claw), so I can swap out options. Since I'll be using the other chassis for the Dire Wolf, which has set secondary arm weapons, I'll also have the option for doubling up on certain guns with this 'hound. +

+ A quick spray of Halfords camo brown, and the model's ready for painting. +

+++

+ Alaitoc +

+ And speaking of painting, the grind continues on the Phantom. I polished off the right lower leg and blue on the D-bombard arm last night. That leaves just the lower left leg and weapons to go. +

 I'm in two minds on how to paint the Wraith Glaive – whether to go for an eye-catching colour, like bright green or pink, or something more muted, like a ghostly grey-white. I guess if I foul it up, it's not all lost – after all, I can just pop the arm off, as it's magnetised! +


+ These are not the greatest pictures in the world to show what I've done – sorry – but I'm just so pleased with how it's coming along. I'm pleased that I decided to paint the forearm wraithbone, as though the weapon is worn like a sleeve; just seems to work much more nicely than blue. +

+ You'll also spot that I've started adding some dark areas. These are a mix of black, scorched brown and the same dark Prussian blue I used for the Titan's blue armour. It just takes the edge off the black and stops it looking dead. +


+ I'm still very pleased with how it's coming along – and it was a treat to return to blue, a colour I find very relaxing to paint. +

+++


+ To close, a picture of the Legio Validus Engine above – he was feeling left out. +


Friday, May 7

+ inload: Battle Bling review +

+ Let the forges burn hot! 
Battle Bling
Titan accessories review +

+ *Warhorn noises* +

+ Mentioned a few times in my inloads on Adeptus Titanicus have been my desire for two things: more Titans, and more options. With mechadendrites crossed for the much-hinted at Rapier or something similarly exciting being revealed soon, it's largely fallen to third parties to produce upgrades beyond the basic weapons available from GW and FW. +

+ These have largely started popping up on 3D-printing sites and so forth; but those lacking a 3D printer have largely been left feeling a little like Tantalus. I was therefore pleased to see some entrepreneurial and intrepid hobbyists like Battle Bling and Winterdyne [+noosphericexloadlink embedded+] begin to sell physical prints and casts. +

+ Today's review looks at Battle Bling's output. As I understand things (from their appearance on the excellent Maximal Fire, God Engine Cast and Full Stride podcasts [+appendnote: all well worth a listen+], this two-man studio sculpts and prints both their own designs and some from outside the studio, such as Artisans of Vaul's great Lucius-Alpha Warlord head, as mentioned in this inload [+noosphericinloadlink.embedded+], modelled by Gaugamela in the pictcapture at the opening of this inload. + 

+++

+ Shop and communication +

+ Battle Bling sell through an Etsy store [+noosphericexloadlink embedded+] and eBay [+noosphericexloadlink embedded+]. I made two orders – an initial foray for heads through eBay, and a larger order through Etsy; both nice smooth transactions, as you'd expect through these third-party shops. +

+ I had a couple of questions about one of the Warlord weapon arms before placing the second order. These were answered politely and clearly within the working day – all nice and professional. +

Postage and packing were free within the UK, which was lovely. I'm sure I'm not the only one to have put together a cart in an online shops, only to balk at the P&P at the last minute. It's a particular problem with eBay bits stores, I find, and relieving to have the P&P baked into the cost of items. +


+ The smaller order came very swiftly – within three days, if I recall – while the second took nearly a fortnight. Perhaps demand has slowed Battle Bling down a little; but nice and swift, either way. The larger order came parcelled in a sturdy box with a handwritten address. +

+ appendnote: I've always found unboxing videos a bit of a weird concept, but hopefully pictures of blurry objects within bubblewrap is of use to someone on the fence about whether to order... +

+ Within, each item was individually bagged in a plastic bag within separate sealed bubblewrap. Arguably the double-layering is a little excessive; but on the other hand, a few small pieces I've received over the years have found their way out of bubble wrap and rattled around. While I would have preferred some biodegradable wrap, I can't fault the thoroughness. Key thing is that everything arrived safely and swiftly. +

+++

+ On to the good stuff: mechanical joins +

+ First out of the bag was the Warlord Titan shoulders; perhaps surprisingly, the most complex single kit in the order. At £9 for two shoulders (i.e. enough for both arms of one Warlord), this was the only kit that I hesitated on buying; nearly deciding that I could work out a way to easily swap out at the elbow rather than shoulder. +

+ Warlord Titan shoulders +

+ Having magnetised my Warlords at the shoulder, in the end I ended up deciding it was worth it. Forgeworld's equivalent, like the Mori Quake Cannon [+noosphericexloadlink embedded+], are slightly more expensive (particularly when you take P&P into account), but include the arm connection. +

+ On reflection, I think it's good to have the option of whether to buy the weapon alone for a slight discount, or together with shoulders, so fair do's to Battle Bling here. 


+ The kit itself comes in five parts. I was pleased to see a muted grey hue that shows the details nicely, rather than the more common white or clear that I've seen from other 3D printing services like Shapeways. +

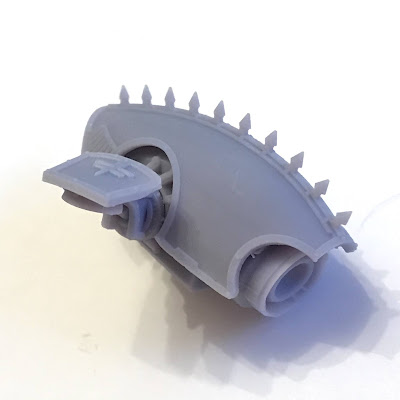
+ Some 3D prints I've bought have been delivered with a dense, complex lattices of brittle scaffolding that needs to be carefully removed. It was with a sigh of relief that I saw the 3D print supports here were notable by their absence; a few stubs the only evidence that they were there (you can see them on one piece at the upper left of the image). Kudos to the designer here, not only for supplying the finished product largely clean, but placing the supports where they will be hidden once assembled. +

+ One of the great advantages of 3D prints over resin casts is the lack of shrinkage and warping. Having fought with my Forgeworld upgrade arms to get the 5mm magnet in cleanly, it was a relief to test fit the Battle Bling one here and have it fit snugly, as seen above. So snugly, in fact, that I had to use a stack of magnets to get it back out! +

+++

+ Reaver Titan Magnet Arm upgrade kit +

+ Much along the same lines are these Reaver Titan Magnet Arm upgrades, intended to replace the standard arms entirely, and making magnetising both easier and hidden. At the other end of the pricing scale to the Warlord shoulders, you get enough here for three Reavers for £4. +

+ Not a huge amount to say about them other than they look clean, magnets fit well, and will doubtless make hot-swapping things a bit easier all-round. +

+++

+ Weapon upgrades +

+ Much of what I've said about the shoulders above applies equally here – the colour and quality of the supplied accessories is excellent. The telltale striations of 3D-printing are all but absent in the kits, and the parts that fit the plastic kit are perfectly-sized. +

+ Reaver/Warbringer Plasma Cannon arm +

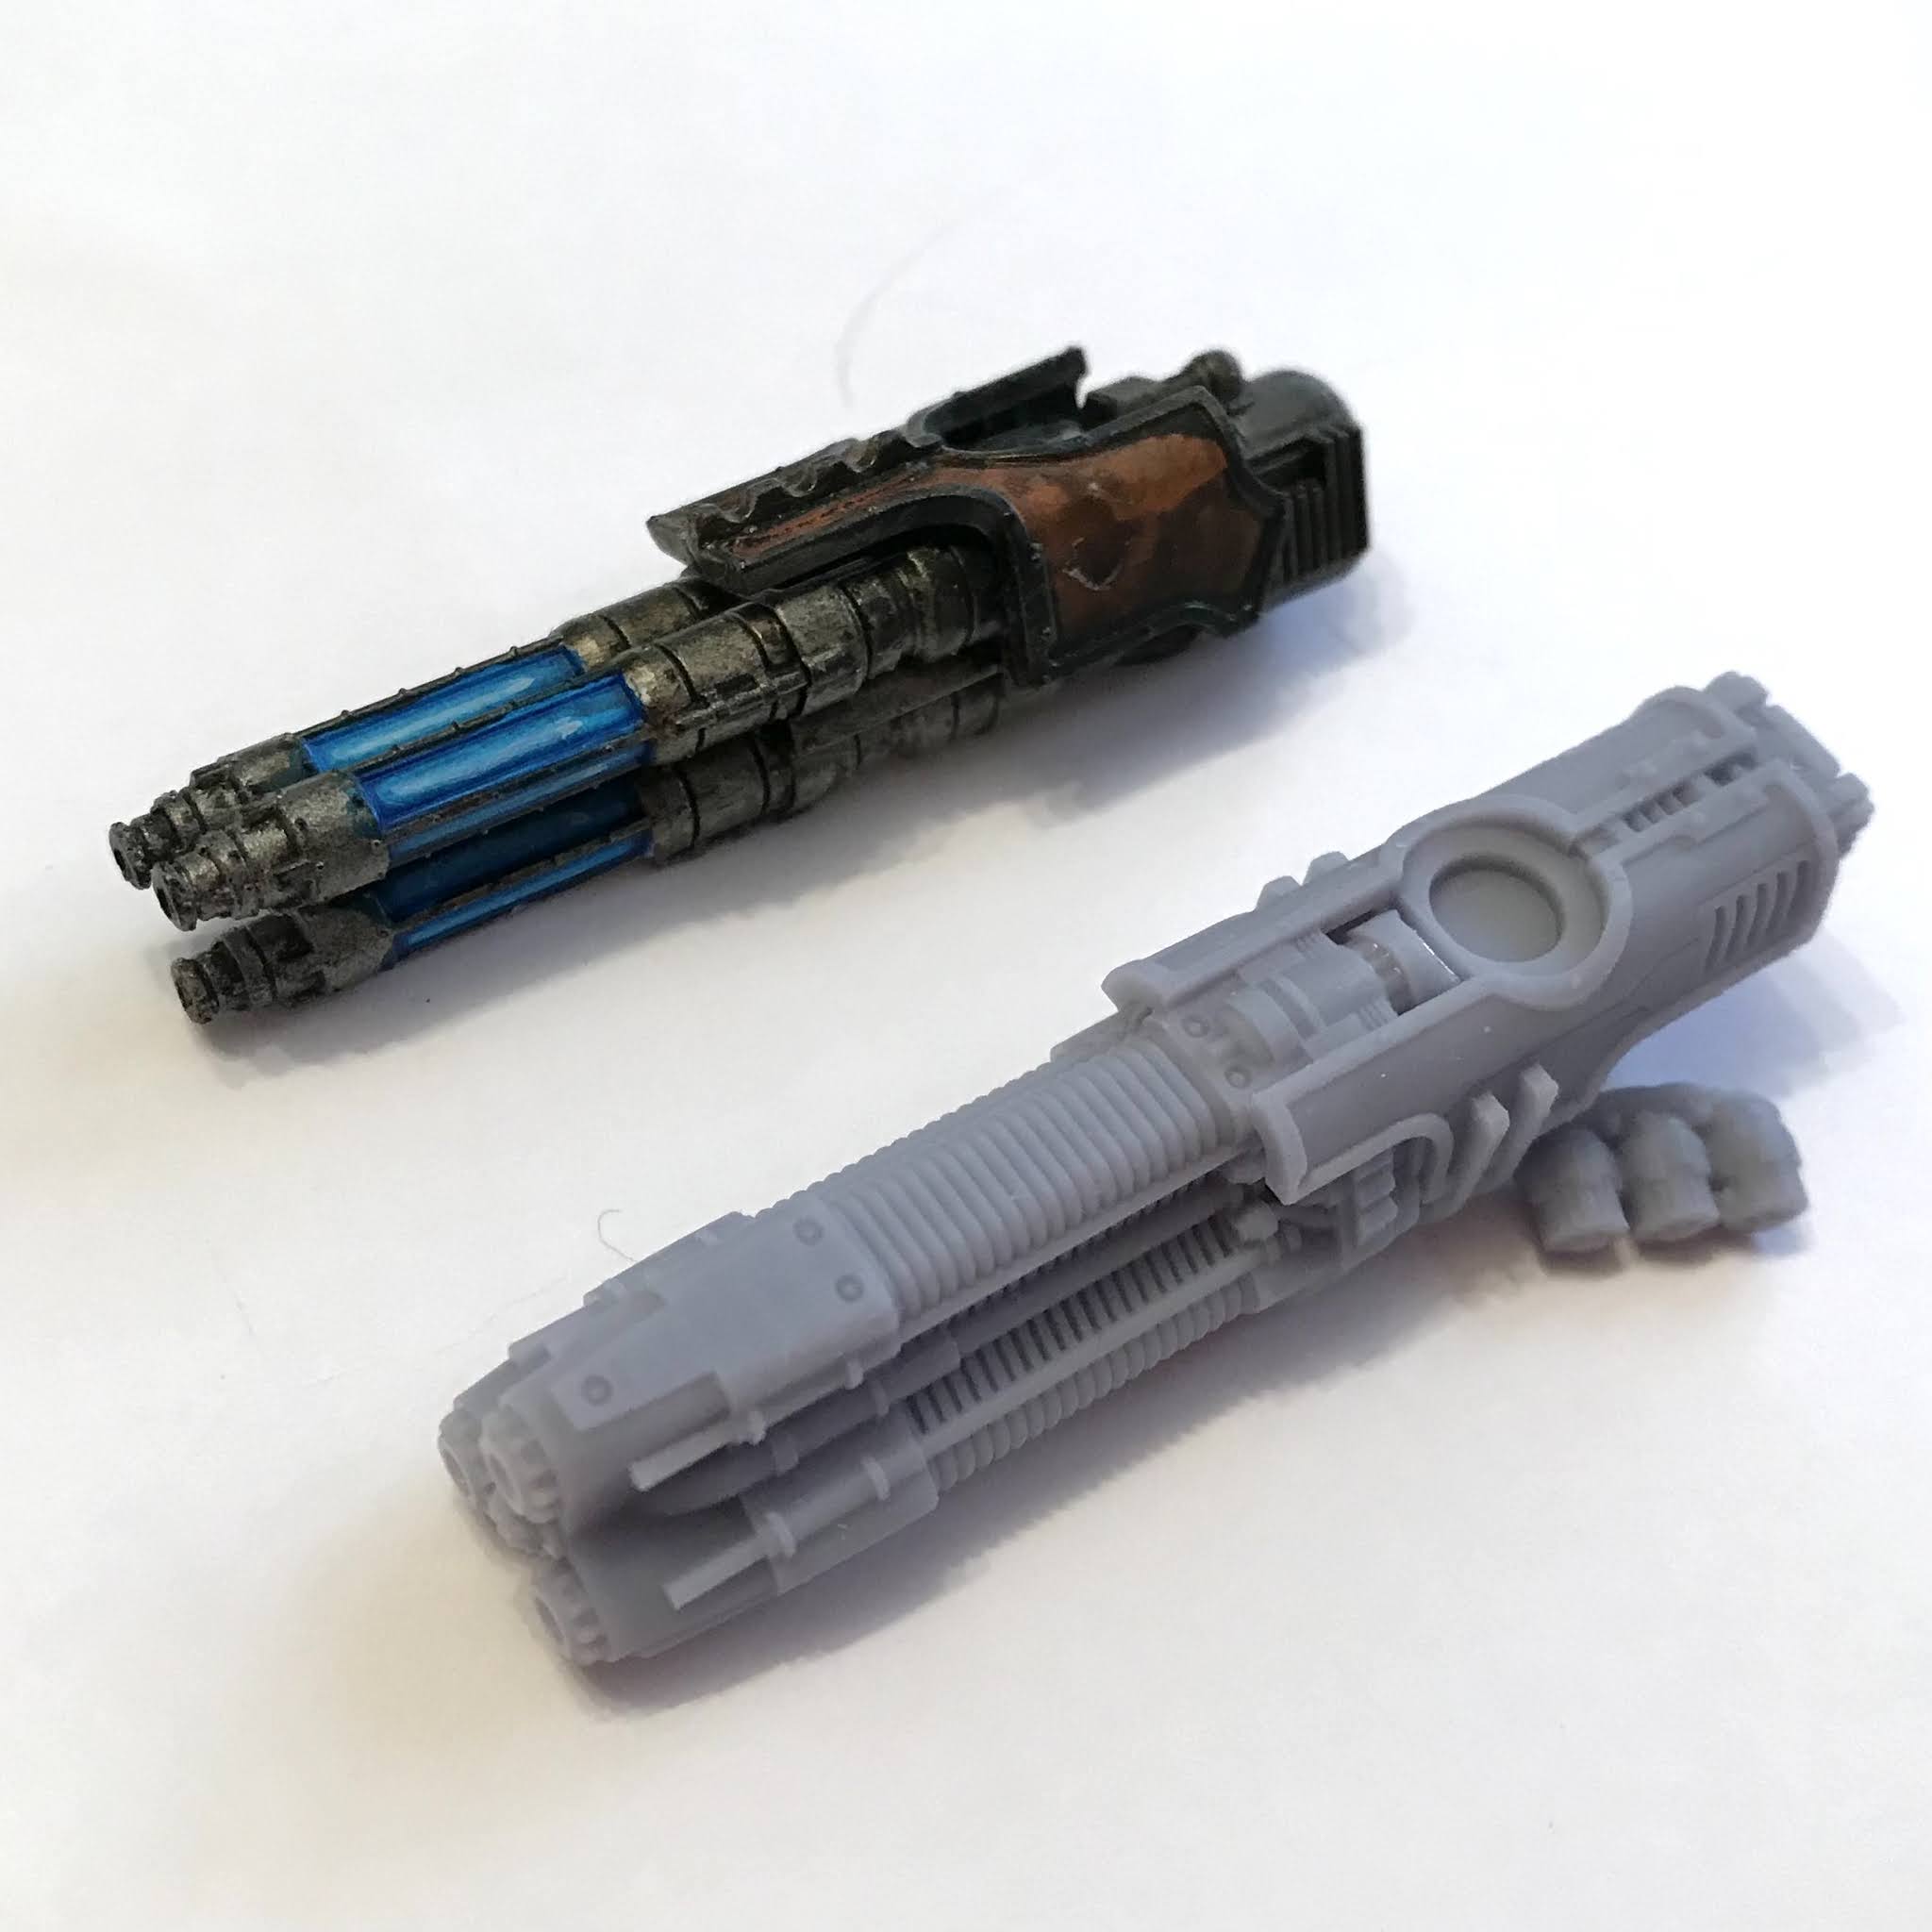
+ Shown here is the Battle Bling Reaver Plasma Cannon Arm alongside a Laser Blaster from the GW plastic Reaver. As you can see, the size and aesthetics match very nicely, without the details being direct copies of existing designs. The guns included recesses in the barrels, so no drilling necessary. Priced at £8, which seemed about right to me. It's comparable to, but slightly cheaper than what I'd expect from an official equivalent . +

+ The weapon comes in two parts; the gun itself and an ammo chamber, which appears to be able to be added to either side, allowing you to build a left or right arm. +

+ The design seems a nice midway point between the Warhound and Warlord plasma weapons; and fits in very well. Slightly bulkier than the GW weapons, it gives the Titan a solid look. +

+ There is also a Nemesis Warbringer version, which I didn't order. From the pictures on the shop, it looks identical, but is £1 dearer. Not sure if there is any difference, but that could either do with being consolidated, or clarified by Battle Bling. Perhaps £9 is their pricing standard for Warbringer weapons in general? With no other options, it stands out as a bit of an oversight at the moment. +

+++

+ I thought I'd treat both of these Warlord upgrades together, as the comments largely apply to both. +

+ Lascutter Weapon Arm +

+ Plasma Burner Weapon Arm +


+ Unlike the Reaver weapons, these are mono-sided: that is, they only fit on the right arm. This is clearly labelled on the shop; and you can message the team to request a mirrored version – a nice bit of customer service. +

+ Both scale nicely with the GW/FW equivalents, as shown in the Lascutter picture aginst the Forge World Mori Quake Cannon. As noted with the comments on the shoulder kit, these are just the guns – you'll need to build them into your plastic kit, or order the separate shoulders. +

+ Lovely designs; the Lascutter a nice update of a classic weapon that incorporates a modern aesthetic, and the Plasma Burner a cool new riff on the plasma weapon concept. It's nice to see this creativity, and I'm looking forward to other weapons from Battle Bling. Neither has official rules, of course, but you could either sub them in for others (the Lascutter might make a fun counts-as powerfist, while the plasma burner could be a plasma annihilator or perhaps a gatling blaster to represent its short range), or come up with your own rules. I'm hoping that the community will playtest third party weapons like this; it seems entirely within the wheelhouse of the target market. +

+++

+ Conversion kits +

+ The Holy Grail of third party upgrades for me is a variety of alternative Reaver heads, including one modelled after the 'long-faced' original variant. Battle Bling haven't made that yet – though they have already updated some of my favourite old Adeptus Titanicus heads in the form of the jut-jawed Command Head, classic plastic Warlord head (bought as a pair) Gothic splendour of the Custodian Head. The latter has been updated to be an option for the new Warmaster Titan – probably a good idea in light of the additional size that affords them. +

[+APPENDNOTE: If you're interested in more shots of the head inspired by the classic plastic Warlord, you can see my painted efforts below. There's also a painting tutorial in this inload [+noosphericinloadlink embedded+]. +]

+ I'll wait patiently for the Reaver options, but if, like me, you remember the old Titans fondly, you'll be pleased with the 'Oldeus Pattern' Warhound Kit. Coming in eight parts – chassis/body, top armour, and two sets of arm options – this is the same quality typical of the rest of the order:

Side-on traditional weapon mounts


Cowled modern weapon mounts

+ I thought it was a particularly nice touch to include options for a 'proper old-school' style, with side-mounted guns close to the body, as well as a design that split the difference between old and new, with the guns held horizontally and with shoulder pads. +

+ This kit is available for £16 as a pair only; and requires the plastic Warhound kit to complete. +

+++

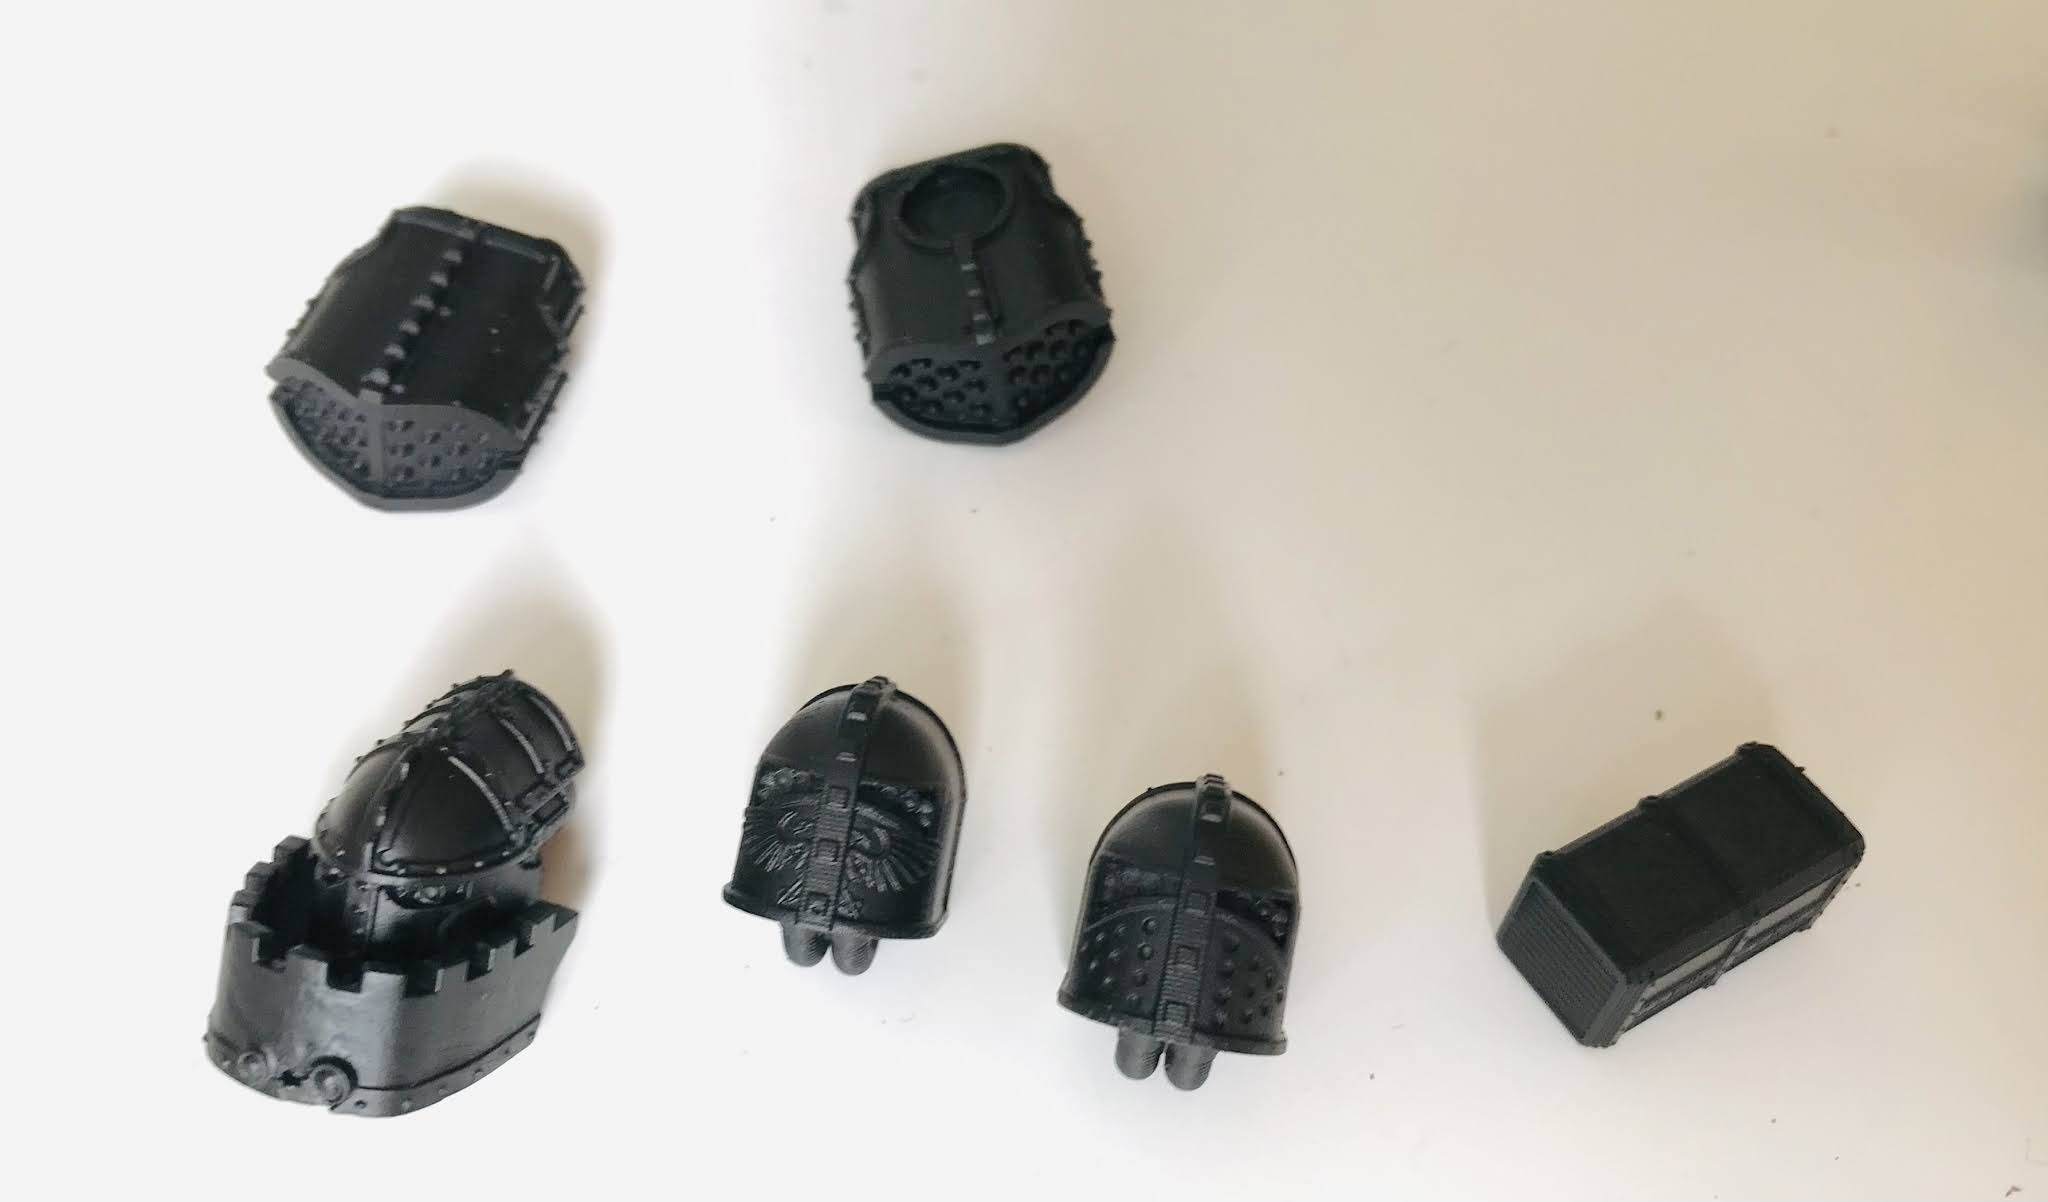
+ Coming back to variant heads for a minute I liked the command head so much that it was what encouraged me to make my first order – the smaller one. What I got it visible below; primed in black. 


+ Thus far, the only clear fault in any piece from Battle Bling was in the command head, which had a very small hole in the front of the jaw – you can see it between the two disc details. I say 'fault' – I'm assuming it's a slight printing flaw, though it could conceivably be a weird design choice. Don't imagine so, however. +

+ This image also shows the heads inspired by the original plastic kit, two arm missile mounts for the Reaver, and an adorable little shipping create with 'Battle Bling' written on it. This was a little three-piece freebie in my first order; I was half-expecting something similar in the larger order, but I won't deduct any points for them throwing in a fun addition in my first! +

+++

+ Fitting +

+ I did a quick dry fit on the plastic titan, and confirmed that the Warlord shoulder kits will nicely accommodate GW plastic, FW resin and Battle Bling 3D-print weapons. I guess that's heavily implied, but for anyone hesitating over an order, wondering whether these kits are 100% compatible, I can reassure you that they all fit together beautifully. +


+ Fitted with magnets and in in place on a work-in-progress Reaver, the Battle Bling Missile Launcher arms demonstrate the fitting nicely. +

+ Not being hugely au fait with the technology of 3D printing, I'm assuming that the material is some from of resin, but will happily be corrected. The key thing is that it doesn't strike me as fragile and brittle as other 3D prints I've bought, but nor is it quite as flexible as typical resin, such as you might buy from Forge World. When assembling, pay particular care and attention with clippers and knife until you get the hang of the particulars of the material. +

+++

+ In terms of aesthetics, I think the design is spot-on. I'm always pleased to see third party designers – who are often hobbyists and enthusiastic fans themselves, as it is clear the Battle Bling team are – add their own spin to things, rather than make a direct copy. While the kits are compatible with the official kits, there are lots of specific differences, and it's refreshing to see new stuff – alternative heads, unofficial guns etc. – rather than duplicates of the official material. +


+ Even where similarity is necessary, it's nice to see that they've added a twist. This is likely to remain on the good side of GW legal as much as anything else, but the difference between the standard kit shoulder [REF: pictcapture above] and the Battle Bling upgrade is a good example of differentiation done well – and creatively – rather than just paying lip service . +

+ Any improvements possible? +

+ It's never all sunshine and lollipops, but happily the problems are few and far between; very much thoughts for future kits rather than genuine problems.

+ Firstly, no notes are included on assembly. This is a very minor thing for experienced hobbyists, and common for third-party kits. Anyone who's built a plastic Titan won't struggle, and to be honest, I think assembly notes would be a bit coals to Newcastle for the market, but a few videos or step-by-steps for beginners would be a nice way for Battle Bling to add value and make things beginner-friendly. It's a criticism I have of the Forge World kits, too – sometimes things that appear obvious to the designer (which way up an ammo cell is meant to go, for example), aren't to the recipient. +

+ The heads did have a few fitting problems – the prominent cables beneath the chin on the Lucius-Alpha and original-style heads get blocked by the plastic torso armour, restricting the possible poses, or requiring a trim. A slight redesign wouldn't go amiss on these, in my opinion. +

+ Unmodified, the cables on the heads only just fit; restricting posing. +

+ In addition, I found it slightly unclear as to what exactly you get from the shop photographs, as the different products aren't hugely consistent: some are just illustrated with scans; others include pictures of printed parts; others show painted models. It'd be nice to have at least one thing that's consistent – and personally I'd prefer that to be a flat shot of the printed, unpainted pieces as a priority, with painted inspirational models really useful. +

+ From what I've seen, this is largely down to the company being relatively new, not having painted examples of everything, and bringing in bits both from in-house and external designers. Nevertheless, I'd have been miffed to have ordered a weapon on the assumption that it would come with a shoulder (for example), and hope that this is on Battle Bling's plans for the future. +

+ Happily, they're running a painting competition through May on their Facebook page [+noosphericexloadlink embedded+], which I hope gives them a good source of photographs to use for their store. +

+++

+ Summary and judgement +


+ Three mechadendrites up. All indications are that Battle Bling are a good company that makes excellent products for a decent price point. +

+ If they're taking suggestions, then an option of being able to buy arms as full sets – that is, an arm weapon and a shoulder, akin to the Forgeworld approach – wouldn't go amiss. I'd also suggest some consolidation of whether they want to offer complete modularity in their range, or a smaller range of more complete options. +

+ If modular, then break down things like the original Warlord heads into two separate heads (I had no use for the one with the Imperial Eagle, for example), and allow the purchase of one Oldeus-pattern conversion kit. If the second option, then decide on a price for (for example) Reaver Arms, and chuck in an arm connection along with each weapon. That'd allow a smaller, more easily navigable range that's rip for growth. All that said, I'm no businessman; and if it's working for Battle Bling, then long may it continue. +

+ The designs and prints are excellent in quality, the drawbacks few, minor, and easily dealt with by the sort of hobbyist who's buying upgrades for this wonderful game. I have no hesitation at all in recommending them enthusiastically. +

+ From indications on their Facebook page, the range is set to expand steadily, with releases every Wednesday. I for one will be checking in – just don't take too long with that second Reaver head! +

+++