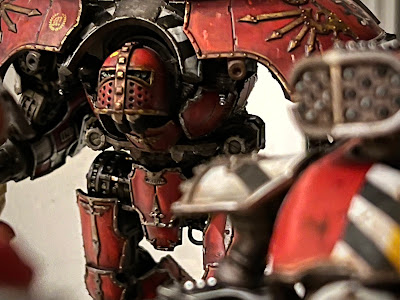
+ Toll the Great Bell Twice! +
+ With push of button, fire the engine and spark turbine into life. +
+++
 |
| + [Insert heavy metal song pun here +] |
+ Precision strike: cutting it close +
Two days to go, and as you can see above, the oils are on and drying. The nice thing about oils is their long working time. There's no rush, and no stress (well, no additional stress about timings!), so you can gently tick through the session, and find them perfectly workable at the end. I used a couple of techniques here: oil dot filters, and washes.
The washes are done almost exactly as with acrylics: thin the paint down and apply with a brush. The main difference is that I suggest you use rather less oil paint than you would acrylic paint as they'll take much longer to dry. Oil dot filters, however, are a new technique to the blog, so here's the rundown:
+ Oil dot filters +
Once that was done, I swapped to a goat hair fan brush [+noosphericexloadlink embedded+], as these are relatively cheap and sturdy. I loaded this with thinner (I used Sansodor [+noosphericexloadlink embedded+]).
I then slowly and steadily drew the fan brush directly downwards over each panel in turn. This draws the oil paint downwards from each dot, softening and creating gentle streaks. At the bottom of the area, lift the brush away, wipe it on a cloth, and repeat until the effect is as you want it. The more brushstrokes you use, the more oils will be drawn away. The key is to work steadily and evenly, and always in one direction.
 |
| + The finished result – compare this with the pre-oils version below. + |
 |
| + Strike to enlarge. + |
+ Oil filter keynotes +
- Ventilate Throw open a window. Odourless or not, solvents in the respiro-sacs aren't very good for you.
- Cede control When stippling, don't worry about an even effect or coverage. Slight variation across the surface looks more natural and pleasing. Likewise, having some dots containing more paint than others will give variety of tones in the streaks.
- Adapt Remember that the Titan is not locked in the pose you've chosen, so look at the panel and decide on the direction before working straight down to the base. Rainfall and similar weathering will carry dirt and grease straight down whever possible, so consider where 'down' is likely to be for the majority of the time.
- Vary You can also do oil filters in circles or more random directions to add interest to flat areas.


Very cool; nice work! The effects stand for themselves. That's a fantastic look maniple.
ReplyDeleteBeautiful down to every detail. Fantastic work!
ReplyDelete