
+ Battle report: The Mirror Plains +

+ Game rules: Antares 2 [+noosphericinloadlink embedded+]
+ Mission: Engage and Establish – from turn 3 onwards, units would earn a Victory Point (VP) for being wholly within 10cm of the centre of the board.
+ Combatants: Apologist, commanding the Emperor's Children; vs Bob Hunk, commanding the Imperial Fists.
+ Battleground: The Civilised World of Crucis – in the region flattened by an historical asteroid strike, the famed 'Mirror Plains'.
+ We tested out our adaptation of the Gates of Antares 2 rules in this game, and so deliberately kept it fairly low-key and simple. +
+++
+ Forces +
+ Each side utilised a Reinforced Patrol – two ten-man tactical squads supported by an armoured vehicle. A standard pattern of deployment used by the Legiones Astartes during short-range patrols, it would have been familiar to a thousand Xenos species engaged during the Great Crusade. +

+ Intended to make the most of the Adeptus Astartes' famed flexibility; the Reinforced Patrol proved a satisactory replacement for standard Demi-Company deployment where resources were scarce – as they commonly were during the Age of Darkness. +
+ In this instance, the more common Predator attachment had been replaced by a hardier Land Raider by both sides – a mark of the respect the Legions had for the others' capabilities. A single Centurion – a mid-level commander – accompanied each. +
+ Deployment +

+ Anchoring their centre with the famed Land Raider Iron Duke, the Imperial Fists took a typically conservative approach, with two combat squads on each wing. Facing them, the Emperor's Children massed on the right flank, leaving just one squad on the left to frustrate flanking manoeuvres. +
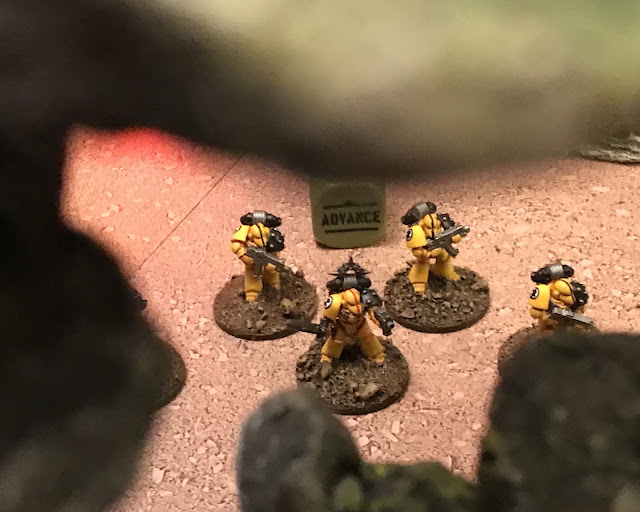
 |
| + Emperor's Children Astartes advance quickly towards the large rock formation. + |
+ The Antares rules use a dice-bag mechanic to determine initiative. Rather than taking alternate turns (IGOUGO) or alternating activations, you put a die for each unit in a bag, then draw them out blind. The colour of the die determines which side can activate a unit. You therefore get a slightly varied order which keeps things exciting – you might have a string of your units activate, for example, so you have to adapt on the fly a little. When you run out of dice in the bag, that's the end of the game turn – you pop them back in, and start a new one. +
+ Our game started with both sides advancing fairly cautiously. As we were using 15mm models, we converted the stats to centimetres, rather than inches. Despite using a small table (two 22 x 30in Kill Team boards put side by side), the long ranges of the mechanics meant we could trade shots early on – though to little effect. Professional soldiers are well-trained enough to ignore fire if it's completely ineffective, but once bullets start impacting the ground around them, or whizzing past their ears, they'll start to take evasive action. A unit thus receives a Pin marker when it is shot at and at least one hit is scored. A combination of negative modifiers caused by the long range and cover meant that no direct casualties were caused, though a few pin markers began to build up. +
+ Pins represent morale degradation, minor flesh wounds and other distractions that make them less combat capable. Each pin causes a -1 modifier on most tests – so a unit with two pins will be harder to order (-2 to Co), and their firing will be less effective (-2 to Acc). Eventually, the weight of fire can become so dangerous that the unit flees – this happens if a unit has more pins than its Command (Co) stat. +
+ Pins are hard to get rid of. You can remove one if you pass a successful order test, but unless you take specific measures, that's all you can lose in a turn. As it becomes increasingly harder to remove pins as they build up (as it becomes increasingly hard to pass the order test), it's a key part of an effective strategy to concentrate fire on enemy units, rather than spread your fire thinly. +
 |
| + Imperial Fists traverse rocky cover and push forward, firing as they go. + |
+ True to form, the Imperial Fists advanced stoically. Advance actions allow units to move their standard move rate, then shoot their weapons. As noted, the small movement rate meant that they remained at extreme range with most of their guns. Despite their decent accuracy (Acc) stat, the range and cover meant the Emperor's Children on the left remained untroubled. +
+ In the Antares rules, D10s are used. Lower results are always better, and there are critical success (on 1s) and critical fails (on 10s). These have various effects in-game depending on what you're doing, but they add a lot of entertainment value and prevent anything feeling completely hopeless – 'Ooh! A lucky hit got through!' +
 |
| + The main Emperor's Children group race forward + |
+ On the right flank, the Emperor's Children advanced more quickly, secure in the cover of the rock formation. I used the Run action for the squads at the right of the picture, which allows the models to move at double their movement value. This can be increased to triple the movement rate by Sprinting, which requires a test against agility (AG). If the test is failed, the unit takes a pin, which represents the squad becoming disrupted, strung out or exhausted. Happily, Space Marines have good stats all round, so passed comfortably and powered forward. +
 |
| + Imperial Propaganda dramatisation – the game got so involved, I forgot to take many pictures of the middle bit. Sorry! + |
+ Following a string of Emperor's Children dice emerging from the bag, I – perhaps ambitiously – swung the Land Raider out of cover. While most units can take just a single action, tanks are Multi-Order Dice (MoD) units. As the name suggests, they add two order dice, and so can do more stuff during their turns. This allows them to (for example) race forward to a firing position, then fire at full effect; advance more cautiously while firing on the move; or set up as pill boxes for supporting fire. Lots of options. +
+ I was hoping that I'd be lucky and get a second die out of the bag, but my swift strike was foiled – two Imperial Fists dice came out in quick succession, and the Iron Duke all but obliterated its opposing number with two successive fire orders! Fire orders mean the unit can't move, but it receives a +1 bonus to its shooting. Exposed and out of cover, and with the long range of the lascannons, my Land Raider was quickly scrap metal. +
+ Of note here is that it's not just heavy weapons that hurt. It's not just casualties removed that matters in warfare, but whether the survivors are disrupted. Here, while the lascannons were doing the heavy work, it's worth noting that the twin heavy bolters were also instrumental in putting down pins – even on tanks. Normally, the Heavily Armoured rule means that tanks only take a pin from incoming fire if their Resistance (Res) stat – a combination of the unit's resilience and armour – is modified below 10. While the heavy bolters didn't meet that criteria – the Land Raider's Res is a mighty 15, and the heavy bolters armour-modifiying Strike value (Sv) is just -2 – the sheer weight of fire meant that the Emperor's Children Land Raider critically failed a Res roll and took a wound – so would have taken a pin anyway. +
+++
+ Over the next activations, the surviving Emperor's Children scrambled forward, desperate to ensure the loss of their Land Raider hadn't spelt their fate. An exception to this was on the left, where an unlucky roll saw the lone squad there go Down – doubtless shaken by the loss of the nearby Land Raider! The Imperial Fists, meanwhile, stuck to their plan, advancing cautiously and hitting out increasingly effectively. +
+++
+ In the centre, the Fists' fire began to cause casualties, with the Emperor's Children squad here coming under sustained fire. Three squads of Fists' shot at them, causing two direct casualties. Thus might sound underwhelming, but it's worth noting that, with three pins on them, the Emperor's Children squad was virtually incapable of acting. +
+ This, to me, is one of the nice things about the Antares rules. As it's more about suppression and concentration of fire, your models tend to stay on the board a bit longer. Not only does this give better aesthetics to the game, it gives a nice depth to the tactics you use. You have the choice to press on with a supressed squad, or move back into cover and try to Rally your forces for a second (or subsequent) attack. Isolated actions are rarely effective – as this report nicely demonstrates! +
+ The Rally order is unique in ignoring the number of pins on the unit when making the order check – so it's always against your baseline Co stat. If passed, the unit can do nothing, but does lose D6 additional pins. While inconvenient for the army commander, it does encourage you to plan a few turns ahead, rather than exercising absolute control at all times. You've got to account for the fog of war and the morale of your troops. +
+ Grimly, the Imperial Fists Centurion ignored his Emperor's Children counterpart, opting to finish off the squad nearest him and leave the traitor Champion to his well-trained forces. Inflicting just a single casualty, the Emperor's Children were forced to take a Break test as they were below half strength. A test against Command, modified by the number of pins, a failed Break test means that the unit flees – and with a hefty -3 on their test, the craven traitors fled, taking their order die with them, and giving the Fists an greater chance of pulling their dice from the bag in subsequent activations. +
 |
| + The Emperor's Children strike appears from around the rock outcrop – but it's too little, too late, as the Imperial Fists have established an effective firing line for mutual support. + |
+ The rocky outcrop was proving a double-edged sword. While it had protected the Emperor's Children advance, it had left the Imperial Fists untroubled – only the squad on the extreme left flank had suffered pins from the Emperor's Children in cover. As a result, the Fists' high command (Co) stat – against which order rolls are made – meant that they were largely able to operate effectively, and hadn't been properly supressed. +
+ This wasn't, however, the end for the Emperor's Children. Deciding on a risky assault, they rounded the corner. The Fists' Land Raider opened up on the attackers as they appeared – which should have been devastating. Alas for the Fists, the Iron Duke failed a crucial order test. When you draw a die from the bag, you need to roll a die against the Command (co) value of the unit, minus pins. If you fail, the unit ignores your orders and instead goes Down – attempting to protect itself by hitting the dirt. It can do nothing else until the end of the turn. With a Co of 8 and unpinned, the Land Raider was extremely unlucky to have failed – but as a result, the emerging Emperor's Children were miraculously spared the full weight of its fire. +
+++
+ One squad put down supressing fire on the Fists' rightmost squad, adding a crucial pin. A supporting squad of Emperor's Children was then able to assault the Fists' squad. Assaults in these rules are broken down into stages. The target unit can React (opting to stand and shoot, fall back to avoid the combat, or counter-charge); then the assaulting unit moves in, triggering Point Blank Shooting – effectively a second shooting action where both sides shoot; and then the survivors get stuck into Hand-to-hand combat.
+ The resulting combat was bloody. The Point Blank Shooting as the Emperor's Children ran in allowed them to gun down an Imperial Fist with a lucky shot, while the return fire was hampered by the speed of the attack (the Emperor's Children sprinted, and successful hits against units that sprint must be re-rolled, representing the difficulty of hitting fast-moving targets) and by the pin on the Fists (as elsewhere, pins reduce the accuracy of the affected squad). Pistols blasted and knives flashed in the subsequent hand-to-hand combat. +
 |
| + The Emperor's Children were victorious – but only briefly! + |
+ Combat works like shooting, only using the Strength (Str) stat in place of Acc. [+Nota bene I made a mistake here, and thought we used Acc. As it happens, Space Marines have the same Str as Acc anyway, so it would have made little difference+]. Here, the Emperor's Children Centurion proved his worth, his power sword carving down two opponents with a string of lucky rolls. The Fists were wiped out, taking down one of the Emperor's Children with them.+
+ Unlike shooting, in assault you get a pin for each casualty caused, so despite winning, the Emperor's Children were left in a pretty ropey way! +

+ When a unit is destroyed, its Order die is removed from the bag – so it's worth finishing off units, even if they're not an immediate threat. Even an enemy unit under heavy fire can contribute its Order die to the pool, making it less likely you'll draw one of yours. +
+ As a MoD(2) unit, the Land Raider wasn't completely wasted, as an Imperial Fists order die was drawn next. With all the Emperor's Children forces on the left having activated, the Land Raider used Fire order to open up on the more distant squad, as it was the only Imperial unit that could see them. The lascannons and heavy bolters reduced two to ash. +
 |
| + Fire streaks in from along the line. + |
+++
+ Result: Imperial Fists victory! +
+ The last turns were marked by the Imperial Fists increasing strategic lead, and weight of fire telling on the beleaguered Emperor's Children. From turn three onwards, the Fists had stuck doggedly to the mission and held firmly to the centre ground. As a result, the final totals were 7 to the Emperor's Childrens' paltry 1! A resounding victory for the forces of the Emperor. +
+++
+ Post-game musings +
+ Well, that was fun! Getting to use the awesome 15mm marines was a treat, and I thought the game looked smashing. While the final result looked one-sided – and indeed I felt under pressure early on, when the Land Raider exploded! – the crucial thing is that I didn't feel despondent. Because the game proved so involving, and damage didn't necessarily involve removing models, there was still lots to play for. +
+ We chatted afterwards, Bob Hunk being typically magnaminous in victory. Aside from some understandably frustration about the one-in-a-hundred chance of his Land Raider failing two Order tests on the trot(!), we both felt the rules worked surprisingly well to represent battles in the Age of Darkness, and it was a tense, engaging experience. +
 |
| + We'll get you next time, lapdogs! + |
+ The Gates of Antares factions are very high-tech, and usually have the benefit of a buddy drone to help squads direct fire. I stripped them out of our Age of Darkness 15mm rules, both to streamline them and to fit the setting better. Afterwards, I asked Bob Hunk his thoughts on adding them back in in some way. I mooted adding them back in as servo skulls or a similar 'counts-as', but after some discussion we decided instead to test a special rule to allow a unit with boltguns in to reroll a single shooting die. We called it 'Bolter drill', as that's a familiar 40k term. The vehicles got a similar boost, called 'Machine spirit'.+
+ Most Antares armies have one or two special rules, so I didn't feel we were going too far off-piste with the change. It would minimise book-keeping and tokens, and, crucially, return one of the best bits of Gates of Antares, the feel-good 'safety net' of buddy drones' re-rolls. The single re-roll may seem minor, but it has a lot of benefits. Misses can become hits – or even lucky hits (a very fun part of a D10 system) – and critical misses, which can't be re-rolled, return to being a fun bit of bad luck to work around, as intended in the original Antares 2 rules. +
+ Overall, using a smaller board and smaller models felt 'right', so the tweaks we proposed were minor:
- Give boltguns two shots (rather than one)and the Rapid Fire rule. This allows you to fire a single shot at full accuracy, or two shots each at -1. We felt this would allow boltguns to have more of an effect on the game and encourage taking basic Legion Tactical squads.
- Add the army special rules 'Bolter drill' and 'Machine spirit' to help ameliorate bad luck and add a fun twist of luck.
- Increase the basic movement rate of Space Marines from 6cm to 10cm to encourage manoeuvre.
+ Thanks to Bob Hunk for the fun game, and playtesting – and I'm looking forward to taking on the rest of the PCRC in future games. If you'd like to inload our draft rules for Space Marines in Antares, check out the +Death of a Rubricist+ Facebook group [+noosphericexloadlink embedded+]+
+++
No, seriously, I do not have enough words to praise all this. It's awesome beyond any measure!
ReplyDeleteOne of the best battle reports I ever read! Thank you. This reminds me why Antares is the best ruleset I can find for my battles. Such a great game!
ReplyDelete