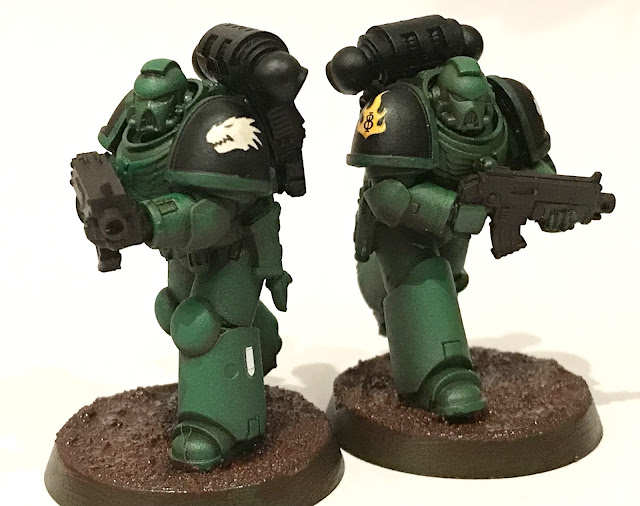
+ Experimental techniques: Salamanders +
+ The problem with batch painting is that everything moves in lockstep; there are few rewarding stages where you start to see how things are progressing. One advantage, however, is when you're trying out new things – or combining things in a new way, as I am here. +
+ Basing +
+ The bases are a fairly obvious development since last time. These were coated with pumice gel for texture and allowed to dry. They were then coated with burnt sienna oil paint. Why oils for basing? The short answer is to see how they worked. The tubes of burnt sienna I have contain far more paint than Citadel pots, so it's quicker, cheaper and easier to mix up a big fluid pool. As I'm doing this in relatively short bursts, I don't mind the additional curing/drying time of oils over acrylics. +
+ Secondly, touching the (dry) textured base with a little thinner causes the solvent to instantly flow outwards into the recesses, so when the oils (themselves diluted with Sansodor solvent) are added, they likewise flow. It's all very quick and clean, and I found it much easier to avoid accidentally getting paint on the model. +
+ Finally, I was planning to use this colour as the oil wash on the figures – and since it would be in the recesses anyway (representing dust and trapped dirt), it nicely suggests how the environment is affecting the marines, tying them in. +
+++
+ Transfers and washes +
+ More subtle additions are the transfers, which were applied just prior to the base texturing. I've not used transfers much, but after seeing so many used so nicely at Golden Demon, I thought perhaps I'd been a bit unfair to them, and figured I'd give 'em a try. +
+ They were applied using water, then allowed to dry. At this point, they stood out as shiny and not sitting quite flat – the problems I'd faced before. Enter two new products to me: Microset and Microsol. These are brushed on (Microset first) and allowed to dry. They soften and slightly dissolve the transfer sheet, leaving the printed pigment in place. I've found they take a couple of coats, so patience – or batch painting – is useful here. +
+ As you can see, a couple of coats of Microsol followed by Microset goes a long way to settling the marking itself nicely, and avoiding the shiny 'stuck-on' look. It does, of course, also influence the style available – I think my usual painterly, grungy look is going to look odd; so a slightly cleaner style is going to be necessary to avoid the transfer sticking out like a sore thumb. +
+ And speaking of transfers, if anyone has some yellow flames (as shown by the sole remaining example on the third line down, just below the Veteran markings) that they don't want, please do get in touch; I'd be happy to buy 'em. +
+++
+ Oil lining +
 |
| + Before on the left, after oil lining on the right + |


No comments:
Post a Comment
+ submission exloadform: inload [comments] herein +